Renovating an RV on a Budget: How to Create a Beautiful Makeover Without Overspending
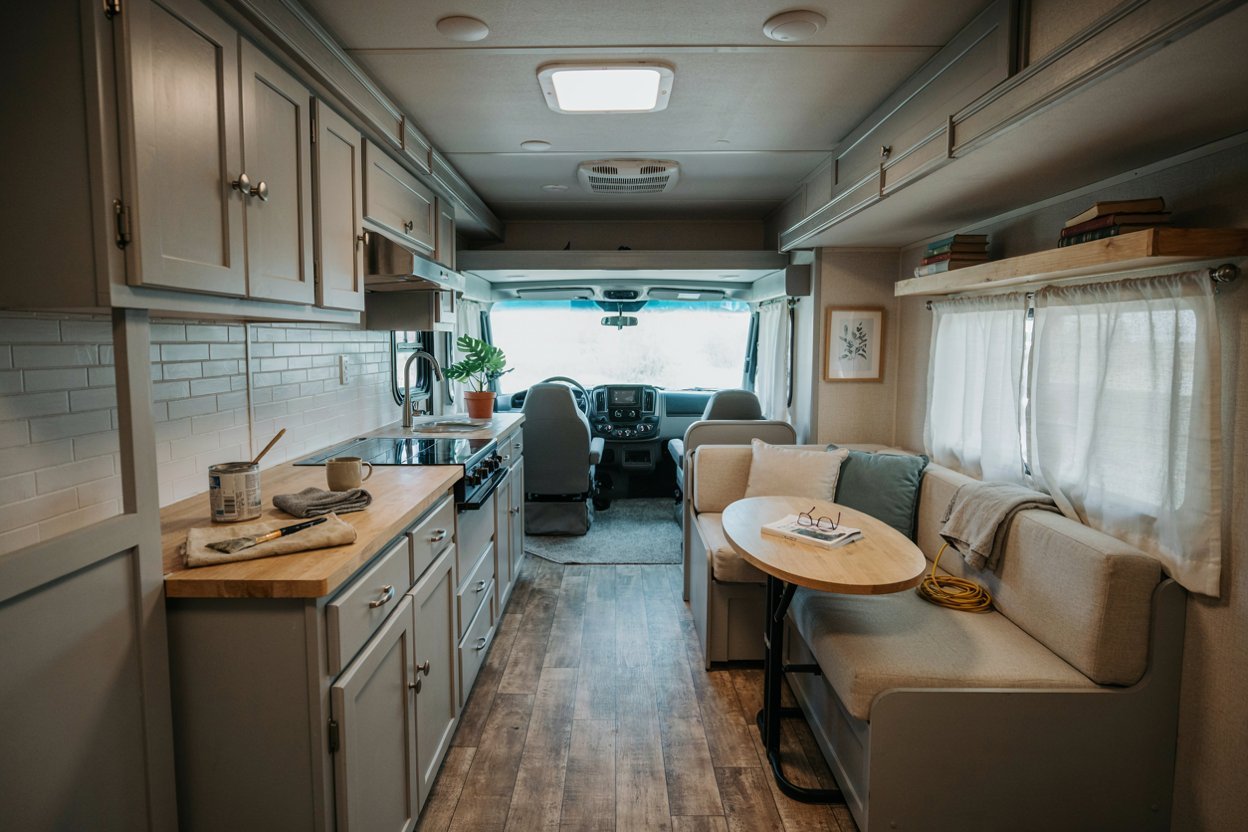
Renovating an RV on a budget can completely change the way your camper looks and feels without requiring a huge renovation budget. I have found that the biggest difference often comes from making a few smart changes instead of trying to replace everything at once.
Fresh paint, updated cabinet hardware, better lighting, new fabrics, improved storage, and small decorative changes can make an older RV feel much more comfortable and personal.
When I work on an RV renovation, I like to look at the space as a whole before buying anything because it is surprisingly easy to spend money on projects that do not make much difference once everything is finished.
Setting a realistic budget, choosing which areas need attention most, and reusing what is still in good condition can keep the renovation affordable.
In this guide, I will walk through the approach I use for planning a budget friendly RV makeover, where I would spend money first, what I would save on, and the simple upgrades that can make an older camper feel fresh without making the project unnecessarily expensive.
Start With a Realistic RV Renovation Budget
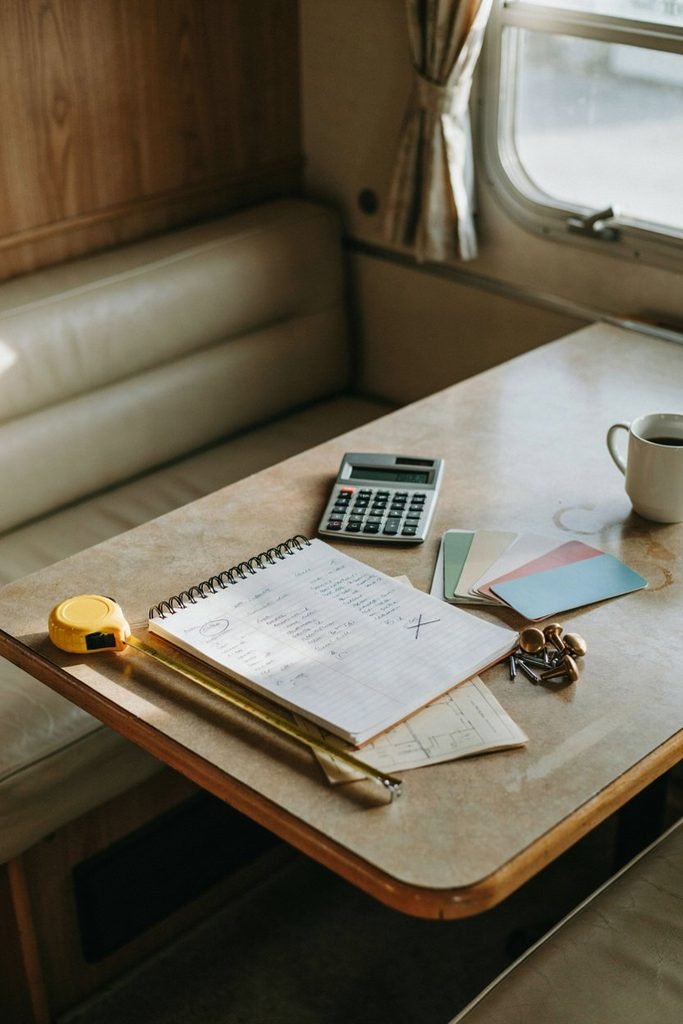
The easiest way to overspend on an RV renovation is to start buying things before deciding what you actually want to change.
I like to begin by walking through the entire RV and making a list of everything that bothers me. I look at the cabinets, walls, flooring, seating, lighting, storage, kitchen, bathroom, bedroom and exterior areas before deciding where the money should go.
This gives me a much clearer picture of the renovation instead of making random purchases along the way.
For example, if the cabinets are structurally sound but look dated, I would rather paint and update the hardware than replace the entire cabinetry. If the flooring is still in good condition, I would leave it alone and put that portion of the budget toward something that will make a bigger visual difference.
Divide Your Renovation Into Three Categories
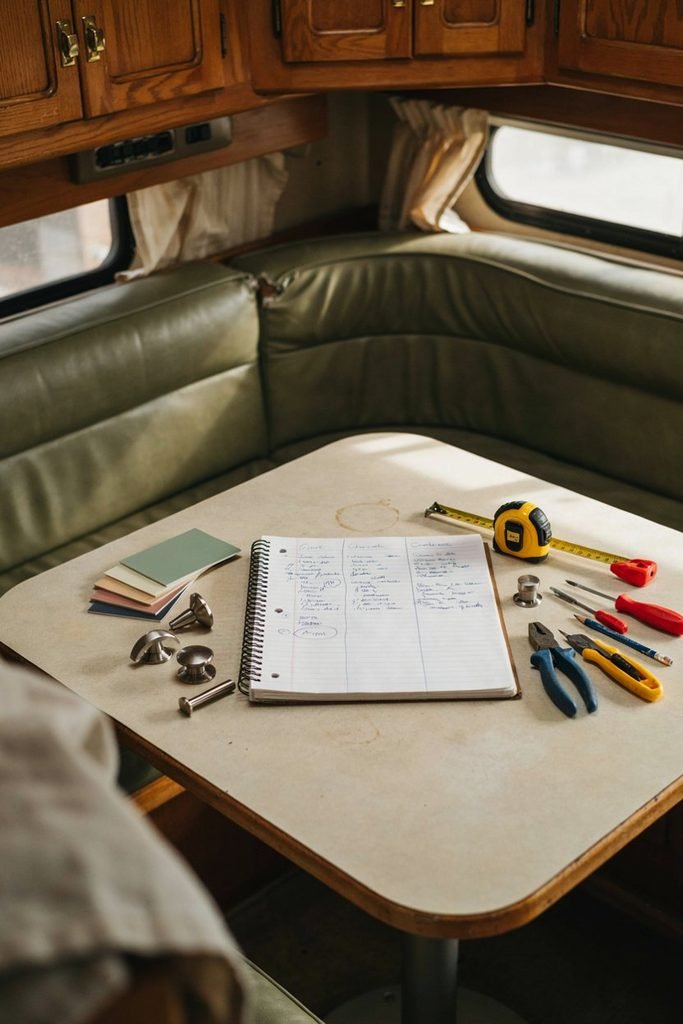
One of the easiest ways I have found to control an RV renovation budget is to divide every project into three categories.
Must fix
These are problems that affect safety, water resistance, function or the condition of the RV.
Examples include water damage, damaged seals, plumbing problems, electrical issues, soft flooring and broken fixtures.
Would improve
These are things that are functional but dated or inconvenient.
Examples include old cabinet hardware, poor lighting, uncomfortable seating and inefficient storage.
Would be nice
These are the decorative upgrades that make the RV more attractive but are not essential.
Examples include artwork, decorative pillows, rugs, curtains and small accessories.
I always recommend dealing with the first category before spending heavily on the third.
A beautiful RV does not feel like a successful renovation if a hidden leak or structural problem is waiting underneath the new finishes.
Decide What You Can Keep
Before removing anything, ask yourself whether it actually needs to go.
This is one of the biggest ways to save money during an RV renovation.
RV furniture and fixtures can be expensive because they have to fit specific spaces. Replacing a perfectly usable dinette, sofa or cabinet can quickly consume a large portion of the renovation budget.
Sometimes the better option is simply to give the existing piece a new look.
I have found that paint, new upholstery, updated hardware and a few carefully chosen accessories can make surprisingly old RV interiors feel completely different.
This is particularly useful with cabinets.
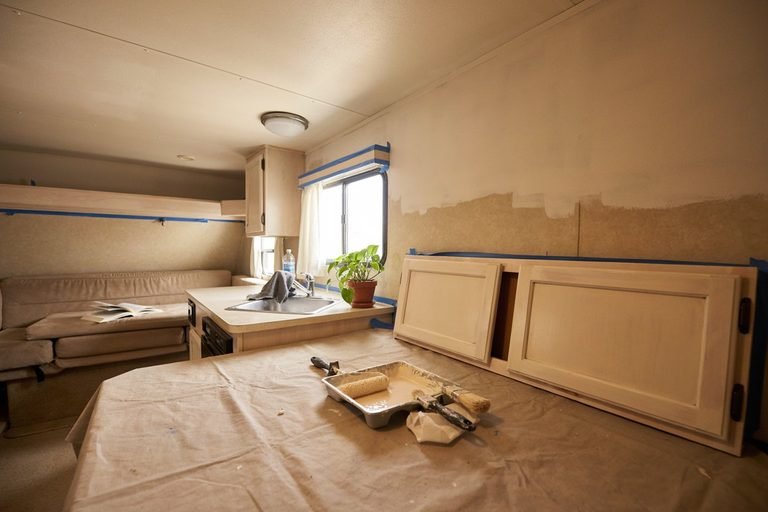
If the cabinet doors are solid and the hinges still work properly, I would not automatically replace them. Cleaning them thoroughly, preparing the surface properly and applying a durable paint can give them an entirely different appearance.
The same idea works with furniture.
An older RV chair can sometimes be improved with new fabric or a washable cover rather than replaced. A dated dinette can look much better with freshly upholstered cushions and a simple table makeover.
The goal is not to make every item new.
The goal is to make the entire space feel intentional.
Choose a Simple Color Scheme
One of the easiest budget upgrades is also one of the most noticeable.
Choose a small color palette before you start buying paint, fabrics and accessories.
I prefer keeping the larger surfaces relatively simple and then adding personality through smaller details.
For example, you could use a warm white or soft neutral on the walls and cabinets, then bring in your preferred accent color through cushions, curtains, rugs and small decorations.
This approach helps prevent the RV from looking cluttered.
It also saves money because you do not need to buy a completely different collection of accessories for every area.
If you already have items that you like, build your color scheme around them rather than starting from scratch.
That is one of the easiest ways to make a budget renovation feel more expensive than it actually was.
Paint Can Make a Huge Difference
Paint is one of the upgrades I would consider early in a budget RV renovation because it can dramatically change the interior without requiring a massive investment.
Dark or dated cabinets can make a small RV feel even smaller. A lighter color can help the space feel cleaner and more open.
However, RV cabinets need proper preparation.
I would not rush straight into painting because poor preparation can lead to peeling, chipping and frustration later.
Start by cleaning the surfaces thoroughly. Remove grease, dirt and residue before doing anything else. Lightly sand where necessary and use a suitable primer if the existing surface requires it.
Then apply thin, even coats rather than trying to cover everything with one heavy coat.
Allow each coat to dry properly before continuing.
This is one area where taking your time can save money because repainting damaged or peeling cabinets is much more frustrating than doing the preparation correctly in the beginning.
Update the Cabinet Hardware
You do not always need new cabinets to make the kitchen or storage areas look updated.
New handles and knobs can change the appearance of cabinetry surprisingly quickly.
This is also one of the smaller purchases I would consider when working with a limited budget.
Before buying anything, measure the existing hardware so you know whether the new pieces will fit the existing holes.
If the spacing does not match, you may end up creating additional holes or having to repair the old ones.
For a budget renovation, I prefer choosing hardware that is simple, durable and easy to clean rather than spending a large portion of the budget on decorative pieces.
Small details like this can make the renovation feel finished without adding unnecessary expense.
Improve the RV Lighting
Lighting is another area where a relatively small change can have a noticeable effect.
Older RV interiors can sometimes feel dark because of dated fixtures or poor placement.
Replacing old lighting with brighter, efficient fixtures can make the interior more comfortable, especially when you are preparing food, reading or spending time inside on a rainy day.
I would focus on the areas where better lighting actually improves how the RV is used.
The kitchen counter, dining area, bathroom and bedroom are good places to consider.
You do not need to replace every light fixture simply because you are renovating.
Look at the existing setup and determine which areas genuinely need improvement.
That keeps the renovation focused and prevents small purchases from quietly eating into the budget.
Make the Kitchen Feel New Without Rebuilding It
The RV kitchen is one of the areas where small changes can have a major visual impact.
You do not necessarily need new countertops, cabinets and appliances to make it feel refreshed.
Start with the cabinets.
Then look at the backsplash, faucet, hardware, lighting and countertop accessories.
If the countertop is still functional and in good condition, keep it.
If the backsplash looks dated, consider an affordable option that is lightweight and appropriate for an RV rather than installing something unnecessarily heavy.
I also pay attention to counter space because RV kitchens are already limited.
Instead of filling every available surface with decorations, I prefer accessories that serve a purpose.
A compact cutting board, organized storage containers and a few useful kitchen tools can make the space much easier to use without making it feel crowded.
Do Not Ignore Storage During the Renovation
A budget RV renovation should not only make the camper prettier.
It should make it easier to live in.
Storage is one of the areas I would pay attention to before spending money on decorative upgrades.
Look inside cabinets, under beds, around the kitchen and in every awkward corner.
You may discover that you already have more storage than you realized, but it is being used inefficiently.
Simple organizers can make a significant difference.
Use containers that fit the existing spaces instead of buying organizers first and trying to find somewhere to put them afterward.
I also like using vertical space whenever possible because RV storage is limited horizontally.
Adding hooks, narrow shelves or small organizers can help keep everyday items accessible without taking up valuable counter or floor space.
Where I Would Spend More Money
Even when I am trying to keep an RV renovation inexpensive, I would not automatically choose the cheapest option for everything.
Some areas are worth spending a little more on.
I would prioritize:
Waterproofing and leak prevention
Electrical and plumbing repairs
Quality paint and proper preparation materials
Durable flooring when the existing floor needs replacement
Comfortable bedding and seating
Hardware that will withstand regular use
These are areas where choosing something purely because it is cheap can create more work later.
A budget renovation should reduce unnecessary spending, not encourage you to buy products that will need replacing shortly afterward.
Where I Would Save Money
On the other hand, there are plenty of areas where you can save without sacrificing the overall appearance.
I would look for savings on decorative accessories, artwork, throw pillows, baskets, curtains and smaller organizational items.
You can also reuse pieces you already own when they fit the new design.
Secondhand furniture and decor can also be useful, particularly when you find something that can be cleaned, painted or reupholstered.
The important thing is to avoid buying something simply because it is inexpensive.
A $10 item that you do not need is still $10 spent unnecessarily.
For my own renovation planning, I would rather buy fewer things that actually improve the RV than fill the space with cheap accessories that eventually make the interior feel crowded.
Budget Friendly RV Renovation Ideas That Make a Big Difference
Once the major problems are handled and you have decided which existing features can stay, the fun part of the renovation becomes much easier. This is where I would focus on changes that give the RV a noticeable makeover without turning every project into a major expense.
I have learned that the best budget renovations are not necessarily the ones with the biggest shopping lists. They are the ones where each change improves how the space looks or functions.
Refresh the RV Walls
If the walls look tired, yellowed or dated, a fresh coat of paint can completely change the interior.
Before painting, I would clean the walls carefully and check for any signs of moisture or damage. Paint should never be used to hide a problem that needs to be repaired underneath.
For a small RV, I generally prefer lighter neutral colors because they help the interior feel brighter and more spacious.
You can still bring personality into the space with your furniture, bedding, curtains and accessories.
If painting the entire RV is outside your budget or you simply do not want to take on such a large project, focus on the most visible areas.
A single accent wall or refreshed section can sometimes make enough of a difference without requiring several gallons of paint.
Give Old RV Furniture a Second Chance
Replacing RV furniture can become one of the most expensive parts of a renovation.
Before removing an old sofa, chair or dinette, I would look at whether the frame is still strong and comfortable.
If it is, consider changing the upholstery instead.
New fabric can completely change the appearance of a dated piece.
You can also use washable furniture covers if you want a less permanent and more affordable option.
For RV seating, I would always think about durability before choosing fabric based purely on appearance. The furniture gets used frequently, and something that looks beautiful but stains easily may become frustrating very quickly.
If you have removable cushions, measure them carefully before purchasing fabric or covers.
Taking accurate measurements saves you from buying something that does not fit and having to spend again.
Replace or Refresh the Curtains
Curtains can make an RV feel much more finished.
Older RV curtains can sometimes make the interior feel darker and more dated than it actually is.
Replacing them with lighter curtains can make the space feel more open.
You do not necessarily need expensive custom curtains.
If you can sew, making simple curtains from affordable fabric can reduce the cost considerably. Even if you do not sew, look for ready made curtains that can be adapted to the existing windows.
I would also avoid choosing extremely heavy window treatments unless you specifically need them.
Lightweight curtains are easier to manage and can help maintain the bright feeling of a small interior.
Update the RV Bedroom on a Budget
The bedroom does not need a complete makeover to feel more comfortable.
I would start with the bedding because it has a large visual impact.
A new duvet, comforter, sheets or a few coordinating pillows can make the sleeping area feel completely different.
If the existing mattress is uncomfortable, however, I would prioritize comfort over decoration.
A mattress topper can sometimes be a much more affordable solution than replacing the entire mattress.
This is one of those areas where I think the renovation should be guided by how you actually use the RV.
A beautiful bedroom is nice, but a comfortable bed matters much more when you are spending several nights on the road.
You can then add small touches such as a bedside organizer, reading light or simple wall decoration.
Make the Bathroom Look Cleaner and More Modern
RV bathrooms are small, which means you do not need many changes to make a noticeable difference.
Start with the basics.
Clean the surfaces thoroughly and inspect the seals around the shower, sink and toilet.
If anything is damaged or showing signs of leaking, deal with that before decorating.
Once everything is in good condition, you can focus on cosmetic changes.
New cabinet hardware, a shower curtain, better lighting and a few coordinated storage containers can make the bathroom feel much more polished.
I would avoid adding too many decorative items because small RV bathrooms can become cluttered very quickly.
Instead, choose pieces that serve a purpose.
A small organizer that keeps toiletries contained is much more useful than several decorative objects taking up the limited counter space.
Replace Old Flooring Only When You Need To
Flooring can make an enormous difference in an RV, but it can also consume a large part of the renovation budget.
If the existing floor is structurally sound and still looks acceptable, I would not replace it simply because it is not my favorite style.
If replacement is necessary, choose something durable, lightweight and suitable for the conditions inside an RV.
Before installing anything new, inspect the existing floor carefully.
Soft spots, water damage or uneven areas need to be addressed before new flooring goes down.
This is another situation where spending money on the underlying problem is more important than choosing the prettiest finish.
For a cosmetic update, you can sometimes achieve a completely different look by using a large washable rug instead of replacing the entire floor.
That can be particularly useful when you are working with a very limited renovation budget.
Create an Entryway That Actually Works
The RV entrance is a small area, but it can quickly become one of the messiest.
Shoes, jackets, keys and outdoor items tend to collect near the door.
I like using the entryway as an opportunity to add practical storage rather than decoration.
A few hooks can hold jackets and bags.
A narrow basket can contain smaller items.
A washable mat can help reduce dirt being carried throughout the RV.
If you have enough wall space, a compact organizer can provide additional storage without taking up valuable floor space.
The key is to keep everything easy to access.
When an item is difficult to put away, it usually ends up being left somewhere else.
Use Peel and Stick Materials Carefully
Peel and stick products can be useful for budget RV renovations because they can change the appearance of a surface without requiring a full replacement.
They can work particularly well for certain backsplashes, accent areas and decorative surfaces.
However, I would not automatically use them everywhere.
RV interiors experience movement, temperature changes and regular use, so the surface needs to be properly cleaned and prepared.
Before covering a large area, test the material in a small, less noticeable location.
Make sure it adheres properly and that the finished look works with the rest of your interior.
This is especially important if you are renovating an RV that spends a lot of time traveling.
A product that looks perfect on installation day is not necessarily a good renovation choice if it starts lifting shortly afterward.
Add Affordable RV Organization
Organization is one of my favorite ways to improve a camper without spending a fortune.
The trick is to organize according to how you actually live in the RV.
For example, kitchen items that you use every day should be easy to reach.
Cleaning supplies should have a dedicated place.
Outdoor equipment should not be mixed with everyday indoor items.
Clothing storage should be arranged so that you can see what you have without pulling everything out.
Small bins, baskets and drawer organizers can help tremendously.
I would measure every cabinet and drawer before buying organizers.
RV storage spaces are often unusually shaped, and a product that looks perfect online may waste valuable space once it arrives.
Use the Walls for Extra Storage
When floor and cabinet space are limited, the walls can become valuable storage areas.
Hooks are one of the easiest options.
You can use them for towels, jackets, hats, bags and lightweight camping equipment.
Small wall mounted organizers can also work well for things such as mail, chargers or personal items.
However, I would be careful about adding too much weight.
Anything mounted inside an RV needs to withstand movement while the vehicle is traveling.
Use appropriate mounting hardware and make sure the item is secure before hitting the road.
This is one area where I would prioritize safety and durability over appearance.
Upgrade the RV Kitchen Without Replacing the Appliances
Replacing appliances can quickly push a budget renovation into expensive territory.
If your refrigerator, stove, microwave and other major appliances are working properly, keep them.
Instead, concentrate on the surrounding details.
Updating cabinet hardware, improving lighting, organizing the drawers and adding a simple backsplash can make the kitchen feel considerably newer.
You can also replace small items that are worn out, such as drawer organizers, sink accessories and storage containers.
I find that coordinated small details can make an older kitchen feel much more intentional.
The important thing is not to overcrowd the counters.
RV kitchens have limited workspace, so every item should earn its place.
Make the Dinette More Comfortable
The dinette is often one of the hardest working areas in an RV.
It may be where you eat, work, read, plan your route or spend time when the weather keeps you indoors.
If the structure is still good, I would focus on comfort rather than replacement.
New cushions or cushion covers can make a dramatic difference.
You can also refresh the table surface if it is scratched or outdated.
A simple table makeover may involve sanding, painting or applying an appropriate finish rather than replacing the entire table.
Adding a small centerpiece can make the area feel inviting, but I prefer keeping it simple so the table remains usable.
Add Small Details That Make the RV Feel Personal
Once the practical work is finished, this is where you can add personality.
I like using a few carefully chosen pieces rather than trying to decorate every surface.
A small piece of artwork, a textured throw, a couple of cushions or a simple plant can make the RV feel more like a personal space.
You can also bring in travel memories through photographs or small souvenirs.
Just remember that anything you take on the road needs to be secured properly.
Decor that looks beautiful while the RV is parked can become a problem once you start driving.
I always prefer decoration that is lightweight, useful or easy to store.
Shop Your Own Home Before Buying More
One of the easiest ways to save money during an RV renovation is to look around your own home before shopping.
You may already have baskets, pillows, blankets, storage containers, artwork or small lamps that work with your new design.
This is especially helpful when you are trying to create a specific color scheme.
Instead of buying everything at once, start with what you already have and identify the few pieces that are genuinely missing.
I have found that this approach also makes the finished RV feel more personal because you are not simply filling it with new items.
Do the Renovation in Stages
You do not have to finish the entire RV in one weekend.
In fact, trying to do everything at once can make the project more expensive and stressful.
I prefer breaking a renovation into manageable stages.
Start with repairs.
Then move to the largest visual changes.
After that, improve storage and functionality.
Finally, add decorative details.
This approach gives you time to see how each change affects the space before spending money on the next one.
It also gives you an opportunity to change your mind.
You may discover that once the cabinets are painted and the lighting is improved, you no longer need to replace something you originally thought needed to go.
That is exactly the kind of decision that helps keep an RV renovation under control.
How to Finish an RV Renovation Without Going Over Budget
The final stage of an RV renovation is where it is easy to get carried away. Once the main improvements are finished, it can be tempting to keep buying accessories, changing small details and adding projects that were never part of the original plan.
I have found that this is where having a clear stopping point helps. A successful budget renovation does not mean changing every surface inside the RV. It means creating a space that feels comfortable, functional and personal while making sensible decisions about where your money goes.
Make a List Before You Start Shopping
Before buying the final items for the renovation, I would make one last list of everything that is actually missing.
Walk through the RV and look at each area separately.
Check the kitchen.
Check the bathroom.
Check the bedroom.
Check the seating area.
Check the storage.
Check the entrance.
Then ask whether each item on your shopping list solves a genuine problem or simply looks appealing.
This simple step can prevent a surprising amount of unnecessary spending.
I have found that online shopping makes it especially easy to convince yourself that you need another organizer, cushion, basket or decorative piece.
If you cannot explain exactly where an item will go and how you will use it, I would leave it off the list.
Give Yourself a Renovation Contingency Fund
Even when you plan everything carefully, RV projects can uncover unexpected problems.
A cabinet may have hidden water damage.
A floor may be softer than expected.
A seal may need replacing.
A repair may require an additional part.
This is why I would never plan to spend every dollar of the renovation budget on visible upgrades.
Keep some money aside for surprises.
If you do not end up needing it, that is a good thing. You can always use the remaining money later for an upgrade that genuinely adds value.
Having that cushion also makes the renovation less stressful because an unexpected repair does not automatically force you to stop the entire project.
Know When to DIY and When to Hire a Professional
Doing some of the work yourself is one of the easiest ways to reduce renovation costs, but I would not try to DIY every single project.
Painting, decorating, basic organization and some cosmetic updates can often be manageable projects if you are comfortable doing them.
Electrical, structural, gas and certain plumbing repairs are different.
If you are unsure about a repair that could affect safety, I would rather have it properly inspected than risk creating a much bigger problem.
Saving money is important, but safety needs to come before the renovation budget.
The same applies to water damage.
A cosmetic fix over an unresolved leak may look good temporarily, but it does not solve the underlying problem.
Look for Secondhand and Clearance Materials
You do not need to buy every renovation item at full price.
I would check clearance sections, local resale options, outlet stores and secondhand marketplaces when appropriate.
This can be particularly useful for furniture, decor, baskets, storage pieces and other noncritical items.
You can sometimes find something that is nearly perfect and then make a small adjustment to suit your RV.
For example, a piece of furniture may look outdated but have a solid frame. A coat of paint or new upholstery can turn it into something that fits your renovation much better.
The key is to know what you are looking for before you start shopping.
Otherwise, it becomes very easy to buy inexpensive things simply because they are inexpensive.
Reuse What You Already Have
Reusing materials is another practical way to keep the renovation affordable.
An existing shelf may only need paint.
A cabinet may only need new handles.
A chair may only need a new cover.
A table may only need refinishing.
Curtains may be reusable in another area.
Even leftover paint from another project can sometimes be useful for a small accent area.
I like this approach because it reduces waste as well as cost.
It also forces you to be more creative.
Sometimes the most satisfying part of a renovation is taking something that looked tired and finding a way to make it work again.
Avoid Making the RV Too Heavy
One thing that is easy to overlook during an RV renovation is weight.
It is tempting to add heavier furniture, thick flooring, large storage units, decorative materials and other upgrades because they look substantial.
But an RV has weight limitations for a reason.
Before adding a major item, consider how much it weighs and whether it is genuinely necessary.
This is another reason I prefer simple renovations.
Lightweight materials, compact storage and multifunctional furniture can help you improve the interior without adding unnecessary weight.
Always check your RV manufacturer’s specifications and weight ratings before making significant changes.
Secure Everything Before You Travel
A renovation is not finished just because the RV looks good while it is parked.
You need to make sure the new additions can handle travel.
Open every cabinet.
Check the drawers.
Test the hooks.
Look at the shelves.
Make sure decorative items cannot easily fall.
If you installed new hardware or mounted anything to a wall, check that it is secure.
I like doing a practical test before a longer trip.
Move around the RV as if you were preparing for travel and look for anything that could shift, slide or fall.
A few minutes of checking can save you from arriving at your destination to find that your freshly renovated space has turned into a mess.
Focus on Comfort, Not Just Appearance
A beautiful RV is nice, but the best renovation is one that makes the camper more enjoyable to use.
Think about the things you do repeatedly.
Where do you sit?
Where do you prepare food?
Where do you sleep?
Where do you store your clothes?
Where do you keep your shoes?
Where do you charge your devices?
Where do you relax after a long day of traveling?
These everyday activities should guide your renovation decisions.
For example, spending money on comfortable seating may be more valuable to you than replacing a decorative wall feature.
Adding better lighting may make more difference than buying another piece of artwork.
Improving storage may be more useful than adding another decorative shelf.
The right priorities will depend on how you use your RV.
Keep a Record of What You Spend
I strongly recommend keeping track of every renovation purchase.
It does not need to be complicated.
A simple spreadsheet or notes document is enough.
Record the item, price and area of the RV where it will be used.
This helps you see where the money is actually going.
Small purchases are particularly easy to overlook.
A few storage containers here, some hardware there and several decorative items later can add up quickly.
When everything is recorded, it becomes much easier to decide whether you still have room in the budget for another project.
It also gives you a useful record for future renovations.
Take Your Time With the Finishing Details
Once the main renovation is complete, resist the urge to immediately fill every empty space.
Live with the RV for a while.
Use the kitchen.
Sleep in the bedroom.
Spend time in the seating area.
Take a trip if possible.
You may discover that something you thought you needed is not actually necessary.
You may also notice a storage problem that was not obvious when the RV was sitting empty.
This is one reason I like finishing an RV renovation gradually.
The longer you use the space, the easier it becomes to understand what actually needs changing.
Budget RV Renovation Ideas That Give You the Most Impact
If I had a limited budget and wanted to make an older RV feel dramatically better, I would prioritize the changes that provide the biggest improvement for the money.
These would be high on my list:
- Deep clean the entire RV
- Repair leaks and water damage
- Paint dated cabinets and walls
- Replace old cabinet hardware
- Improve the lighting
- Refresh curtains and window treatments
- Update cushions or furniture covers
- Improve kitchen and bathroom storage
- Replace damaged flooring only where necessary
- Add a few personal decorative touches
You do not need to complete all ten projects at once.
Even three or four well chosen improvements can make an older RV feel completely different.
What I Would Not Spend Money On First
When the budget is tight, I would avoid starting with purely cosmetic projects that do not improve the condition or functionality of the RV.
I would not spend the majority of the budget on decorations while ignoring a damaged floor.
I would not replace functional appliances simply because they look old.
I would not buy expensive furniture before checking whether the existing furniture can be repaired or reupholstered.
I would not cover a water damaged surface with a new finish without finding the source of the moisture.
And I would not buy large quantities of storage products before measuring the spaces they need to fit into.
These decisions may seem obvious, but they are exactly the types of small choices that can turn a budget renovation into an expensive one.
The Best RV Renovation Is One That Fits Your Lifestyle
There is no single formula for renovating an RV.
Someone who spends most of their time camping off grid will have different priorities from someone who mainly stays at established campgrounds.
Someone who cooks frequently will benefit from a different kitchen setup than someone who eats outside most of the time.
Someone who travels with children or pets will need different storage and furniture solutions.
That is why I would always design the renovation around the way you actually use the RV rather than copying another camper’s interior exactly.
Take inspiration from other RV renovations, but adapt those ideas to your own space.
Your RV does not need to look like a showroom.
It needs to work for you.
Final Thoughts
Renovating an RV on a budget is really about knowing where your money will make the biggest difference.
You do not need to replace everything to create a beautiful camper. A fresh coat of paint, updated hardware, improved lighting, refreshed furniture, better organization and a few carefully chosen details can completely change an older RV.
The most important thing I have learned is to slow down before spending. Fix the problems that affect the condition of the RV first, keep anything that is still useful, reuse what you can and spend more on the areas that affect safety, comfort and durability.
Once those priorities are handled, the cosmetic improvements become much easier.
A budget renovation can still feel thoughtful and polished. In many cases, the simplest changes are the ones that make the RV feel most like your own space.
And that is ultimately what I want from an RV renovation: a camper that looks good, works well, feels comfortable and is ready for the next adventure without leaving you with a renovation bill that costs more than it needed to.