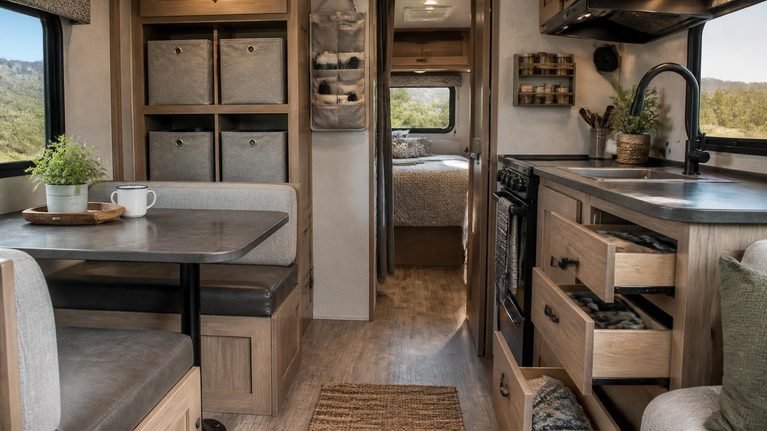
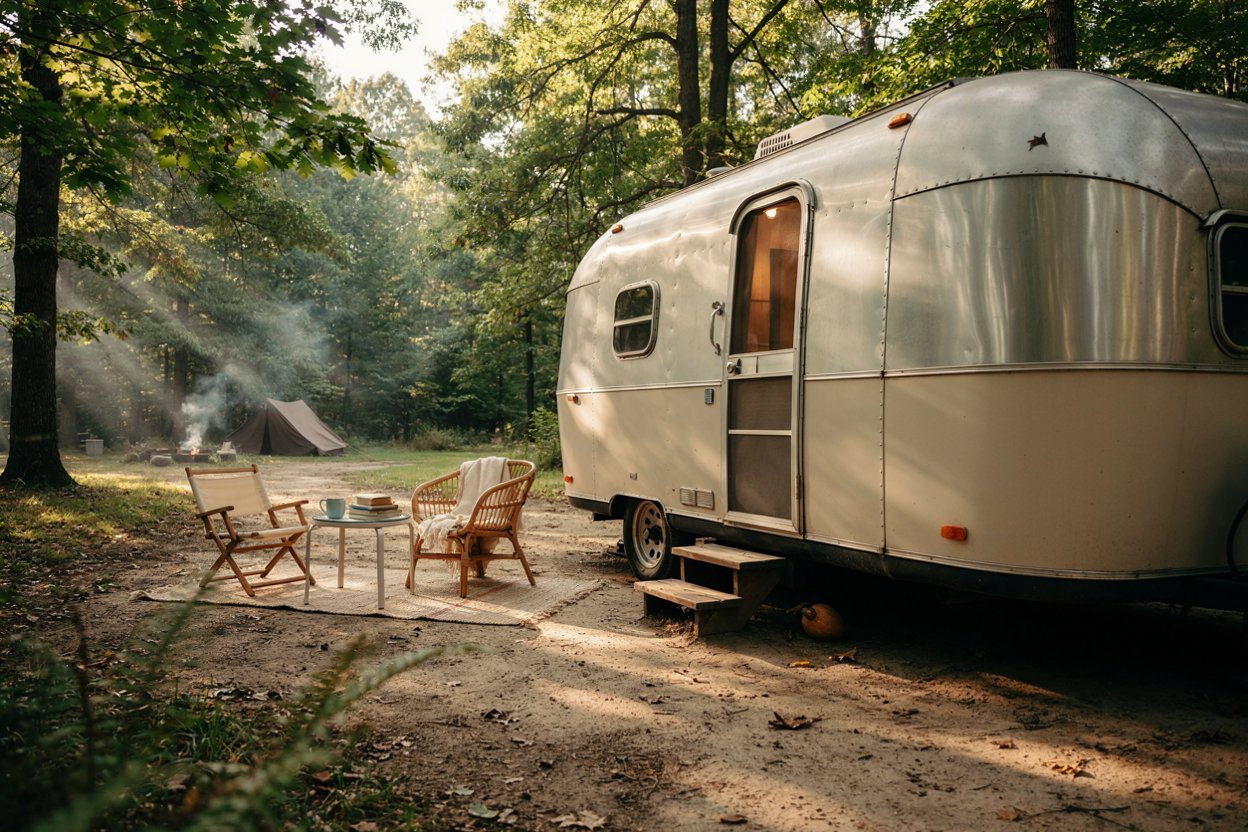
Tiny Vintage Trailer Transformed into an Adorable Home on Wheels
There is something special about a tiny vintage trailer that makes it feel completely different from a modern RV. The curved shape, small windows, old fashioned details, compact kitchen, and cozy interior can make even a very simple camper feel like a little home waiting to be brought back to life.
When I started thinking about transforming a tiny vintage trailer, I knew I did not want the finished space to look like a typical camper.
I wanted it to feel warm, comfortable, practical, and personal while still keeping some of the character that made the original trailer charming. Small trailer renovations can be surprisingly rewarding because every design decision matters when you are working with limited space.
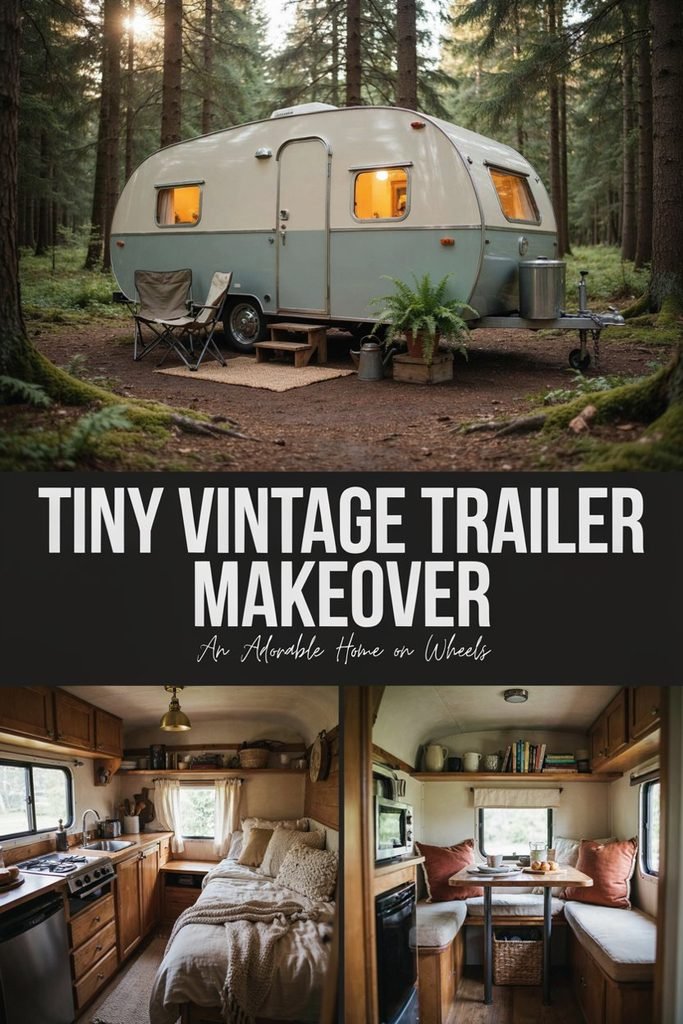
A clever storage idea, lighter wall color, comfortable bedding, vintage accessories, or carefully chosen lighting can completely change the atmosphere. In this makeover, I focused on creating a tiny home on wheels that would actually be enjoyable to use, not simply something that looked beautiful in photographs.
The goal was to make the interior feel larger, organize the available storage, improve the sleeping area, create a useful kitchen, and add decorative details without making the trailer feel crowded.
If you have ever dreamed about renovating an old camper, restoring a vintage travel trailer, creating a cozy camping space, or turning a small trailer into a weekend getaway, there are plenty of ideas here that can be adapted to your own project.
Disclaimer
This post may contain affiliate links. As an Amazon Associate, I earn from qualifying purchases at no additional cost to you. I only recommend RV and camping products that I genuinely find useful for creating a comfortable, organized trailer. Trailer layouts, storage dimensions, electrical systems, and product compatibility can vary, so always measure your space and check specifications before buying.
Amazon Shopping List You Need
- Foldable Storage Bins – I use these to keep small trailer essentials organized without taking up too much space.
- Battery Powered LED Puck Lights – I love using these to add cozy lighting without complicated installation.
- Over the Door Hanging Organizer – I always look for ways to turn unused door space into extra storage.
- Collapsible Kitchen Storage Containers – I use these when I need practical kitchen storage in a tiny trailer.
- Compact Folding Step Stool – I keep one handy for reaching high cabinets and storage areas.
- Boho Throw Pillow Covers – I love using these to give a small trailer a warm vintage inspired feel.
- Portable Rechargeable Fan – I always like having a compact fan for better airflow on warm camping days.
Why I Wanted to Transform a Tiny Vintage Trailer
Small trailers have a way of encouraging you to think differently about what you actually need.
That was one of the things I enjoyed most about this project.
Inside a tiny trailer, there simply is not room for unnecessary furniture, oversized decorations, or storage that only looks good but serves no purpose. Every cabinet, shelf, cushion, hook, and countertop has to earn its place.
I have worked on enough home projects to know that making a small space attractive is usually easier when you begin with functionality rather than decoration.
That was especially important here.
I wanted the trailer to feel adorable, but I also wanted it to be somewhere I could realistically spend a few nights without constantly fighting with the lack of space.
The idea was to create a little home on wheels that felt comfortable enough for slow mornings, simple meals, rainy afternoons, and relaxed evenings.
Rather than completely removing every vintage characteristic, I wanted to combine the old charm with practical improvements.
That balance became the foundation for the entire renovation.
Starting With the Trailer Itself
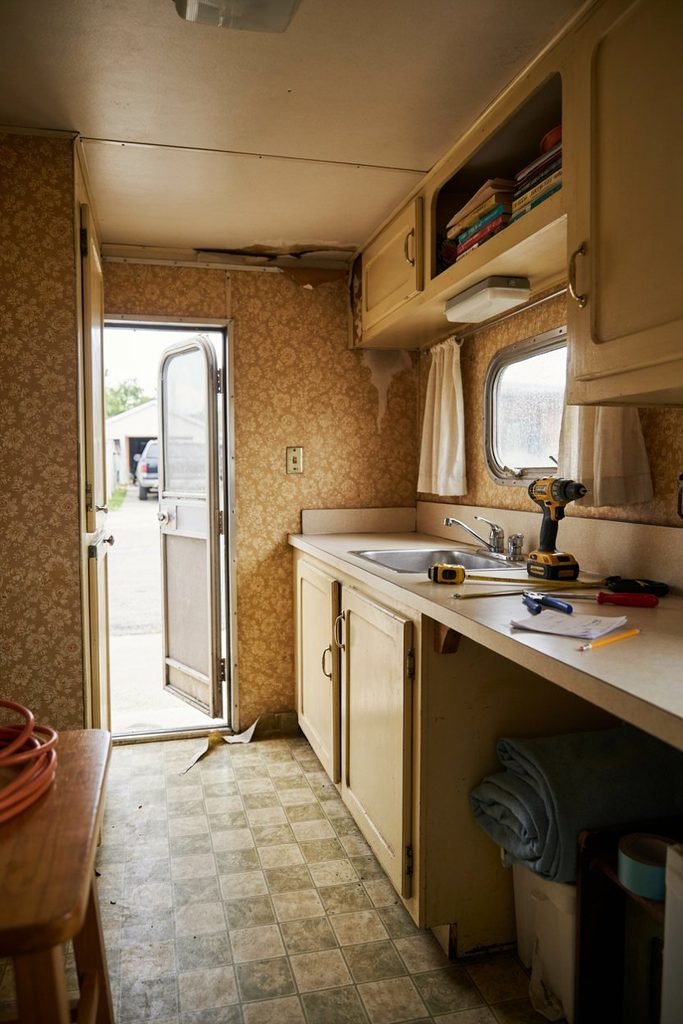
Before thinking about paint colors, bedding, curtains, or decorations, I think the most important part of a trailer renovation is understanding what you are actually working with.
A tiny trailer can look charming from the outside while hiding plenty of problems underneath.
I would always recommend starting with a careful inspection before purchasing furniture or ordering decorative materials.
Look closely at the roof, walls, flooring, windows, doors, cabinets, electrical system, plumbing, and areas where water could potentially enter.
Water damage deserves particular attention.
A small leak can create much more work than expected, especially in an older trailer.
I also pay attention to the condition of the floor because soft or damaged flooring can indicate a problem underneath that needs to be addressed before cosmetic work begins.
This is one of those parts of a renovation that is not particularly glamorous, but it can save a tremendous amount of frustration later.
There is no point installing beautiful new flooring if an underlying moisture problem has not been fixed.
The same goes for the walls.
Before covering anything, I would make sure the surface is clean, dry, and structurally sound.
Deciding What to Keep
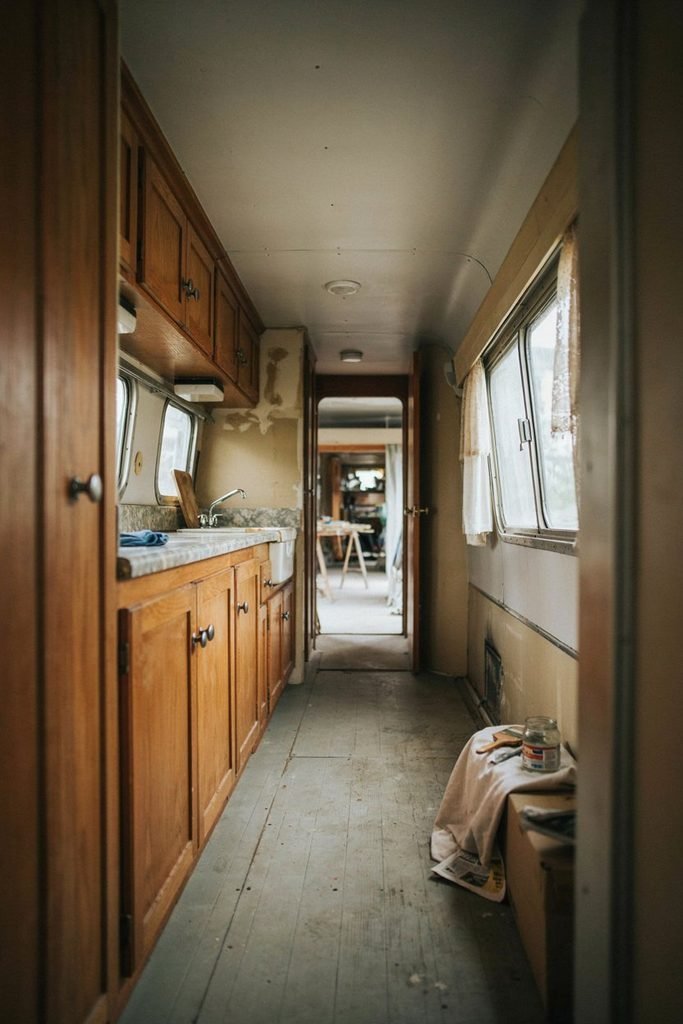
One of my biggest decisions was determining which original features were worth keeping.
With an older trailer, it can be tempting to remove everything and start completely from scratch.
Sometimes that is necessary.
But I think completely stripping away the original character can also remove some of the charm that made the trailer interesting in the first place.
The goal was not to make the trailer look brand new.
I wanted it to feel refreshed.
That meant looking carefully at the existing cabinets, hardware, windows, doors, and other small details before deciding what needed to go.
Some pieces may only need cleaning.
Others may need sanding, paint, new hardware, or a little repair work.
That approach can also help keep renovation costs under control.
Instead of automatically replacing something, I like to ask whether it can be repaired or transformed first.
A cabinet with a dated finish may look completely different after cleaning, sanding, and painting.
Old handles can sometimes be replaced with inexpensive hardware.
A tired countertop may be able to be refinished rather than completely removed.
Those little decisions can make a surprisingly big difference.
Planning the Layout Before Decorating
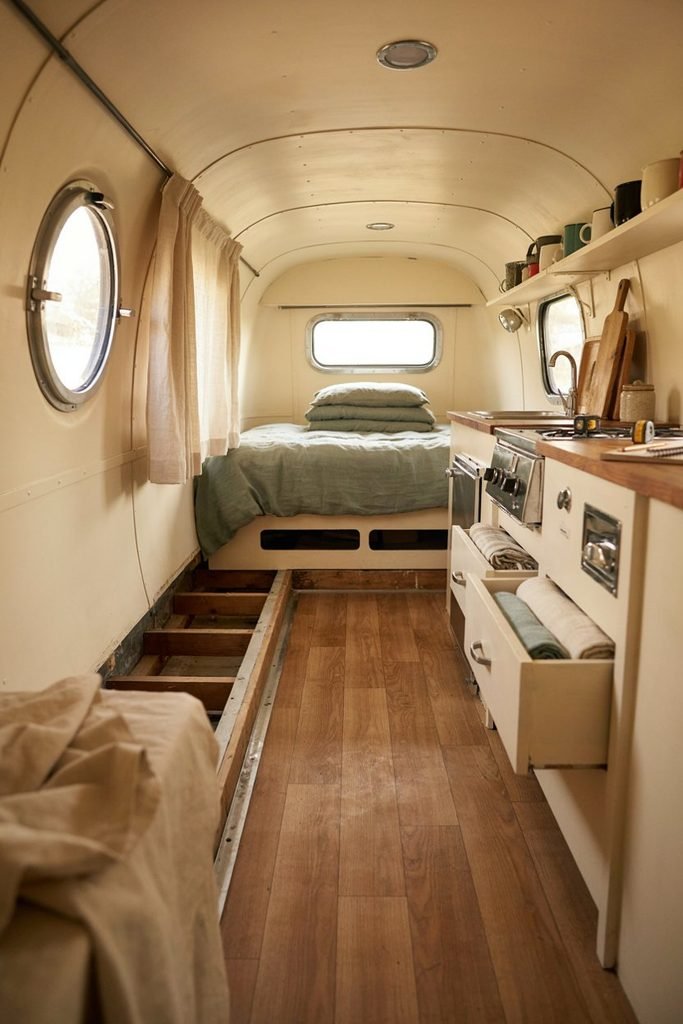
The biggest mistake I think people can make with a tiny trailer is decorating before figuring out the layout.
When space is limited, you cannot simply add things wherever you have room.
Everything needs to work together.
I started by thinking about how the trailer would actually be used.
Where would we sleep?
Where would we sit?
Where would food be prepared?
Where would bags, shoes, jackets, cooking supplies, bedding, and camping equipment go?
Where would we put things when we were inside the trailer?
Those questions sound simple, but they make a huge difference.
A beautiful tiny trailer can become frustrating very quickly if there is nowhere to put everyday items.
I also wanted to maintain a clear walking area.
This is particularly important in a small camper because visual clutter can make the entire interior feel smaller.
Instead of trying to fill every available wall, I preferred to leave some open areas.
That breathing room helps the trailer feel more spacious.
Making a Tiny Trailer Feel Bigger
One of the first design goals was making the interior feel larger than it actually was.
There are several simple ways to do this without changing the physical dimensions of the trailer.
Lighter colors were one of the easiest choices.
A soft white, warm cream, light beige, or muted neutral can help reflect natural light and make the walls feel less enclosed.
I also wanted to avoid using too many competing colors.
In a large house, several colors can work together without making the room feel busy.
In a tiny trailer, that same combination can quickly become overwhelming.
I preferred a simple palette with a few warm accents.
Natural wood tones, soft textiles, vintage inspired hardware, and small decorative touches added personality without taking over the room.
Mirrors can also be useful in compact spaces because they reflect light and visually extend the room.
I would use them carefully, though.
The goal is to make the trailer feel open rather than turn it into a collection of reflective surfaces.
Choosing the Right Flooring
Flooring may not be the most exciting part of a trailer makeover, but it has a major effect on the finished appearance.
Because the space is so small, the floor is visible from almost every angle.
I wanted something that would look attractive while also being practical for camping.
That means considering dirt, moisture, shoes, pets if they are coming along, and the inevitable spills that happen when you are cooking in a compact kitchen.
A light wood appearance can work beautifully in a vintage trailer because it adds warmth without making the floor visually heavy.
I also like flooring that is relatively easy to clean.
There is no reason to choose something delicate for a space that is going to be used outdoors.
One lesson I have learned from working on small spaces is that beautiful does not have to mean fragile.
The best materials are the ones that still look good after being used.
Giving the Walls a Fresh Start
The walls were another area where a relatively simple change could make the trailer feel completely different.
Older campers can sometimes have dark, dated, or heavily patterned interiors.
While those finishes may have been fashionable when the trailer was built, they can make a tiny space feel even more enclosed.
A fresh neutral color can completely change that feeling.
I prefer warm whites and soft neutral shades rather than an extremely cold white.
The warmer tones work especially well with vintage details because they keep the interior from feeling too modern.
Before painting, though, preparation matters.
The walls need to be cleaned properly and any damaged areas should be repaired first.
It is easy to become impatient when you can already imagine the finished trailer, but rushing preparation usually shows in the final result.
Taking the time to create a smooth surface makes the paint look considerably better.
Creating a Cozy Sleeping Area
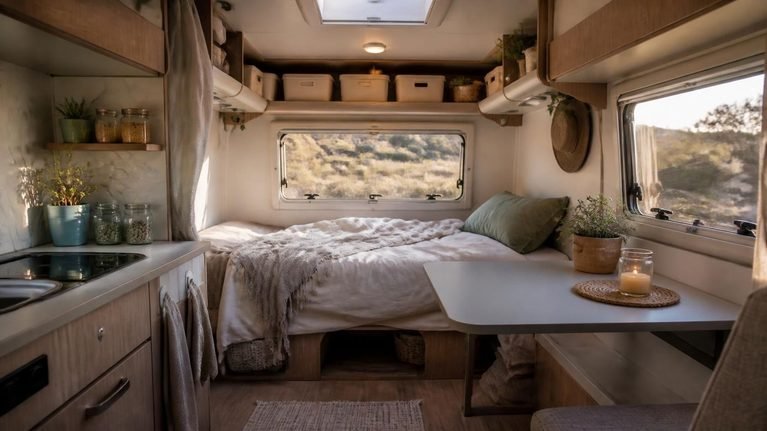
The sleeping area was one of the most important parts of the transformation because a tiny trailer should still be comfortable at night.
There is always a temptation to focus heavily on how the bed looks.
I think comfort needs to come first.
A mattress that looks beautiful but leaves you waking up sore is not much of an improvement.
I wanted the sleeping area to feel soft and inviting while still leaving enough room to move around.
Simple bedding helped keep the space visually calm.
Rather than using lots of decorative pillows, I preferred a few comfortable layers that could easily be moved when it was time to sleep.
Soft blankets also added warmth and texture.
This is one place where a small amount of fabric can make a huge difference.
Curtains were another simple way to add personality.
I like fabrics with subtle vintage patterns because they give the trailer some character without competing with everything else.
Using Every Inch of Storage
Storage became one of the most important practical considerations.
There is never enough storage in a tiny trailer.
Instead of trying to solve that problem by adding large cabinets, I looked for unused areas.
The space underneath seating can become valuable storage.
The area above the kitchen can sometimes hold lightweight items.
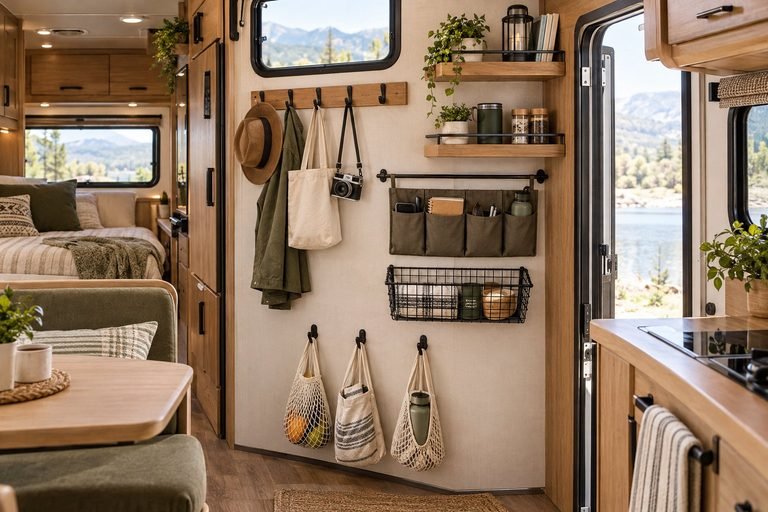
Small wall mounted shelves can provide room for things that need to remain accessible.
Hooks are also incredibly useful.
A few strategically placed hooks can hold jackets, towels, bags, hats, or cooking utensils without requiring another cabinet.
I have found that open storage works best when the items are attractive enough to become part of the decoration.
For example, a simple wooden shelf holding a few dishes can look intentional rather than cluttered.
The important thing is not to fill every shelf simply because the space exists.
Leaving some empty space makes everything look more organized.
The Vintage Details That Make the Trailer Special
This was probably my favorite part of the design process.
Modernizing a vintage trailer does not mean removing everything that makes it vintage.
In fact, some of the smallest details can give the finished space its personality.
Vintage inspired cabinet handles, warm lighting, simple patterned curtains, natural wood, classic dishware, woven baskets, and old fashioned accessories can all contribute to that feeling.
I like decorations that look as though they belong in the trailer rather than items that were added simply to fill a photograph.
That distinction makes a big difference.
The trailer should feel like a place someone actually lives and travels in.
A small basket might hold blankets.
A vintage style tray might become useful for serving breakfast.
A simple framed print might add character to an otherwise empty wall.
When decoration has a purpose, the trailer feels much more natural.
Why Function Had to Come Before Decoration
One thing I kept reminding myself throughout the renovation was that this was still a camping space.
It needed to function.
That meant thinking about cleaning, cooking, sleeping, storing belongings, opening cabinets, moving around, and getting ready for the day.
Every decorative decision had to work with those practical needs.
This is especially important if you are planning your own tiny camper renovation.
Before buying something because it looks cute, ask yourself where it will go and whether you will still like having it there after a few camping trips.
That simple question can prevent a lot of unnecessary purchases.
I would much rather have a trailer with fewer beautiful things and plenty of usable space than a trailer packed with decorations that make everyday life difficult.
The Foundation of the Transformation
By this point, the biggest changes were already beginning to take shape.
The trailer was still tiny.
The dimensions had not magically changed.
But the space was starting to feel different because the design was becoming intentional.
The lighter walls helped reflect the available light.
The flooring gave the interior a cleaner foundation.
The sleeping area began to feel comfortable rather than cramped.
Storage was being considered from the beginning rather than added as an afterthought.
Most importantly, the vintage character was still there.
That was exactly what I wanted.
The next stage was where the trailer really began to feel like a little home rather than an old camper.
The kitchen, seating area, lighting, textiles, storage solutions, and small decorative details would all have to work together without overwhelming the limited space.
That is where the transformation became much more personal.
Giving the Tiny Kitchen a Fresh New Look
The kitchen was one of the areas where I wanted to make a noticeable change without losing the practical side of the trailer.
A tiny trailer kitchen does not give you much room to work with, so I quickly realized that adding more things was not necessarily going to make it better.
The goal was to make the existing space work harder.
I started by looking at the cabinets.
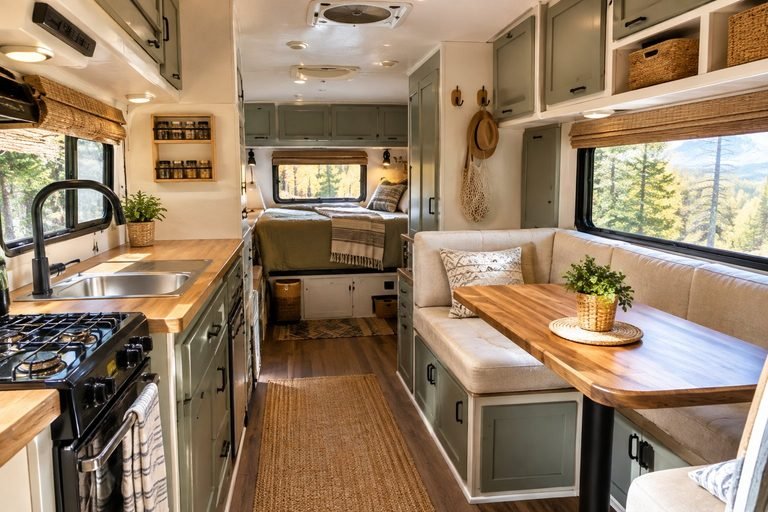
Older cabinets can sometimes make a small trailer feel dark, especially when they have a dated wood finish or heavy hardware. Giving them a lighter finish made the kitchen feel considerably more open.
I also liked the idea of keeping a little bit of natural wood visible because it helped balance the lighter colors.
That combination gave the kitchen a softer vintage cottage feeling instead of making it look like a completely modern RV.
The cabinet hardware was another small detail that made a surprisingly big difference.
New handles can change the appearance of old cabinetry without requiring the cabinets themselves to be replaced.
This is one of the areas where I would encourage anyone doing a budget trailer renovation to look at what can be refreshed before deciding that everything needs to be replaced.
Keeping the Countertop Simple
Counter space is precious inside a tiny trailer.
Even making breakfast can become difficult when there is nowhere to put a cutting board, plate, coffee mug, or ingredients.
I wanted the countertop to remain as open as possible.
Instead of keeping appliances and decorative items permanently on the counter, I preferred storing things away when they were not being used.
That made the kitchen feel larger and made cooking much easier.
I also liked using a simple countertop surface that worked with the rest of the interior.
A busy pattern would have made the small kitchen feel visually crowded.
A subtle surface allowed the cabinets, wood accents, and accessories to provide most of the character.
This is something I have found useful in small spaces in general.
When the room is already compact, too many patterns competing with one another can make everything feel smaller.
Making a Tiny Kitchen Functional
The most important question for me was not how many appliances I could fit into the trailer.
It was how easily I could prepare a simple meal.
There is a big difference.
A tiny trailer kitchen does not need to function like a full size home kitchen.
For camping, I usually think about the meals that will actually be prepared.
Breakfast might involve coffee, eggs, fruit, and toast.
Lunch could be something simple that does not require much preparation.
Dinner might involve one pan or a small grill outside.
Planning around those realistic meals makes it much easier to decide what equipment is actually necessary.
I found that this approach helped prevent the kitchen from becoming overloaded.
Instead of storing every possible cooking gadget, I focused on versatile pieces that could be used for several different meals.
That freed up cabinet space and made the kitchen easier to maintain.
Adding Open Shelving
One of my favorite changes was incorporating a little open storage.
Open shelving can be extremely useful in a tiny trailer because you can see exactly where everything is.
It also eliminates the need to constantly open and close cabinet doors when you are cooking.
I used the shelves for items that I wanted to reach easily.
A few dishes, mugs, bowls, and small kitchen accessories can actually become part of the decoration when they are arranged thoughtfully.
The key is restraint.
If every inch of the shelf is filled, the result can quickly look messy.
I found that leaving small gaps between items made the entire kitchen feel more intentional.
Open shelves also make it easier to remember what you have packed.
That sounds like a small thing, but it becomes surprisingly helpful when you are preparing for a camping trip.
Using Baskets to Control Clutter
Baskets became another simple storage solution.
I like baskets in small spaces because they can hide the little things that would otherwise end up scattered around.
A basket can hold napkins, dish towels, snacks, toiletries, chargers, or extra blankets depending on where it is placed.
They also soften the appearance of hard surfaces.
Inside a vintage trailer, natural woven baskets work particularly well because they complement wood and neutral colors.
I would avoid buying too many different basket styles, though.
Using similar materials throughout the trailer helps the small space feel cohesive.
This is especially helpful when you have several storage areas visible at once.
Creating a Comfortable Seating Area
The seating area had to serve several purposes.
During the day, it needed to be comfortable enough for sitting, eating, reading, or having coffee.
At other times, the same space might need to accommodate additional sleeping arrangements or storage.
That made flexibility very important.
I focused on comfortable cushions and fabrics that felt soft but were still practical enough for a camping environment.
I also wanted the seating area to connect visually with the sleeping space rather than feeling like a completely separate room.
Using similar colors and fabrics throughout the trailer helped accomplish that.
The result felt more like one little room instead of several disconnected areas squeezed into a camper.
Choosing Textiles Carefully
Textiles are one of the easiest ways to change the personality of a tiny trailer.
Curtains, cushions, bedding, rugs, and blankets can introduce warmth without taking up much physical space.
For this trailer, I leaned toward soft neutral colors with subtle vintage inspired patterns.
I wanted the fabrics to feel cozy without becoming overly decorative.
A small rug can also make a big difference.
It adds warmth underfoot and helps define an area without requiring additional furniture.
But there is one practical consideration I would never ignore.
Everything inside a camping trailer eventually gets dirty.
Dirt comes in from outside.
Food gets spilled.
Shoes touch the floor.
Rainy weather can make things damp.
For that reason, I prefer fabrics that can be cleaned relatively easily.
A beautiful textile is not worth much if it cannot survive actual camping.
Installing Warm Lighting
Lighting completely changed the atmosphere inside the trailer.
During the day, natural light did most of the work, but after sunset the right lighting became especially important.
Bright overhead lighting can make a tiny camper feel more like a utility space.
I wanted something softer and warmer.
Small lamps and warm lighting helped create a much more comfortable atmosphere.
I also liked having different sources of light rather than relying on one central fixture.
That allowed me to keep certain areas brighter while leaving the rest of the trailer softer.
For example, the kitchen can benefit from stronger task lighting, while the seating and sleeping areas can use gentler lighting.
This is a simple design trick that works particularly well in compact interiors.
Making the Windows Part of the Design
The windows were another feature I did not want to overlook.
In a tiny trailer, windows are extremely valuable because they bring in natural light and give the interior a visual connection to the outdoors.
Instead of covering them with heavy curtains, I preferred lightweight fabrics that allowed daylight to enter.
That made the interior feel more open.
Curtains also provided privacy when needed without making the space feel closed off all day.
I think window treatments are one of those details where practicality and design can work together very easily.
There is no reason a curtain cannot be both attractive and functional.
Adding Small Vintage Accessories
Once the main renovation work was done, I could finally think about accessories.
This is where it is very easy to get carried away.
There are so many adorable vintage camper accessories available that it can be tempting to fill every shelf and wall.
I had to remind myself that the trailer was still a functional space.
I chose a few pieces that felt meaningful or useful instead.
A vintage inspired clock, a small framed print, an old fashioned tray, a ceramic mug, or a simple piece of artwork can give the interior personality without taking over.
I also liked choosing objects that looked as though they belonged naturally in a little travel trailer.
That made the design feel less staged.
Creating a Small Dining Area
Eating inside a tiny trailer requires a little creativity.
A traditional dining table would have taken up too much valuable floor space.
Instead, I focused on creating a compact eating surface that could serve more than one purpose.
A small table can become a place for breakfast in the morning, a workspace during the afternoon, and an additional preparation surface when cooking.
That flexibility is exactly what I look for in small space furniture.
If one item can serve two or three purposes, it earns its place much more easily.
The same principle applies to seating.
A bench with storage underneath is far more useful than a piece of furniture that only provides somewhere to sit.
Making the Bathroom Area Feel Less Cramped
If your vintage trailer has a bathroom, this is another area where keeping things simple can make a huge difference.
A small bathroom can become visually overwhelming very quickly.
I preferred a clean palette, simple storage, and only the essentials.
Light colors helped the area feel brighter.
A small mirror also helped reflect light and make the room appear slightly more spacious.
Instead of adding decorative objects, I focused on practical storage.
Hooks can hold towels.
Small shelves can hold toiletries.
Compact containers can prevent products from taking over the available counter space.
The basic rule was the same as everywhere else in the trailer.
Everything needed a purpose.
Hiding Everyday Items
One of the less exciting but more important parts of the renovation was deciding where everyday items would live.
This included things like chargers, cleaning supplies, toiletries, cooking equipment, towels, bedding, and camping accessories.
If those things do not have a designated home, they quickly end up sitting on countertops and seats.
That makes a tiny trailer feel much smaller.
I found it helpful to group similar items together.
Kitchen items stayed together.
Bathroom supplies stayed together.
Outdoor items were kept in a separate area.
Bedding had its own storage space.
That organization made packing and unpacking easier as well.
When everything has a specific place, it is much easier to notice when something needs to be replaced or restocked before the next trip.
Using Vertical Space
One of the biggest lessons from this renovation was how valuable vertical space can be.
When floor space is limited, look upward.
The walls can hold shelves, hooks, small cabinets, hanging baskets, and other lightweight storage solutions.
The area above seating can sometimes become useful storage.
The space around the kitchen can also be used for cooking utensils and small supplies.
Even the back of a cabinet door can potentially provide additional organization.
The important thing is to avoid making the walls feel crowded.
I found that a few carefully selected storage solutions were much better than covering every available surface.
Keeping the Trailer Easy to Clean
A tiny trailer does not need much space to become difficult to clean.
That is why I paid attention to materials and surfaces throughout the renovation.
Smooth surfaces are easier to wipe down.
Washable fabrics are easier to maintain.
Flooring that can handle dirt and moisture is far more practical than something delicate.
I also tried to avoid unnecessary little objects that would have to be moved every time the trailer was cleaned.
This may not sound like an exciting design principle, but it matters when you actually use the space.
A trailer should be easy to reset after a trip.
The easier it is to clean, the more likely you are to enjoy using it.
Creating a Home Rather Than Just a Camper
At this stage, the trailer was starting to feel completely different.
It was still small.
There was no way around that.
But it no longer felt like every inch was fighting for attention.
The kitchen was practical.
The sleeping area felt inviting.
The seating area was comfortable.
Storage had a purpose.
The lighting created a warmer atmosphere at night.
The vintage details gave the trailer personality.
Most importantly, the different areas felt connected.
That was something I cared about throughout the project.
I did not want to walk from one part of the trailer to another and feel like each section belonged to a different design.
Keeping the color palette simple and repeating a few materials helped everything work together.
The Details That Made the Biggest Difference
Looking at the transformation as a whole, some of the smallest changes had the biggest visual impact.
Fresh paint made the walls feel brighter.
Updated hardware made the cabinets feel newer.
Warm lighting changed the mood at night.
Simple textiles added softness.
Open shelving improved accessibility.
Baskets reduced visual clutter.
A few carefully chosen vintage accessories gave the trailer character.
None of those changes required dramatically increasing the size of the trailer.
That is an important lesson for anyone working with a small camper.
You do not necessarily need a massive renovation to create a noticeable transformation.
Sometimes the best results come from making several small improvements that work together.
What I Would Prioritize If You Are Renovating Your Own Trailer
If you are looking at an old camper and dreaming about turning it into a tiny home on wheels, I would recommend working in this order.
Start with the condition of the trailer.
Make sure structural, water, electrical, and plumbing concerns are addressed before focusing on appearance.
Then think about the layout.
Decide how you will sleep, cook, eat, store your belongings, and move through the space.
After that, choose your main colors and materials.
Once those decisions are made, the decorative choices become much easier.
I also recommend creating a realistic shopping list before buying anything.
Small purchases add up quickly during a renovation.
It is easy to spend money on cute accessories and then realize you still need important practical items.
Prioritizing the functional work first helps keep the project under control.
The Interior Was Finally Coming Together
The interior transformation proved that a tiny trailer does not need to be large to feel special.
It needed thoughtful planning.
Every part of the space had a job, but that did not mean it had to look purely functional.
The combination of lighter colors, comfortable textiles, vintage details, practical storage, and warm lighting created the cozy atmosphere I had been hoping for.
But there was still another side of the transformation to finish.
The exterior needed attention too.
A beautiful interior can make a trailer feel wonderful once you step inside, but the outside is what sets the tone before you even open the door.
Giving the Exterior a Fresh Start
Once the interior was finally coming together, I turned my attention to the outside of the trailer.
The exterior was important because it was the first thing anyone would see.
I wanted it to have the same cozy personality as the inside without making it look overly decorated.
The goal was simple.
I wanted someone to see the trailer sitting at a campsite and immediately get the feeling that there was a welcoming little space inside.
The first step was making sure the exterior itself was in good condition.
Just like with the interior, I think it is important to deal with practical problems before worrying about appearance.
The roof, seams, windows, doors, trim, and other areas exposed to weather need careful attention.
A fresh coat of paint cannot solve an underlying leak or structural problem.
Once the practical side was taken care of, the cosmetic transformation became much more enjoyable.
Choosing an Exterior Color
Color can completely change the personality of a vintage trailer.
I wanted something that felt classic enough to suit the age of the trailer while still giving it a fresh appearance.
A soft neutral exterior can look beautiful against trees, mountains, beaches, and open camping areas.
I also liked the idea of adding a subtle contrasting color for the trim.
The important thing was not to make the exterior too busy.
Because the trailer itself already has an interesting shape, it does not need a dozen decorative details.
A simple color combination can actually make the vintage lines stand out more.
That was the direction I preferred.
Cleaning Up the Vintage Details
Older trailers often have little exterior details that are worth preserving.
Trim, windows, handles, lights, and metal accents can add a tremendous amount of character.
Instead of automatically replacing everything, I looked at which pieces could simply be cleaned and refreshed.
Sometimes something that appears completely worn out just needs proper cleaning and a little attention.
This was another lesson I took from the renovation.
Before replacing an old feature, take a closer look at it.
You may discover that the original piece has more character than a brand new replacement ever could.
That is particularly true with vintage trailers.
The little imperfections are often part of what makes them charming.
Creating a Welcoming Entry
The entrance became one of my favorite parts of the exterior.
Even a tiny doorway can feel special with a few thoughtful touches.
A small outdoor mat makes the entrance more practical and helps keep dirt from being carried inside.
A simple light near the door makes arriving after dark much easier.
I also liked the idea of adding a few small decorative elements without turning the entrance into a crowded display.
The same rule applied outside as inside.
Useful details were always better than decorations that simply took up space.
Adding an Outdoor Living Area
One of the biggest advantages of having a tiny trailer is that you do not have to do everything inside.
The campsite becomes part of your living space.
That is why I wanted to create a comfortable outdoor area next to the trailer.
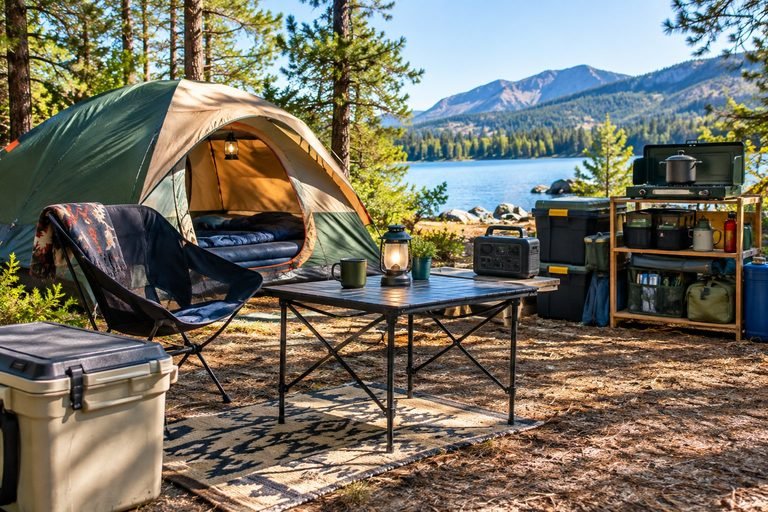
A small outdoor rug helped define the space.
A couple of comfortable chairs created somewhere to sit in the morning.
A compact folding table gave us a place for coffee, meals, books, or whatever else we happened to be doing outside.
This setup made the trailer feel larger without actually changing the trailer itself.
That is one of my favorite tricks when working with small campers.
Instead of trying to force every activity indoors, think about how the area immediately outside the trailer can become an extension of the living space.
Making Outdoor Space Comfortable
Comfort matters just as much outside as it does inside.
I wanted seating that could be moved easily and stored when necessary.
Heavy furniture may look beautiful in photographs, but it is not always practical when you are traveling.
Portable pieces make much more sense for a tiny trailer.
A soft outdoor blanket can also make an evening outside more comfortable when temperatures drop.
I like having a few pieces that can be brought outside when needed and packed away when it is time to travel.
That keeps the campsite flexible.
Creating a Small Outdoor Dining Area
Meals were another reason I wanted a usable outdoor space.
When the weather is pleasant, there is something much nicer about eating outside rather than squeezing everyone around a tiny trailer table.
A compact folding table was enough.
There was no need for a large outdoor dining set.
I wanted something that could handle breakfast, lunch, or dinner but could also be folded away easily.
This is another place where I think small space camping teaches you to be intentional.
You do not need a huge setup to enjoy a comfortable meal.
A table, a few chairs, good lighting, and a pleasant view can be enough.
Adding Simple Outdoor Lighting
Outdoor lighting made the campsite feel completely different after sunset.
I preferred soft lighting rather than anything extremely bright.
The idea was to create enough illumination to move around safely and enjoy the outdoor area without making it feel like a parking lot.
Small lanterns and subtle lights around the seating area worked well for the atmosphere I wanted.
I also liked having a light near the trailer entrance because that served a practical purpose.
This is an example of something I always try to remember with decorating.
The prettiest solutions are often the ones that solve a real problem at the same time.
Bringing the Vintage Feeling Outside
I did not want the vintage character to stop at the trailer door.
A few simple details helped connect the interior and exterior.
Natural materials worked particularly well.
Wood, woven textures, neutral fabrics, and simple classic accessories complemented the trailer without making the campsite look overly themed.
I avoided adding too many matching vintage pieces.
When everything is perfectly coordinated, the result can sometimes feel more like a staged display than a real camping setup.
I wanted the space to feel collected naturally.
Making the Trailer Practical for Real Camping
At this point, it would have been easy to focus entirely on appearance.
But the real test of a trailer renovation is what happens when you actually use it.
A camper needs to withstand packing, traveling, cooking, sleeping, cleaning, changing weather, and all the little inconveniences that come with being outdoors.
That meant checking how easily the cabinets opened and closed.
I wanted to make sure storage areas were accessible.
I thought about where shoes would go.
I considered where dirty clothes would be placed.
I made sure frequently used kitchen items were easy to reach.
Those details are not necessarily visible in photographs, but they make a huge difference during an actual trip.
The Importance of Lightweight Materials
Weight is another consideration that is easy to overlook when renovating a trailer.
Adding furniture and decorative pieces can make a trailer heavier surprisingly quickly.
That is why I prefer lightweight solutions whenever possible.
A large solid piece of furniture might look beautiful, but a lighter alternative can often accomplish the same job without adding unnecessary weight.
This is especially important if you are renovating a small trailer that will be towed regularly.
Before adding something permanent, I would think about its weight, how it will be secured, and whether it is really necessary.
A tiny trailer does not have unlimited capacity.
Securing Everything Before Traveling
Another lesson from the renovation was that anything inside a trailer needs to be considered from the perspective of travel.
A decorative item may look perfectly safe while the trailer is parked.
Once you are driving, everything moves.
Cabinet doors need to stay closed.
Dishes need secure storage.
Loose decorations can fall.
Containers can slide.
Items stored on shelves need to be stable.
I found that it was much easier to design storage with travel in mind from the beginning rather than trying to solve those problems later.
If something needs to be moved every time the trailer is prepared for travel, it may not be the most practical choice.
What I Would Not Do Again
Every renovation teaches you something.
There were decisions I liked and decisions that made me stop and think about how I would approach the project differently next time.
One thing I would always recommend is resisting the urge to buy everything at once.
It is much easier to understand what you actually need after the major renovation work is complete.
When I started thinking about the finished trailer, it was tempting to imagine every shelf filled and every corner decorated.
But once the space was actually usable, some of those things were not necessary.
Buying slowly gave me a better idea of what the trailer really needed.
Do Not Underestimate Preparation
Another thing I would emphasize is preparation.
Painting, installing flooring, updating cabinets, and changing fixtures can make a trailer look dramatically better.
But none of those improvements should happen before the basic condition of the trailer has been evaluated.
A pretty interior cannot compensate for a leaking roof.
New cabinets do not solve an electrical problem.
Beautiful flooring does not fix moisture damage underneath.
The less visible work may not be the most exciting part of the project, but it is what makes the finished renovation worthwhile.
Keeping the Renovation Budget Under Control
Tiny trailer renovations can be done at many different budget levels.
You can spend a relatively modest amount refreshing an existing camper, or you can invest heavily in custom materials and professional work.
I think the biggest factor is deciding where your money will have the greatest impact.
I would prioritize structural repairs and safety first.
After that, focus on improvements that affect everyday comfort.
Flooring, paint, lighting, bedding, storage, and kitchen functionality can make a huge difference.
Decorative accessories can come later.
This approach also gives you more flexibility.
If the budget becomes tighter than expected, you can still have a functional trailer while delaying some of the cosmetic extras.
Where I Think It Is Worth Spending More
There are certain areas where I would rather spend more money if the budget allows.
A comfortable mattress is one of them.
You spend a significant portion of your camping trip sleeping, so comfort is not something I would sacrifice just to make the trailer look pretty.
I would also prioritize quality hardware and materials in areas that receive frequent use.
Cabinet handles, drawer slides, hinges, faucets, and other frequently touched components need to hold up to regular use.
Good lighting is another worthwhile investment.
The right lighting can make the entire trailer feel better without requiring a major structural change.
Where I Would Save Money
There are also plenty of areas where spending less makes sense.
Decorative accessories do not need to be expensive.
Secondhand stores, flea markets, estate sales, and simple home goods can be excellent places to find pieces that work in a vintage trailer.
I also like repurposing items when possible.
A small basket from another room can become trailer storage.
An old tray can become a serving surface.
A simple shelf can become kitchen storage.
Not everything needs to be purchased specifically for an RV.
Sometimes the most interesting pieces are the ones you find unexpectedly.
Making the Trailer Feel Personal
The finished trailer did not need to look like someone else’s idea of a perfect camper.
I wanted it to feel personal.
That meant choosing colors and accessories that I genuinely liked instead of following every current decorating trend.
This is something I would encourage anyone renovating a trailer to consider.
Trends can be useful for inspiration, but your trailer should ultimately reflect the way you want to travel.
If you love vintage details, keep them.
If you prefer a minimalist interior, simplify it.
If you love color, introduce it through cushions, curtains, bedding, or small accessories.
There is no single right way to create a tiny home on wheels.
The Biggest Lesson From the Transformation
The biggest lesson I took from this project was that small spaces reward thoughtful decisions.
A tiny trailer does not give you much room to make mistakes.
But it also does not require a huge amount of material to make a dramatic improvement.
A lighter wall color can change the entire interior.
Better lighting can completely alter the atmosphere.
A comfortable mattress can make the trailer much more enjoyable.
A few smart storage solutions can eliminate a surprising amount of clutter.
And a carefully chosen vintage detail can give the whole space personality.
Those changes may seem small individually, but together they can completely transform an old trailer.
Why I Love the Idea of a Tiny Home on Wheels
There is something incredibly appealing about having a small space that can travel with you.
A tiny vintage trailer encourages a slower and simpler way of traveling.
You do not need a huge kitchen.
You do not need a giant bedroom.
You do not need a living room filled with furniture.
You need somewhere comfortable to sleep, somewhere practical to prepare food, somewhere to sit, and enough storage for the things you actually use.
Everything else becomes a bonus.
For me, that simplicity is part of the charm.
The trailer becomes more than transportation and more than accommodation.
It becomes a little retreat.
The Finished Transformation
Looking at the finished trailer, I was happiest that it still felt like the same little vintage camper underneath all the changes.
The renovation did not erase its personality.
It simply gave that personality a cleaner, more comfortable, and more practical setting.
The lighter interior made the space feel brighter.
The updated kitchen became easier to use.
The sleeping area became more inviting.
The storage solutions reduced clutter.
Warm lighting created a cozy atmosphere at night.
Outside, the simple seating area gave us somewhere to relax without needing to squeeze everyone inside.
None of these changes made the trailer physically larger.
They simply made the existing space work much better.
What I Hope You Take From This Makeover
If you are considering renovating a tiny vintage trailer, I hope this project shows you that you do not have to completely rebuild everything to create something beautiful.
Start with the condition of the trailer.
Fix the important problems first.
Then think carefully about how you actually plan to use the space.
Choose a simple color palette.
Prioritize comfortable sleeping arrangements.
Look for unused storage opportunities.
Use vertical space when possible.
Choose lightweight and practical materials.
Keep decorations intentional.
And most importantly, do not be afraid to preserve some of the original character.
That vintage charm is often the very reason the trailer captured your attention in the first place.
Final Thoughts
This tiny vintage trailer became a good reminder that a small space can still feel incredibly inviting.
The finished result was not about squeezing as many features as possible into a few square feet.
It was about deciding what mattered and giving those things enough room to work.
I wanted a trailer where I could make coffee in the morning, sit comfortably, sleep well, keep our belongings organized, and step outside to enjoy the campsite without feeling like I had brought an entire house with me.
That is what made the transformation worthwhile.
A tiny trailer does not have to be perfect.
It just needs to feel like somewhere you want to return to.
For anyone dreaming about an old camper makeover, a vintage trailer restoration, or a cozy home on wheels, I think that is the best place to start.
Think less about creating the most impressive trailer and more about creating one that fits the way you actually live and travel.
Once you know what you need, the design becomes much easier.
And sometimes, the smallest spaces end up creating some of the biggest memories.