How to Paint the Exterior of an RV
Painting the exterior of an RV can completely change the way an older camper looks without the cost of replacing it or paying for a professional RV makeover.
I have found that the biggest difference between an RV that looks freshly renovated and one that simply has a coat of paint slapped over the old finish comes down to preparation.
The exterior has to be cleaned properly, damaged areas need attention, old paint needs to be prepared, and the right type of paint has to be chosen for the surface.
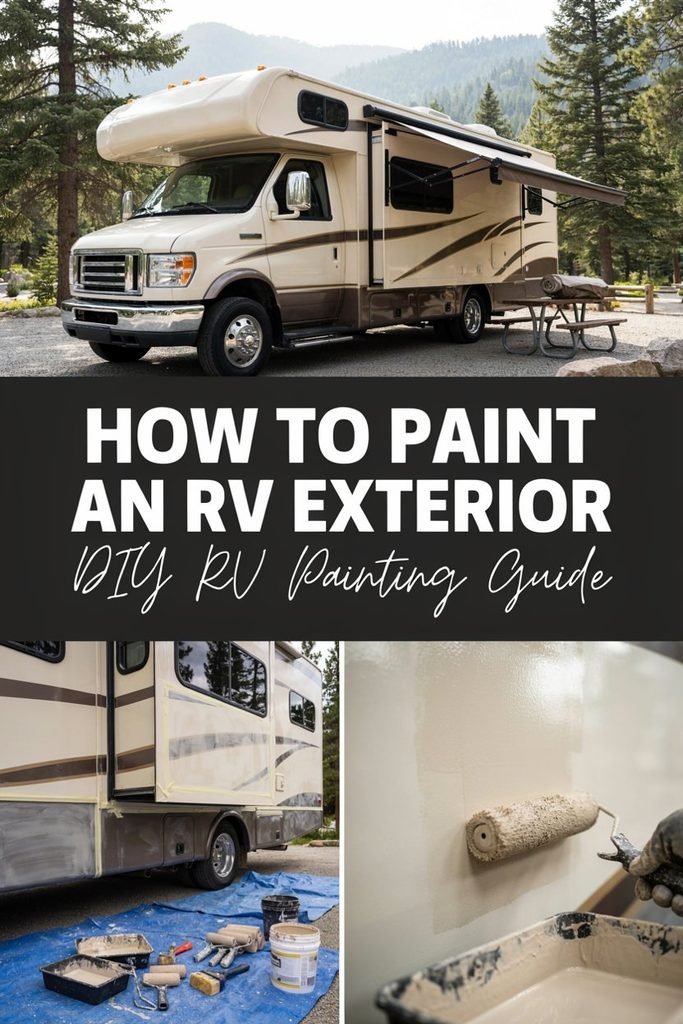
An RV also has plenty of windows, seams, vents, trim, lights, and other areas that make the job more involved than painting an ordinary wall. In this guide, I will walk you through how to paint an RV exterior, what supplies you need, how to prepare fiberglass and aluminum surfaces, and the practical things I would pay attention to before starting.
These steps can help you create a cleaner, smoother, more durable finish while avoiding some of the frustrating mistakes that can make an RV painting project much harder.
Why Paint the Exterior of an RV?
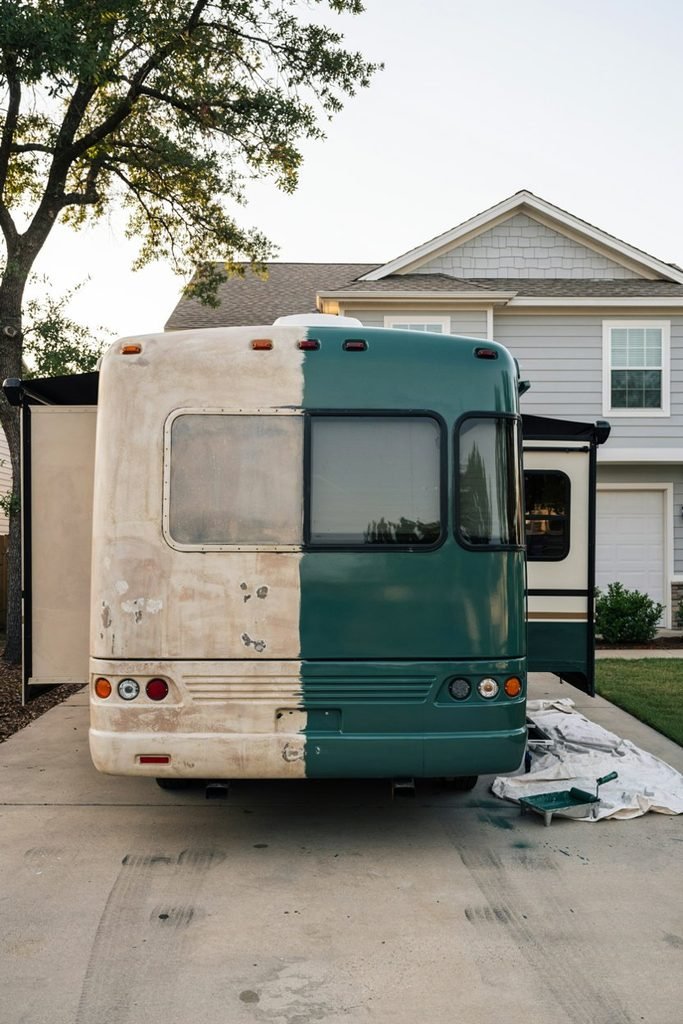
There are plenty of reasons to paint an RV exterior, but improving its appearance is usually what motivates people to start the project.
Older RVs can develop faded finishes, chalky surfaces, peeling paint, stained panels, and outdated color combinations. Even when the interior is comfortable and functional, the outside can make the entire camper feel much older than it actually is.
A fresh exterior paint job can make a dramatic difference.
For me, one of the biggest advantages is that painting gives you an opportunity to make the RV feel more personal. Instead of keeping the traditional factory appearance, you can choose a color combination that works with the interior, your camping style, and the overall look you want.
Painting can also be useful when you are renovating an older RV on a budget. If the structure and exterior panels are still in good condition, there is no reason to replace perfectly usable materials simply because they look tired.
The important thing is not to think of exterior RV painting as simply applying paint.
The preparation is the real project.
If you rush through the preparation, even expensive paint can end up looking uneven, peeling, or rough. If you take the time to prepare the surface properly, the final result can look much more polished.
What to Know Before Painting an RV Exterior
Before buying paint, I recommend walking around the entire RV and looking closely at the exterior.
This is one of those steps that is easy to skip because you are eager to get started. I would not skip it.
You need to know what you are actually working with.
Look carefully at:
• Fiberglass panels
• Aluminum siding
• Existing painted surfaces
• Decals and graphics
• Cracks and damaged areas
• Peeling or flaking paint
• Oxidized or chalky surfaces
• Old caulking
• Window seals
• Roof edges
• Exterior storage doors
• Vents and access panels
• Exterior lights
• Metal trim
• Areas around screws and fasteners
Pay particular attention to areas where water could potentially enter.
Painting should not be used to hide an exterior problem. If you discover a damaged seal, soft material, loose trim, or evidence of water intrusion, deal with that problem before painting.
A beautiful paint job will not fix an underlying moisture problem.
In fact, covering a problem without repairing it can make future repairs more difficult because the new finish can hide the area that needs attention.
Inspect the RV Before You Start
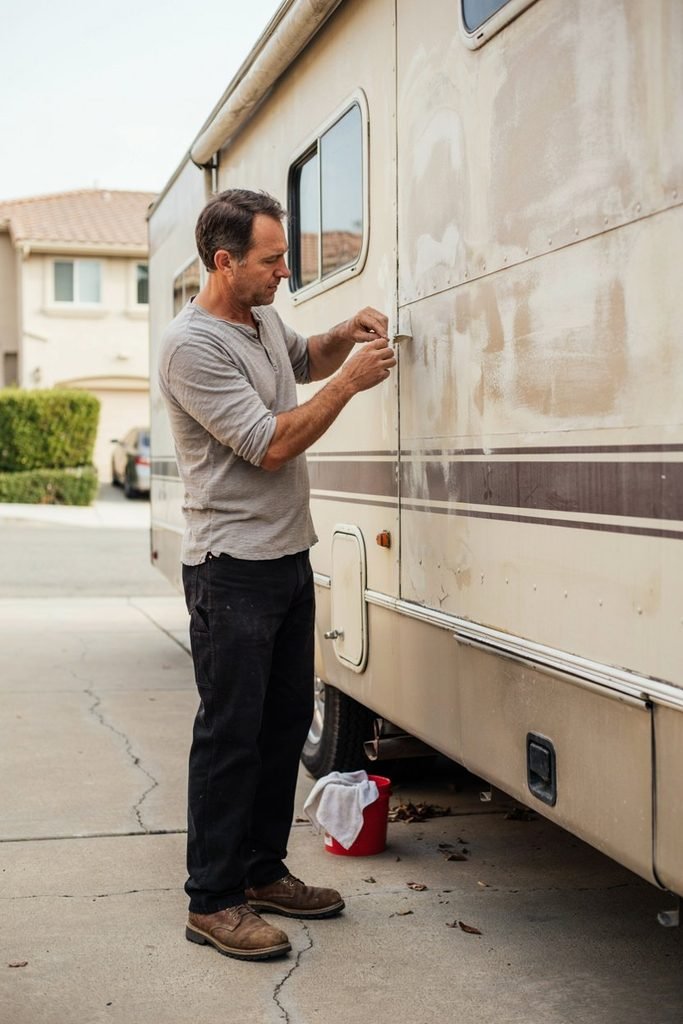
I like to approach an RV painting project almost like a small renovation.
Walk around the entire camper in good daylight and look at the exterior from different angles. Faded areas that are difficult to notice from directly in front of the RV can become very obvious when sunlight hits the surface from the side.
Run your hand across the panels as well.
You are looking for rough areas, loose material, raised edges, peeling sections, and places where the old finish feels different from the surrounding surface.
If the RV has old decals, decide whether you want to remove them before painting.
This is important because decals can leave behind adhesive residue and can sometimes reveal a different color underneath. Removing them may also expose areas where the original finish has been protected from sunlight.
That means you may have a noticeable color difference after the decals are gone.
I would rather discover that before painting than halfway through the project.
Choosing the Right RV Exterior Paint

The type of paint you use matters just as much as the preparation.
An RV exterior is exposed to much more abuse than an interior wall. It has to deal with direct sunlight, rain, road dirt, temperature changes, wind, and constant movement while the RV is being driven.
That is why ordinary interior house paint is not the product I would reach for.
You want an exterior coating that is appropriate for the material you are painting and capable of handling outdoor exposure.
Depending on your RV, you may be working with fiberglass, aluminum, metal, or a combination of materials. Some RVs also have previously painted surfaces that require a different preparation approach from an untouched factory finish.
Always check the paint manufacturer’s instructions to confirm that the product is suitable for your specific surface.
Pay attention to whether the product requires a primer.
Some situations may call for a bonding primer, particularly when you are working with a difficult surface or changing from one type of finish to another.
Primer can also help create a more consistent base, especially when the old surface has different colors, repaired areas, or exposed material.
Fiberglass RV Exterior
Fiberglass is common on many RV exteriors and can provide a smooth surface that looks excellent when properly prepared.
The problem is that fiberglass can become heavily oxidized.
If you run your hand over an older fiberglass RV and notice a chalky residue, that is a sign that the surface needs serious cleaning and preparation before painting.
Do not simply paint over it.
The surface needs to be cleaned and prepared so that the new coating has a suitable foundation.
You may also find small scratches, faded areas, old adhesive, or previous repairs.
Those areas need to be addressed before the final paint goes on.
A smooth finish starts with a smooth foundation.
Aluminum RV Exterior
Aluminum siding requires a slightly different approach.
Older RVs with aluminum siding may have textured panels, seams, rivets, old paint, and areas of oxidation.
The goal is to remove dirt and loose material without damaging the surface.
You also want to avoid creating unnecessary scratches that could become visible through the new paint.
If the aluminum has oxidation or corrosion, address it during preparation rather than expecting the paint to cover it permanently.
This is especially important around seams, fasteners, and areas that are frequently exposed to moisture.
How Much Preparation Is Really Necessary?
This is where I would spend most of my time.
It can be tempting to think that cleaning the RV, giving it a quick sanding, and starting to paint will save time.
Usually, it does not.
Poor preparation tends to show up later.
You may end up with paint that does not adhere properly, visible scratches, uneven texture, peeling sections, or areas where the old finish remains visible.
Taking an extra day to prepare the surface can save you from having to repair the paint job later.
I would rather spend more time preparing the RV and less time correcting mistakes.
Supplies You Will Need
You do not need every professional painting tool available, but having the right basic supplies makes the project considerably easier.
Depending on the condition and material of your RV, I would gather:
• Exterior RV compatible paint
• Appropriate primer if required
• Quality paint rollers
• Small brushes for detail work
• Paint trays
• Sandpaper in several grits
• Sanding blocks
• Cleaning solution suitable for the RV surface
• Degreaser
• Clean microfiber cloths
• Sponges
• Buckets
• Painter’s tape
• Plastic sheeting
• Drop cloths
• Scrapers for loose material
• Caulk removal tools if needed
• Exterior compatible sealant for repairs
• Ladder or suitable work platform
• Safety glasses
• Gloves
• Dust mask or appropriate respirator when required by the product
I would not try to save money by buying the cheapest brushes and rollers available.
A poor quality roller can leave lint behind, while a cheap brush can make detail work frustrating.
You do not need luxury equipment, but reliable basic tools are worth having.
Wash the RV Thoroughly
Before sanding or painting, the exterior needs to be thoroughly cleaned.
RV exteriors collect road film, dirt, grease, dust, tree residue, insects, and other contaminants that can interfere with paint adhesion.
Start at the top and work downward.
This allows dirty water to move toward the lower sections rather than repeatedly washing already cleaned areas.
Pay special attention to:
• Around windows
• Under exterior trim
• Around storage doors
• Behind mirrors
• Around vents
• Along seams
• Around lights
• Near the lower body panels
• Behind exterior accessories
Once the RV is washed, allow the surface to dry completely.
Do not rush into sanding while the surface is still wet.
Remove Old Decals Carefully
If your RV has large factory graphics or old decals that you want to remove, give yourself plenty of time for this part.
Old decals can become brittle with age, making them much harder to remove than newer ones.
Work slowly rather than trying to rip everything off at once.
Once the decal is removed, there may be adhesive left behind. That residue needs to be removed before painting.
This is another reason I recommend inspecting the RV before buying your paint.
You may think you have a simple afternoon project until you realize that the exterior is covered with several layers of old graphics.
Sanding the Exterior
Sanding is one of the most important preparation steps because it helps create a surface where the new coating can properly adhere.
The exact sanding approach depends on the existing finish and the material underneath.
You are generally trying to remove loose paint, smooth rough areas, dull glossy surfaces, and create a consistent surface.
You do not necessarily need to remove every bit of the original factory finish if it is sound and compatible with your new coating.
What you do not want is to leave glossy, poorly prepared areas next to heavily sanded sections and expect the new paint to behave exactly the same everywhere.
After sanding, remove all the dust.
A surface that looks clean can still have a surprising amount of fine sanding dust sitting on it.
Use clean cloths and follow the paint manufacturer’s preparation recommendations before moving on.
Repair Damaged Areas Before Painting
This is the stage where you should deal with cracks, holes, damaged trim, loose components, and other imperfections.
Do not assume that several coats of paint will hide everything.
Paint is not a filler.
Small imperfections that seem insignificant before painting can become surprisingly obvious once a fresh coat of paint is applied.
Take your time with repairs and allow any fillers, primers, or sealants to cure according to their manufacturer’s instructions.
The surface should be dry, clean, stable, and ready for paint before you continue.
Protect Everything You Are Not Painting
An RV has a lot of parts that you do not want covered in paint.
Windows are an obvious example, but I would also protect:
• Door handles
• Exterior lights
• Vents
• Tires
• Wheel wells
• Mirrors
• Locks
• Trim
• Seals
• Utility connections
• Exterior outlets
• Roof accessories
• Storage compartment hardware
Painter’s tape is useful around edges, but plastic sheeting can provide much better protection for larger areas.
Take your time with this stage.
It may feel slow when you are standing there covering windows and trim instead of painting, but cleanup is much easier when you prevent the mess in the first place.
Think About the Weather
Weather can make or break an exterior painting project.
Ideally, you want suitable temperatures, manageable humidity, and no rain in the forecast during the important drying and curing periods.
Direct sunlight can also make some surfaces extremely hot.
That can affect how quickly paint dries and how easily you can maintain a consistent finish.
I would rather postpone the project than try to paint during unsuitable weather.
A calm, dry day with comfortable working conditions gives you much more control.
You should also read the paint manufacturer’s recommended temperature and humidity ranges because products differ.
Plan the Painting Order
Before opening the paint, decide how you are going to move around the RV.
You do not want to paint yourself into an awkward corner or repeatedly touch freshly painted areas while trying to reach another section.
Think about the RV in sections.
You may want to work from the upper portions toward the lower portions while maintaining a logical path around the vehicle.
Also consider where you will place your ladder, paint tray, tools, and supplies.
I learned that a little planning makes a surprisingly big difference on an RV because there are so many corners and obstacles compared with a normal wall.
The Most Important Rule
If there is one thing I would emphasize before moving on to the actual painting, it is this:
Do not rush the preparation.
The finished appearance is largely determined before the first coat of paint is applied.
A clean and properly prepared surface gives your paint a much better chance of adhering evenly. It also makes it easier to achieve a professional looking finish without unnecessary coats.
Once the RV is thoroughly cleaned, repaired, sanded, dust free, protected, and ready for the coating you have chosen, the actual painting becomes much more manageable.
Should You Use a Roller, Brush, or Paint Sprayer?
There are several ways to paint an RV exterior, and each method has advantages.
For many DIY RV owners, a quality roller combined with brushes for detailed areas is the easiest approach.
A paint sprayer can produce a very smooth finish, but it requires more preparation and experience. Overspray can travel surprisingly far, which means protecting windows, vehicles, buildings, plants, and surrounding surfaces becomes even more important.
A roller gives you much more control.
I particularly like using a roller for large flat sections because it allows me to spread the paint evenly without creating as much overspray.
Brushes are useful for:
• Around windows
• Around doors
• Along trim
• Around exterior lights
• Around vents
• Tight corners
• Small detailed areas
The best approach is often a combination rather than relying on one tool for the entire RV.
Apply Primer If Your Surface Requires It
If the paint system you selected requires primer, do not skip this step simply because the existing exterior looks clean.
Primer can help create a consistent base and improve adhesion when the existing surface is difficult or when you are changing the appearance significantly.
Before applying primer, make sure the surface is completely prepared and free from dust, grease, and loose material.
Apply the primer according to the manufacturer’s instructions.
Avoid putting it on excessively thick.
A thick layer does not automatically mean better coverage.
You want an even application that creates a suitable base for the next stage.
Allow the primer to dry or cure for the recommended amount of time before applying your paint.
This is one of those moments when waiting can feel frustrating, especially when you are eager to see the new color, but rushing between coats can create problems later.
Start With a Small Test Area
Before committing to the entire RV, I strongly recommend testing your paint system on a small, inconspicuous section.
This can help you see how the color looks against the existing exterior and how the coating behaves on your particular surface.
Paint can look very different outside compared with how it appears on a small color sample indoors.
Natural daylight can make colors appear brighter, darker, warmer, or cooler.
A test area also gives you the opportunity to check adhesion and coverage before investing hours into painting the entire camper.
If something does not look right, it is much easier to change your plan at this point.
Begin With the Hard to Reach Areas
I prefer to deal with detailed areas before concentrating on the large panels.
Use an appropriately sized brush around windows, doors, trim, vents, and other areas where a roller cannot easily reach.
Do not overload the brush with paint.
Too much paint can collect along edges and create drips.
Work carefully and keep an eye on areas where paint can pool.
The goal is to create a clean transition between the detailed areas and the larger sections that you will later cover with a roller.
Paint the Large Exterior Panels
Once the detailed areas are ready, move on to the larger panels.
Load your roller evenly and avoid soaking it with paint.
Too much paint can create runs and uneven areas, while too little paint can cause you to press too hard against the surface.
Use steady strokes and maintain consistent pressure.
You do not want to repeatedly go back over an area after the paint has started becoming tacky.
That can create visible texture and unevenness.
I find it easier to work in sections rather than trying to cover an enormous RV wall from one end to the other.
Divide the exterior into manageable areas and maintain a wet edge as you work.
What Does Maintaining a Wet Edge Mean?
Maintaining a wet edge simply means keeping the edge of the section you are painting wet enough that the next section can blend into it.
This is especially important on large exterior panels.
If one section dries before you connect it to the next section, you can end up with visible lines or differences in texture.
Work steadily without taking unnecessarily long breaks in the middle of a panel.
If you need to stop, try to stop at a natural break such as a corner, trim line, door opening, or other visual division.
Do Not Apply the Paint Too Thickly
It can be tempting to apply a heavy coat when the old RV color is still showing through.
I understand the temptation because you want that new color to look solid immediately.
However, thick paint can create its own problems.
You may end up with:
• Runs
• Sagging
• Uneven drying
• Visible brush marks
• Soft areas that take longer to cure
• Uneven texture
Several properly applied coats are generally preferable to one extremely thick coat when the paint system calls for multiple coats.
Follow the manufacturer’s coverage and recoat recommendations rather than trying to force the result.
Allow the First Coat to Dry Properly
This is another stage where patience pays off.
Do not assume that because the surface feels dry to the touch, it is ready for another coat.
Drying and curing are not always the same thing.
The surface may feel dry while the underlying coating is still developing its final hardness.
Follow the instructions on your particular paint.
Temperature, humidity, airflow, and the thickness of the application can all affect drying time.
If you apply another coat too soon, you can interfere with the finish underneath.
Inspect the First Coat Before Continuing
Once the first coat has reached the appropriate stage, step back and inspect the entire RV.
Do not just stand directly in front of the surface.
Look at it from different angles.
Walk around the RV and check the panels in natural light.
You may notice areas where the original color still shows through, spots that have a slightly different texture, small drips, or places where the coverage is thinner.
This is the time to address them.
It is much easier to correct imperfections before applying the next coat.
Sand Between Coats When the Paint System Calls for It
Some paint systems may recommend light sanding between coats, while others may not.
Always follow the instructions for the specific product you are using.
If sanding between coats is recommended, keep it light and controlled.
You are not trying to remove the new coating.
You are simply preparing the surface for the next layer.
After sanding, remove all dust before continuing.
Even a small amount of sanding residue can become trapped beneath the next coat.
Apply the Second Coat
The second coat is where the transformation usually becomes much more obvious.
The color should begin looking richer and more consistent, while areas that were slightly transparent or uneven after the first coat should become much less noticeable.
Continue using the same technique.
Do not suddenly change your roller pressure or start applying dramatically more paint simply because the second coat appears to be covering better.
Consistency matters.
Keep your strokes controlled and work methodically around the RV.
Be Careful Around Windows
Windows are one of the areas where a DIY RV paint job can quickly start looking messy.
Even if you carefully taped everything beforehand, pay attention to the amount of paint you are applying near the edges.
Use a smaller brush when necessary.
Avoid pushing large amounts of paint directly against window seals.
If you notice paint beginning to build up along an edge, deal with it while it is still manageable and according to the coating manufacturer’s recommendations.
Clean, sharp edges around windows can make the finished RV look significantly more professional.
Painting Around Doors and Storage Compartments
Exterior doors create another challenge because they interrupt large panels.
Paint carefully around the edges and hardware.
If a storage compartment door can be removed safely and painted separately, that may make the job easier and give you better access to the edges.
Before removing anything, make sure you understand how it is mounted and keep track of the hardware.
Small screws have a way of disappearing when you are working on an RV.
I usually like to keep removed hardware together in a labeled container so I am not trying to remember which screws belong to which panel later.
Keep Checking for Drips
Do not assume that because a section looked perfect when you painted it, it will still look perfect twenty minutes later.
As you continue working, occasionally look back over the sections you have already painted.
Paint can slowly run or collect in areas that were difficult to notice initially.
This is especially common around corners, trim, seams, and vertical surfaces.
Catching a drip while it is still workable is much easier than discovering a hardened run after the paint has cured.
How to Avoid Roller Marks
Visible roller marks can be one of the most frustrating problems on large RV panels.
A few habits can help.
Use a suitable quality roller.
Do not overload it.
Maintain consistent pressure.
Avoid repeatedly rolling over sections that have already started to dry.
Keep your work area manageable.
Most importantly, follow the application instructions for your particular coating.
Different paints behave differently, so there is no single roller technique that works perfectly for every product.
If the manufacturer recommends a particular roller type or application method, I would follow that recommendation instead of relying on a general painting trick.
Do Not Forget the Roof Line and Upper Edges
The upper sections of an RV can be easy to overlook because they are difficult to see from ground level.
However, these areas can become very noticeable when you are standing beside the RV or when someone photographs it.
Use a stable ladder or suitable work platform and never stretch or overreach just to finish a section.
Move the ladder instead.
It is better to spend a few extra minutes repositioning your equipment than to lose your balance while trying to reach the last few inches of a panel.
Take Breaks Before You Make Mistakes
Painting an RV exterior can become tiring because you are constantly moving, reaching, bending, climbing, and working around awkward spaces.
I have found that fatigue makes small mistakes much more likely.
When you become tired, you may start rushing.
You may apply too much paint, forget to check for drips, step against something you just painted, or lose track of which section you were working on.
Taking a short break can actually help you work faster overall because you return with better concentration.
Keep the Work Area Clean
Try to keep your brushes, rollers, paint containers, tape, and other supplies organized.
An RV painting project can become chaotic very quickly.
Keep paint containers covered when they are not being used.
Clean tools according to the product instructions.
Remove loose debris from the work area so that it does not end up stuck in wet paint.
Pay attention to the ground around the RV as well.
Dust, leaves, grass, and insects can become unexpected problems when the exterior coating is still wet.
When Should You Apply Another Coat?
The answer depends on the specific paint.
Do not rely solely on a general rule such as waiting a certain number of hours.
Check the manufacturer’s instructions for the minimum recoat time and recommended conditions.
If the weather is cooler or more humid than expected, the coating may take longer.
Likewise, a hot surface exposed to direct sunlight can behave differently from a shaded section.
The goal is not to finish the project as quickly as possible.
The goal is to give every layer the conditions it needs to perform properly.
Let the RV Cure Before Using It Normally
Once the final coat is applied, you may be tempted to immediately wash the RV, take it on a road trip, or start putting everything back in place.
I would resist that temptation.
The paint may look finished before it has reached its final level of hardness.
Give it the curing time recommended by the manufacturer.
During this period, protect the surface from unnecessary contact, dirt, rain, and anything else that could interfere with the finish.
This is particularly important if you have invested significant time into the preparation.
There is no point rushing the final stage after spending so much effort getting the surface ready.
Step Back and Look at the Whole RV
One of my favorite parts of an RV painting project is stepping back once the major panels are finished.
Instead of focusing on tiny imperfections, look at the entire camper.
The new color can make the RV feel completely different.
An older exterior can suddenly look cleaner, brighter, and much more intentional.
This is also when you can identify areas that need a little additional attention before you consider the project finished.
Do not be discouraged if the RV does not look perfect from two inches away.
What matters is how the entire exterior looks from normal viewing distance, how well the coating has adhered, and whether the finish is consistent and durable.
Common Painting Mistakes to Avoid
There are a few mistakes I would be particularly careful about.
Painting Over a Dirty Surface
Even a small amount of grease or road film can interfere with adhesion.
Clean thoroughly before painting.
Skipping Necessary Primer
If your selected paint system requires primer, use it.
Do not assume that a more expensive paint automatically eliminates the need for proper preparation.
Applying Paint Too Thickly
Thicker is not always better.
Follow the recommended application thickness and allow proper drying between coats.
Working in Poor Weather
Extreme heat, cold, humidity, wind, or rain can make exterior painting much more difficult.
Ignoring Small Repairs
Small cracks, loose trim, and damaged areas should be addressed before painting.
Rushing Between Coats
Give each layer the time recommended by the manufacturer.
Using the Wrong Tools
Poor rollers and brushes can affect the final appearance.
Forgetting About Cleanup
Protect surrounding surfaces before you start rather than trying to remove dried paint later.
What Makes an RV Paint Job Look Professional?
A professional looking RV exterior is not necessarily about having the most expensive paint or the most advanced equipment.
It usually comes down to consistency.
The color should be even.
The edges should be clean.
The surface should be properly prepared.
There should be no obvious drips, heavy roller marks, peeling sections, or areas where the old finish is showing unexpectedly.
The details matter too.
Clean edges around windows, doors, lights, vents, and trim can make a surprisingly big difference.
That is why I would rather take my time with preparation and detail work than try to complete the entire RV in one weekend.
The transformation comes from dozens of small decisions throughout the project.
Before Moving to the Final Stage
At this point, your RV should have its new exterior coating applied and should be given the appropriate time to dry and cure.
But the project is not completely finished yet.
There are still important details to consider before you call the job done.
You need to inspect the finish closely, deal with any small imperfections, carefully remove protective materials, check the exterior seals and trim, and think about how you will maintain the new finish.
Those finishing details can determine whether your freshly painted RV continues looking good after its first few camping trips or quickly starts showing signs of wear.
Inspect the Paint Before Removing Everything
Before you start pulling off the tape and plastic, walk around the entire RV and inspect the paint.
Look at the exterior from several distances.
Stand close enough to see the texture, then step back and look at the entire side of the RV.
Natural daylight is especially helpful because it can reveal imperfections that are difficult to see in artificial lighting.
Check for:
• Drips
• Runs
• Thin coverage
• Missed sections
• Uneven color
• Roller marks
• Dust trapped in the finish
• Paint around trim
• Paint on seals
• Rough areas
• Spots where the original color is still visible
Do not panic if you find a small imperfection.
Most DIY painting projects have a few areas that need attention.
The important thing is to catch them before the project is completely packed away.
Remove Painter’s Tape Carefully
Removing the painter’s tape can be surprisingly satisfying because this is when you start seeing those clean edges around windows, doors, trim, and other areas.
However, do not simply yank the tape away.
Remove it carefully and follow the paint manufacturer’s recommendations regarding when tape should be removed.
If the paint has already hardened heavily over the edge of the tape, pulling aggressively can sometimes damage the edge of the coating.
Work slowly.
If you notice that the paint is beginning to lift along an edge, stop and approach that area more carefully.
The goal is to leave behind a clean, sharp transition.
Check Around Windows and Seals
After removing the tape, inspect the areas around your windows.
You want the new paint to look clean without covering or damaging the seals.
This is also a good opportunity to inspect the condition of the existing sealant.
Painting an RV exterior gives you a perfect reason to look closely at these areas because they are easy to ignore during normal camping trips.
If you notice cracked, separated, or deteriorated sealant, address it using a product that is appropriate for the specific RV application.
Do not assume that any household caulk is suitable for an RV.
The exterior needs materials that can handle outdoor exposure and the movement associated with travel.
Inspect the Exterior Trim
Trim can make a freshly painted RV look much more finished.
Walk around the camper and check the trim pieces carefully.
Look for loose sections, cracked pieces, missing fasteners, or areas where the trim is separating from the body.
If something needs to be secured, it is better to deal with it now.
A beautiful paint job combined with loose or damaged trim will still make the RV look unfinished.
This is one reason I like thinking of an RV exterior painting project as part of a larger exterior refresh rather than simply a paint job.
Look at the RV From the Road
Once the main work is finished, step back.
If possible, look at the RV from a reasonable distance.
This gives you a much better idea of how the finished color works across the entire camper.
You may notice that a small variation you were worried about while standing directly beside the panel is almost impossible to see from a normal viewing distance.
This is also when you can judge whether your color choices work well with the RV’s shape.
Large RVs have long exterior panels, so colors can appear very different once they cover a large area.
Should You Add a Second Color?
A two tone RV exterior can look fantastic, but I would only add additional colors if you have a clear plan.
Too many competing colors can make a large RV look visually busy.
If you want a more modern appearance, consider using one primary exterior color and one complementary accent.
Accent colors can work well around:
• Lower body panels
• Slide outs
• Exterior doors
• Trim
• Horizontal sections
• Existing factory design lines
If you are trying to make the RV look larger and cleaner, simpler color combinations are often easier to maintain visually.
What About RV Decals?
You have a few options after painting.
You can leave the RV without decals for a clean, simple appearance.
You can install new graphics.
Or you can use a small number of decals as accents.
If you decide to add new graphics, make sure the paint has cured sufficiently according to the coating manufacturer’s recommendations before applying them.
The surface should be clean and properly prepared for the decal manufacturer’s application requirements.
I personally like keeping the exterior fairly simple because it makes future maintenance easier and gives the RV a less dated appearance.
How Much Does It Cost to Paint an RV?
The cost can vary dramatically depending on the size of the RV, the condition of the exterior, the paint system you choose, and how much equipment you already own.
A smaller camper may require considerably less paint and preparation material than a large motorhome.
Your budget may include:
• Primer
• Exterior paint
• Rollers
• Brushes
• Sandpaper
• Cleaning supplies
• Painter’s tape
• Plastic sheeting
• Sealant
• Repair materials
• Ladder or work platform
• Replacement trim or fasteners
If the RV requires extensive surface repairs, the preparation cost can become much higher.
That is why I would inspect the exterior carefully before setting a budget.
The paint itself is only one part of the project.
DIY RV Painting Versus Professional Painting
Painting the RV yourself can save a considerable amount of money, but it also requires time.
A professional shop can provide equipment, experience, and controlled application conditions that are difficult to reproduce at home.
DIY painting makes more sense when:
• You are comfortable doing detailed preparation
• You have somewhere suitable to work
• You have enough time for the project
• The exterior does not require extensive structural repairs
• You are comfortable working with painting products
• You want to control the colors and appearance
Professional painting may be worth considering when:
• The RV has extensive exterior damage
• You want a factory style finish
• You do not have suitable workspace
• You are uncomfortable using painting equipment
• The exterior requires major repairs
• You want the project completed quickly
There is no shame in choosing professional help.
An RV is a large vehicle, and exterior painting is considerably more involved than painting a room in your house.
How to Maintain the New Paint
Once the RV is painted, regular maintenance becomes important.
Do not wait until the exterior looks dirty before cleaning it.
Regular gentle cleaning can help prevent dirt and road film from building up.
When washing the RV, use cleaning products that are appropriate for your particular paint finish.
Avoid aggressive scrubbing unless the product and coating specifically allow it.
You should also inspect the exterior periodically.
Look around windows, doors, roof edges, seams, trim, and other areas where moisture could potentially enter.
Catching a small problem early is much easier than dealing with major water damage later.
Be Careful With Pressure Washing
Pressure washing can be tempting because it makes removing dirt from a large RV much faster.
However, high pressure can cause problems if used incorrectly.
It can potentially force water into seams or damage delicate seals and exterior components.
It may also be too aggressive for certain paint finishes.
If you use a pressure washer, follow the recommendations for your RV, paint system, and equipment.
In many situations, a gentler washing approach is the safer option.
Protect the RV From Long Term Sun Exposure
Sunlight is one of the biggest challenges for any RV exterior.
If you can store your RV under suitable cover or in a shaded location, that can reduce prolonged exposure.
When storing the RV outdoors, inspect the exterior regularly.
Look for:
• Fading
• Chalkiness
• Cracking
• Peeling
• New stains
• Damaged sealant
• Oxidation
Regular inspection allows you to address small issues before they become large ones.
Do Not Ignore the Roof
Even though this guide focuses on painting the exterior body, the roof deserves attention too.
The roof is exposed to intense weather and can have a major impact on the overall condition of the RV.
While you are working around the exterior, inspect the roof and roof edges for obvious damage or deteriorated sealant.
Do not automatically paint the roof using the same product as the RV body.
Roof materials and coatings can be very different from exterior wall materials.
Use products specifically appropriate for the roof surface and follow the manufacturer’s instructions.
Common Mistakes I Would Avoid
After working through an RV exterior project, there are several mistakes I would make a point of avoiding.
Painting Without Proper Cleaning
Dirt and grease can interfere with adhesion.
Always start with a properly cleaned surface.
Painting Over Loose Paint
Loose material needs to be removed and the surface prepared before applying a new coating.
Skipping Repairs
Paint cannot solve structural or moisture problems.
Repair the underlying issue first.
Using Interior Paint
The exterior of an RV needs a coating appropriate for outdoor exposure and the surface being painted.
Rushing the Drying Process
Give each layer the time recommended by the manufacturer.
Applying Excessively Thick Coats
Heavy application can create runs, uneven drying, and other problems.
Working in Strong Wind
Wind can carry dust and debris onto wet paint and can make spraying especially difficult.
Painting Directly in Extreme Heat
Very hot surfaces can change how quickly the coating dries and how easily you can maintain a consistent finish.
Forgetting the Details
Windows, trim, vents, lights, doors, and seals can make or break the finished appearance.
Not Protecting the Surrounding Area
Paint overspray and splatter can travel farther than expected.
Protect nearby surfaces before you begin.
How Long Should an RV Paint Job Last?
There is no single number that applies to every RV.
The lifespan of an exterior paint job depends on the paint system, preparation, application, climate, sun exposure, storage conditions, washing habits, and general use.
A well prepared surface with an appropriate coating gives you a much better starting point than simply painting over an old finish.
Regular maintenance can also make a significant difference.
Rather than waiting for obvious peeling or fading, inspect the exterior periodically and deal with small problems early.
What I Would Do Differently on a Future RV
If I were starting another RV exterior painting project, I would put even more emphasis on preparation and planning.
I would inspect every panel before purchasing supplies.
I would make a complete list of repairs.
I would test the paint color on a small area.
I would organize all the tools before beginning.
I would protect every window and piece of trim carefully.
And I would give myself more time than I thought I needed.
The biggest lesson is that an RV is simply too large and too complicated to treat like a normal painting project.
There are too many surfaces, seams, accessories, and details.
Trying to rush through it usually creates more work later.
Is Painting an RV Exterior Worth It?
For the right RV, absolutely.
If the exterior is structurally sound but looks faded, dated, or worn, painting can completely change its appearance.
It can also be a great way to personalize an older camper without replacing the entire exterior.
But I would not recommend starting with paint simply because the RV looks old.
Start by determining why it looks old.
If there is water damage, deteriorated sealant, structural damage, severe corrosion, or another underlying issue, deal with that first.
Once the exterior is sound, painting becomes a much more worthwhile investment.
My Final Tips for Painting an RV Exterior
If you are planning to paint your RV yourself, these are the points I would keep in mind throughout the project.
• Spend more time preparing than you think you need.
• Choose a coating that is appropriate for the RV’s exterior material.
• Follow the manufacturer’s instructions for primer, application, drying, and curing.
• Test your color before committing to the entire RV.
• Work in manageable sections.
• Keep a wet edge when the coating instructions call for it.
• Avoid excessively thick coats.
• Inspect the surface between coats.
• Protect windows, trim, tires, lights, vents, and hardware.
• Give the finished coating adequate time to cure.
• Inspect the seals and exterior trim before considering the project complete.
• Keep the RV clean and inspect the exterior regularly.
• Do not use paint to cover up an underlying moisture or structural problem.
Final Thoughts
Painting the exterior of an RV is a bigger project than it may appear when you are standing outside looking at the finished result. There is a lot that happens before the first coat goes on, from cleaning and sanding to repairing imperfections and protecting all the areas that should remain untouched.
The good news is that you do not necessarily need a professional workshop to give an older RV a completely different appearance. With careful preparation, suitable products, patience, and a realistic plan, a DIY exterior painting project can be very rewarding.
For me, the most important part is remembering that the goal is not simply to cover the old color. The goal is to create a finish that looks intentional, holds up to outdoor conditions, and makes the RV feel like a space you actually want to take on the road.
Take your time with the preparation, do not rush the drying and curing stages, and pay attention to the small details. Those small details are what turn a basic RV repaint into a finished exterior that you can genuinely be proud of.