How to Paint the Interior Walls of an Old RV: Tips and Advice
Painting the interior walls of an old RV can completely change the way the space feels. When we were working on an older RV, I quickly realized that painting the walls was one of those projects that looked simple until I actually started preparing the surfaces.
RV walls are not quite like the drywall you would paint in a house. Many older RVs have thin wall panels, glossy finishes, seams, old adhesive, small imperfections, and years of dirt that can make it difficult for new paint to stick properly. Once I understood that preparation mattered just as much as the paint itself, the project became much easier to manage.
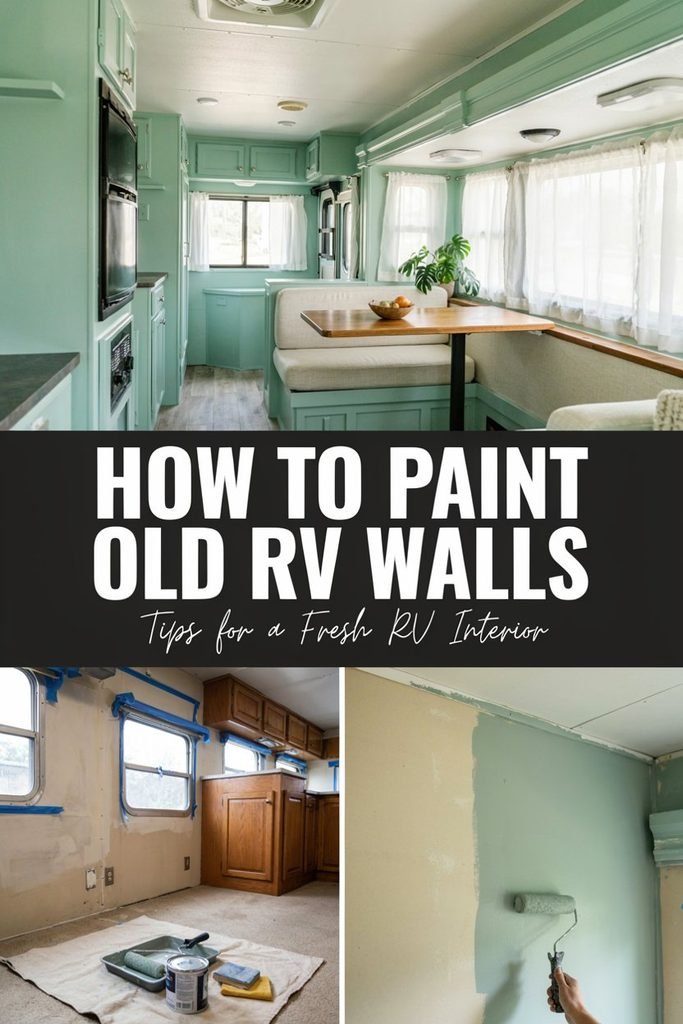
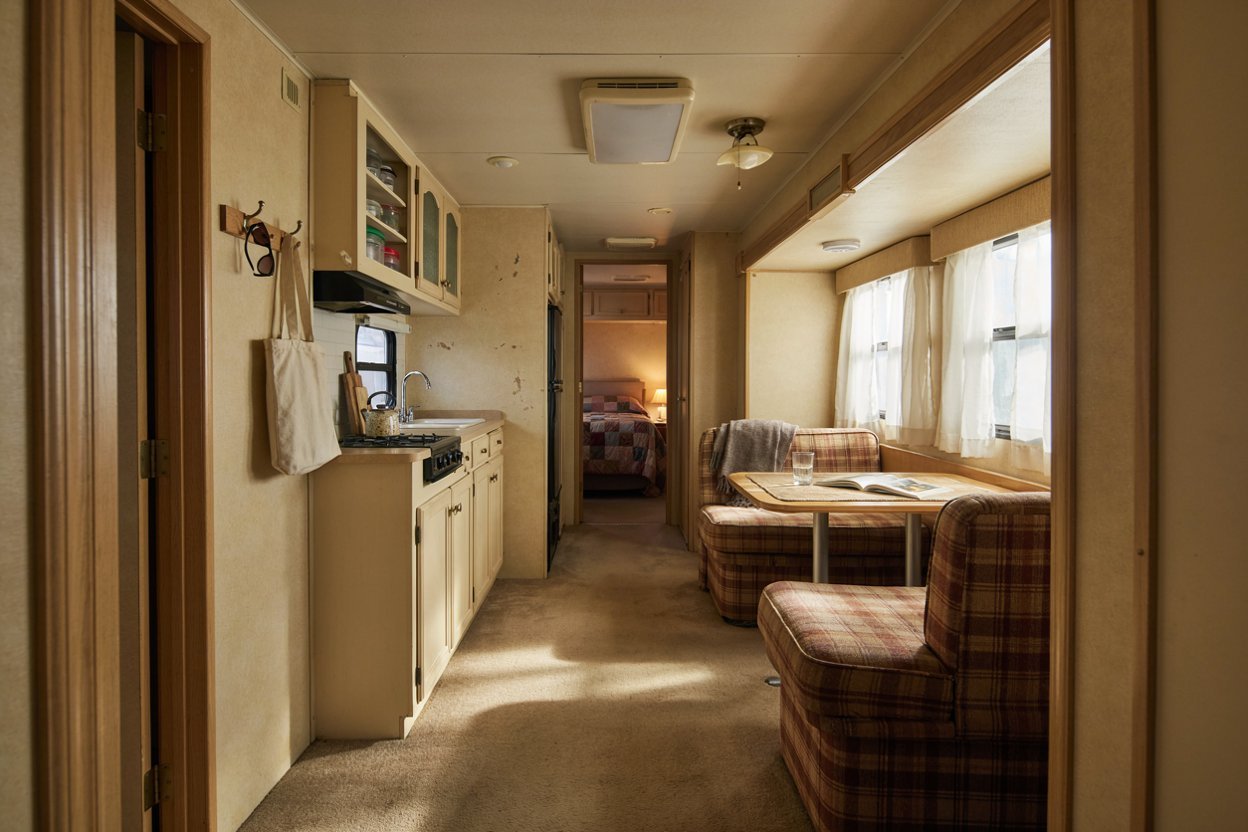
If your RV interior feels dark, dated, or simply does not match the look you want, painting the walls can make a surprisingly big difference. It can make a small RV feel brighter and cleaner without requiring a complete renovation.
In this guide, I will walk you through how I would approach painting the interior walls of an old RV, from inspecting and cleaning the walls to repairing damaged areas, sanding, priming, and getting everything ready for paint. I will also share the little things that can make the job easier when you are working in a tight RV space.
Can You Paint the Interior Walls of an Old RV?
Yes, you can paint the interior walls of an old RV, but the preparation is different from painting a normal room in a house.
The biggest mistake I see people make with RV painting projects is wanting to get straight to the fun part. It is tempting to choose a beautiful paint color, grab a roller, and start covering those dated walls. I understand the temptation because seeing an old interior change color is one of the most satisfying parts of an RV renovation.
But old RV walls need to be properly prepared first.
Depending on the age and construction of the RV, the walls may have a vinyl or laminate type surface rather than traditional drywall. Some surfaces can also be surprisingly smooth and glossy.
Paint does not automatically adhere well to a slick surface, especially when there is dust, grease, cooking residue, smoke residue, or years of general use sitting on top of it.
Before buying your paint, spend some time figuring out exactly what you are working with.
Look closely at:
- The wall surface and whether it is smooth, textured, vinyl, laminate, or painted paneling
- Existing seams between wall panels
- Areas where the wall covering is peeling or bubbling
- Water stains or discoloration
- Old screw holes and nail holes
- Cracks around windows and doors
- Areas with old adhesive
- Greasy areas near the kitchen
- Any signs of water damage
- Loose trim or molding
- Areas where previous paint is already peeling
This inspection may seem like an extra step, but it can save you from painting over a problem that will eventually show through your new finish.
Start With a Thorough Inspection
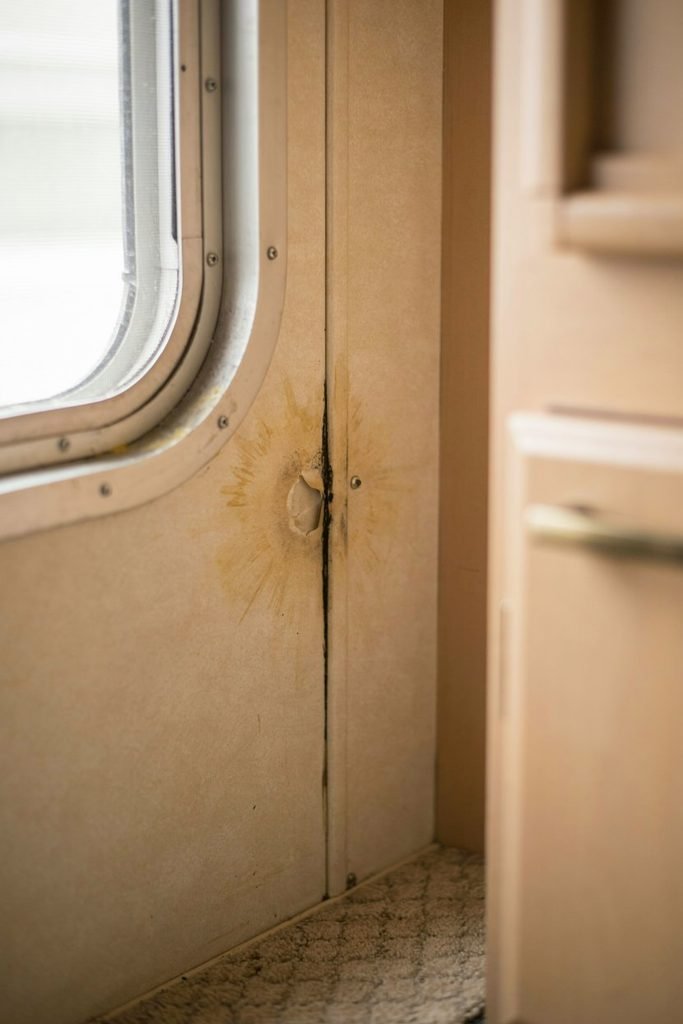
Before I begin any RV painting project, I like to walk through the entire space and look at the walls in good natural light.
This is especially important in an older RV because some damage is not immediately obvious. A wall can look perfectly acceptable from a distance but show loose sections, tiny cracks, stains, or damaged seams once you get closer.
I would not worry about making a perfect list of every tiny imperfection at this stage. The goal is simply to understand the condition of the interior before you start cleaning and preparing it.
Run your hand gently across the walls and pay attention to areas that feel loose or unusual.
If you find a section that is bubbling, lifting, or showing obvious signs of water damage, deal with that before painting. Paint can make a wall look better temporarily, but it will not fix a damaged panel or an underlying moisture problem.
Check Around Windows and Doors
Windows and doors deserve particular attention in an older RV.
These areas can develop small gaps and cracks, and they may also have accumulated dirt around the edges. Look carefully around the corners and along the trim.
I like to inspect these areas before deciding how much caulking or repair work is needed because they tend to stand out once the walls have been freshly painted.
Fresh white or light colored paint has a funny way of making old imperfections more noticeable.
Look for Water Damage
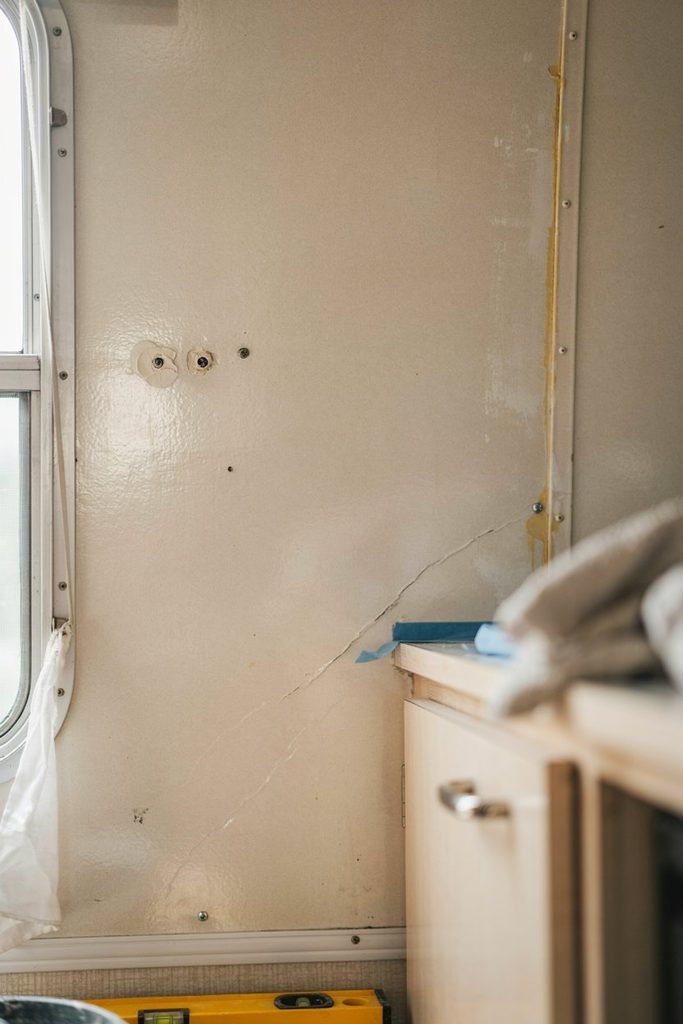
Do not paint over water damage just because the area looks dry.
Check for:
- Brown or yellow stains
- Soft or swollen wall panels
- Peeling material
- Bubbling
- Musty odors
- Discolored seams
- Areas around windows, roof openings, or plumbing that look suspicious
If you find evidence of a leak, identify and address the source before worrying about paint.
This is one of those parts of an RV renovation where slowing down can save you a lot of frustration later. There is no point spending hours preparing and painting a wall if moisture is going to damage your work again.
Remove as Much as You Can Before Painting
One thing that made the painting process easier for me was removing as many obstacles as possible before starting.
RV interiors are already tight. Trying to paint around everything still attached to the walls makes the job slower and usually leads to messy edges.
Depending on your RV, you may be able to remove:
- Wall mounted accessories
- Curtain hardware
- Switch plates
- Outlet covers
- Small shelves
- Decorative trim
- Hooks
- Lightweight fixtures
- Certain pieces of molding
Take photos before removing anything that you might forget how to reinstall.
I have learned that taking a few quick reference photos is much easier than trying to remember exactly where every small piece belongs several hours later.
Put screws and hardware into labeled bags or containers rather than leaving them scattered around the RV. It is a small organizational step, but it makes the finishing stage much less frustrating.
Clean the Walls Before You Sand
This is probably one of the most important preparation steps.
Do not assume the walls are clean simply because they look clean.
An older RV can collect dust, cooking residue, fingerprints, oils, and grime in places that are easy to overlook. If you sand first, you can end up pushing some of that dirt around the surface instead of actually preparing the wall.
Start by wiping the walls thoroughly with a suitable household cleaner that will remove grease and residue without leaving a heavy film behind.
Pay particular attention to the kitchen area.
The walls near a stove or food preparation area can have more buildup than the rest of the RV. Even a small amount of greasy residue can interfere with primer and paint adhesion.
After cleaning, give the walls enough time to dry completely.
Do not rush into sanding while the surface is still damp.
Pay Attention to the Corners
Corners are easy to miss because they are awkward to reach.
I usually work from the top of the wall downward and move systematically around the RV rather than randomly wiping different areas. That way, it is much harder to accidentally skip a section.
Use a clean cloth for the final wipe so you are not simply moving dirt from one part of the wall to another.
Protect the Parts You Are Not Painting
Painting inside an RV requires more patience with masking than painting a large open room.
You have cabinets, countertops, windows, flooring, appliances, switches, outlets, trim, and other surfaces packed into a relatively small area.
Before opening your paint, cover the flooring and anything else that needs protection.
Use painter’s tape around areas that need clean edges, but do not depend entirely on tape to protect everything. Plastic sheeting, drop cloths, and old blankets can be useful for protecting larger surfaces.
I also recommend keeping your paint supplies together in one small area instead of moving them around the RV constantly. In a small space, it is surprisingly easy to knock over a tray or set a wet brush somewhere you did not intend to.
This is one of those projects where keeping the workspace organized makes a noticeable difference.
Repair Small Imperfections Before Painting
Once the walls are clean and dry, inspect them again.
Cleaning often reveals imperfections that were hidden underneath years of dirt.
Small holes, dents, and shallow imperfections can usually be repaired before painting.
Depending on the wall material and the type of damage, you may need an appropriate lightweight filler or repair product. Apply only as much as you need and allow it to dry according to the manufacturer’s instructions.
After the repair material has dried, sand the area until it feels smooth when you run your hand across it.
You do not want to create a visible mound around a small repair.
The goal is to make the repaired area blend naturally into the surrounding wall.
Do Not Over Repair Every Tiny Mark
There is also a point where repairing every tiny mark becomes unnecessary.
Remember that this is an RV.
It is a moving space that experiences vibration, temperature changes, and everyday use. You want the walls to look clean and finished, but you do not necessarily need to treat every microscopic imperfection like you are preparing a luxury home for a magazine shoot.
Focus your effort on imperfections that will actually be visible after painting.
Sanding Old RV Walls
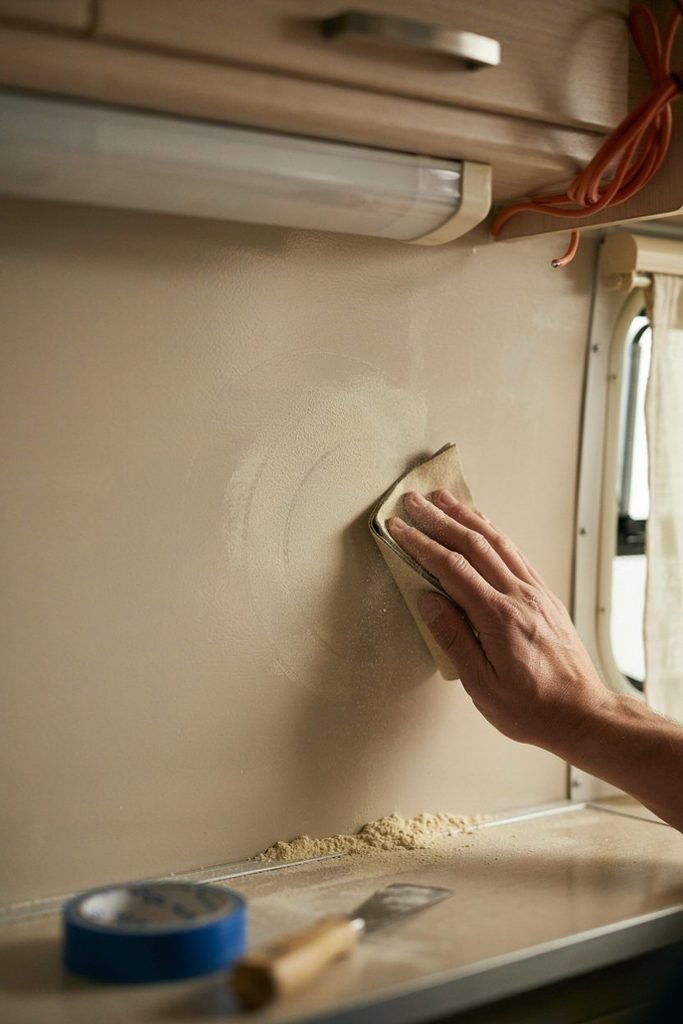
Sanding is another step that should not be skipped when dealing with a smooth or glossy RV wall surface.
The purpose is not to aggressively remove the entire existing wall finish.
Instead, you want to lightly scuff the surface so the primer has something better to grip.
Use the appropriate fine grit sandpaper for the surface you are working with and sand gently.
Pay special attention to glossy areas.
You are not trying to create deep scratches. You simply want to reduce that slick, shiny feeling and create a surface that is more suitable for primer.
I like to periodically stop and run my hand across the wall to check how it feels. If an area still feels extremely smooth and slick compared with the surrounding surface, it probably needs a little more attention.
Be Careful With Thin Wall Panels
This is particularly important in an older RV.
Some RV wall panels are relatively thin, so aggressive sanding can damage the surface instead of improving it.
Use controlled pressure and take your time.
You should not need to attack the wall with heavy pressure to prepare it for primer.
After sanding, remove all of the dust.
A clean microfiber cloth can help pick up fine dust, and you can use the appropriate cleaning method for your specific wall material.
The important thing is that you do not leave a layer of sanding dust sitting on the wall before priming.
What About Old Vinyl RV Walls?
Vinyl covered RV walls are one of the surfaces that can make people nervous about painting.
The good news is that they can often be painted successfully when properly prepared.
The important part is not treating vinyl like ordinary drywall.
First, determine whether the vinyl is firmly attached.
If the material is already peeling, bubbling, or separating from the wall, painting over it is unlikely to give you a durable result.
Fix loose areas first.
Then clean the surface thoroughly, lightly scuff it as appropriate, remove the dust, and use a primer designed to improve adhesion on difficult or slick surfaces.
This is an area where using the right primer can make a much bigger difference than simply buying an expensive paint.
Deal With Old Seams Before Painting
Many older RV interiors have visible seams between wall panels.
Some seams may be perfectly fine and only need cleaning. Others may have cracked, separated, or become more noticeable with age.
Look closely at each seam.
If the seam is stable and simply part of the original construction, you may decide to leave it alone. If it has opened up or contains damaged material, it may need repair before painting.
Be careful with flexible areas.
An RV is not a completely stationary structure, so you do not want to use a rigid repair method in a location that needs some flexibility.
The right repair approach depends on the wall construction and the condition of the seam.
Prime Before You Paint
Once the walls are clean, repaired, lightly sanded, and dust free, you are finally ready for primer.
This is where I would resist the temptation to skip a step.
Primer is especially useful when painting old RV walls because you are often dealing with an unusual surface rather than fresh drywall.
A good bonding primer can help create a consistent surface and improve the adhesion of your finish coat.
Primer is also helpful when you are changing dramatically from a darker wall color to a much lighter one.
Before applying it throughout the RV, read the product instructions carefully and make sure it is appropriate for the wall surface you are working with.
If you are unsure about compatibility, testing a small inconspicuous area first is a smart move.
Let the test area dry completely before deciding whether the result is suitable.
My Biggest Preparation Tip
If I were giving one piece of advice to someone about to paint an old RV interior, it would be this:
Spend more time preparing than you think you need to.
The actual rolling of the paint is not usually the hardest part.
Getting an old RV interior clean, smooth, properly repaired, and ready for paint is where most of the work happens.
When the preparation is rushed, you are more likely to end up with peeling paint, visible imperfections, uneven coverage, or areas where the new paint simply does not want to stick.
When you take your time with the preparation, the painting stage becomes much more enjoyable.
That was especially important to me because I did not want to spend a weekend painting only to discover that I had to redo sections because the surface underneath had not been prepared properly.
A Simple Preparation Checklist
Before moving on to the actual painting stage, I would make sure the interior is ready with this checklist:
- Inspect the walls for damage
- Look carefully for signs of water problems
- Remove wall accessories where possible
- Clean away dirt, grease, and residue
- Allow the walls to dry completely
- Repair obvious holes and damaged areas
- Lightly sand glossy surfaces
- Remove all sanding dust
- Inspect seams and loose wall coverings
- Protect floors, cabinets, counters, and fixtures
- Apply an appropriate bonding primer
Once all of this is done, the RV should look very different even before the final paint color goes on. The walls may still look plain, but the surface should feel cleaner, smoother, and properly prepared.
And that is exactly where you want to be before opening the paint can.
Part 2 continues with the practical painting stage, keeping the same personal, experience based voice and focusing on the details that help readers avoid the mistakes that make an RV interior paint job look uneven or start peeling.
Choose the Right Paint for an RV Interior
I would not choose paint based only on the color you like.
The type of paint matters because the interior of an RV is a little different from a stationary room in a house.
For most RV interior walls, I would look for a good quality interior paint that provides strong adhesion, durability, and easy cleaning. A washable acrylic or latex interior paint can be a practical choice when it is compatible with the surface and primer you are using.
If the RV is going to receive a lot of daily use, I would lean toward a durable finish rather than choosing the cheapest paint available.
You do not necessarily need the most expensive paint in the store either.
I would rather spend more money on proper preparation and a good primer than buy an extremely expensive finish coat while neglecting the surface underneath.
What Paint Finish Should You Use?
The paint finish can change both the appearance and practicality of the RV.
For interior RV walls, eggshell or satin can be good options because they offer a balance between appearance and cleanability.
Flat paint can look beautiful, but it tends to be less forgiving when the walls need regular cleaning.
Semi gloss is more durable and easier to wipe down, but it can emphasize imperfections on older walls.
That is why I usually prefer a softer finish for large wall surfaces and reserve higher sheen finishes for areas where extra durability makes sense.
If your RV has a lot of wall imperfections, a very shiny finish may actually make those imperfections stand out more than you want.
Choosing the Paint Color
This is where you can have some fun.
An older RV can feel surprisingly small and dark, especially when the original interior has brown wood tones, beige paneling, or darker cabinets.
A lighter wall color can make the entire space feel more open.
White is an obvious choice, but you do not have to use a stark bright white.
Soft whites, warm whites, light greige, pale beige, and very light neutral shades can all work beautifully.
When I was thinking about the overall look of an RV interior, I found it helpful to consider the cabinets, flooring, upholstery, countertops, and curtains together rather than choosing a wall color in isolation.
You do not want the walls to look beautiful while everything else suddenly looks out of place.
Test Your Paint Color First
I strongly recommend testing your chosen color before painting the entire RV.
Paint a small section or use a sample board and look at it at different times of the day.
The color can look completely different in morning light compared with artificial lighting at night.
This is especially important in an RV because the windows are relatively small and the amount of natural light can vary dramatically depending on where you park.
A color that looks warm and inviting in a paint store can look much cooler inside a shaded RV.
Start With the Primer
Before applying your finish coat, make sure the primer has dried according to the manufacturer’s instructions.
Do not assume that because the surface feels dry it is ready for another coating.
Different products have different drying and recoat times.
I prefer to give the primer enough time to properly set rather than rushing because I want to finish the project quickly.
Once the primer is ready, inspect the walls again.
This is actually a useful point to catch problems.
Primer can make small dents, scratches, and uneven areas easier to see. If something looks particularly obvious now, it is much easier to fix it before applying the final paint.
Use the Right Roller
A good roller can make a noticeable difference.
For smooth RV wall panels, a relatively short nap roller can help produce a smoother finish than a thick roller intended for heavily textured walls.
The exact roller you need depends on the wall surface.
If your walls have texture, you may need something different.
I would rather test the roller on a small area first than commit to painting an entire wall with a tool that is leaving too much texture behind.
For corners and smaller areas, keep a quality angled brush nearby.
The roller should handle most of the large wall surface while the brush takes care of edges, corners, trim, and areas the roller cannot reach.
Do Not Load the Roller With Too Much Paint
This sounds basic, but it is one of those little things that can affect the final finish.
Too much paint can lead to:
- Drips
- Runs
- Heavy texture
- Uneven coverage
- Paint collecting around edges
Load the roller evenly and remove excess paint before bringing it to the wall.
The goal is controlled coverage rather than trying to cover everything with one extremely heavy coat.
Two lighter coats will often give you a much better result than one thick coat.
Paint in Manageable Sections
An RV is not the place where I would try to paint an enormous section of wall all at once.
The space is too confined, and it becomes difficult to maintain a wet edge when you are constantly reaching around cabinets, windows, doors, and other obstacles.
Work in manageable sections.
I usually like to start near the top and work downward while maintaining a consistent pattern.
Keep your roller moving rather than repeatedly going back over areas that have already started to dry.
This helps reduce visible roller marks.
Paint the Edges First
Before rolling a larger section, use your brush to carefully paint around the edges.
This is sometimes called cutting in.
Work around:
- Windows
- Doors
- Cabinets
- Trim
- Corners
- Ceiling edges
- Electrical outlets
- Wall mounted fixtures
Do not put a huge amount of paint on the brush.
A controlled amount makes it much easier to create a clean edge without creating thick buildup.
Because RV interiors have so many corners and interruptions, I find that patience here makes a bigger difference than trying to paint quickly.
Be Careful Around Windows
Windows can be particularly awkward.
There is usually very little room to maneuver, and the surrounding trim can easily become covered in paint.
Use painter’s tape where appropriate and keep a small brush available for detailed areas.
If you accidentally get paint where it should not be, deal with it according to the paint manufacturer’s instructions rather than allowing a thick blob to dry completely.
The cleaner you keep your edges while painting, the less cleanup you will have later.
Painting Around Cabinets
If you are keeping the existing cabinets, take your time around them.
This is another area where I would rather use a small brush than try to force a roller into a tight space.
If the cabinets are going to be painted too, I would treat that as a separate preparation and painting project rather than trying to do everything at once.
Keeping the wall and cabinet projects organized makes it much easier to control the finish.
If you are only painting the walls, protect the cabinet surfaces carefully.
Freshly painted walls can look messy very quickly if the cabinet edges are covered with accidental splatters.
Apply the First Coat
Once the edges are cut in, start rolling the main wall area.
Use smooth strokes and avoid pressing excessively hard against the wall.
I like to work methodically rather than constantly changing direction.
If you are using a roller, spread the paint evenly and then lightly smooth the section before moving on.
Do not worry if the first coat does not look perfect.
This is important.
The first coat may look uneven, especially when you are covering a darker or heavily colored old wall.
That does not automatically mean something has gone wrong.
The first coat is there to establish coverage and build the foundation for the final finish.
Give the First Coat Enough Time to Dry
This is where impatience can ruin an otherwise good painting job.
Let the first coat dry according to the instructions on your paint.
Do not judge the final color while the paint is still wet.
Wet paint can look darker, glossier, or more uneven than the finished surface.
Once the first coat has dried, step back and inspect the walls from different angles.
Look for:
- Thin areas
- Roller marks
- Missed sections
- Visible primer
- Drips
- Uneven coverage
- Areas where the original wall color still shows through
Fix obvious problems before moving on.
Apply the Second Coat
In most situations, I would plan on applying at least two finish coats.
The second coat is where the transformation usually becomes much more obvious.
Coverage should become more consistent, the color should look richer, and the overall finish should start to feel much more intentional.
Again, resist the urge to apply a very heavy coat simply because you want the project finished.
A controlled second coat will generally give you a cleaner result.
If you are changing from a dark color to a very light color, you may need additional coverage depending on the paint and primer.
That is not necessarily a problem.
It is better to apply another appropriate coat than to leave the walls looking patchy.
How to Avoid Visible Roller Marks
Roller marks are especially noticeable when light enters through an RV window and hits the wall at an angle.
A few things can help.
Use a suitable roller for the surface and avoid overworking paint that has already started to dry.
Do not repeatedly roll the same section simply because you are trying to make it perfect.
Once the paint has started setting, continuing to manipulate it can actually make the finish worse.
Maintain a consistent technique from one section to another.
And make sure your roller is properly loaded rather than almost dry.
A roller that is too dry can create uneven coverage and a rough appearance.
Do Not Forget the Ceiling Edges
If you are only painting the walls, the ceiling edge can become one of the most noticeable areas when you are finished.
Take your time when cutting along the ceiling.
If the ceiling is also being painted, it can be easier to coordinate both surfaces as part of the same renovation.
But if you are leaving the ceiling untouched, protect it carefully.
A small amount of wall paint along the ceiling may seem insignificant while you are working, but it becomes surprisingly noticeable once everything else is clean and freshly painted.
Ventilation Matters Inside an RV
Painting inside a small enclosed space requires extra attention to ventilation.
Open windows and doors where practical and follow the ventilation and safety instructions provided for the paint and primer you are using.
I would avoid spending long periods inside a freshly painted RV with everything closed up.
Because the interior is compact, paint odors can become much stronger than they would in a large room.
If weather conditions allow, keeping the RV well ventilated while the coatings dry can make the experience much more comfortable.
Keep Your Painting Supplies Organized
One small thing that helped me during an RV renovation was keeping a dedicated painting area.
Instead of leaving brushes, rollers, trays, tape, rags, and other supplies scattered throughout the RV, keep them together.
This matters more than it sounds.
You are constantly moving around a small space, and loose supplies quickly become obstacles.
Keep a damp cloth nearby for small accidental splatters and clean tools according to the paint manufacturer’s recommendations when you are finished using them.
The cleaner your workspace remains, the easier it is to concentrate on the actual finish.
What If the Paint Is Not Sticking?
If you notice that the new paint is separating, beading up, peeling, or refusing to cover the wall properly, stop painting that area.
Do not simply add more coats.
The problem may be with the surface preparation or primer.
Possible causes include:
- Grease or dirt remaining on the wall
- A glossy surface that was not properly prepared
- Incompatible products
- Loose vinyl or wall covering
- Moisture
- Contamination on the surface
- Insufficient primer
This is why testing your products and preparing the wall properly is so important.
If the paint is not bonding correctly, more paint will not solve the underlying problem.
Take Your Time Around Tight Spaces
This is one of the biggest differences between painting an RV and painting a normal room.
You cannot always stand comfortably several feet away from the wall and roll in long, uninterrupted strokes.
Sometimes you are leaning over a countertop, reaching behind a cabinet, or trying to get into a tiny corner.
Do not force yourself to work quickly in those areas.
Use smaller tools when necessary.
A quality angled brush can be much more useful than trying to make a roller reach somewhere it was never designed to reach.
Keep the RV Interior Functional During the Project
If you are renovating an RV that you still use, plan the painting project around your schedule.
I found it much easier to work on one area at a time rather than turning the entire interior into a giant unfinished project.
Before starting, think about where you will store supplies, where you can leave painted items undisturbed, and how you will move through the RV without touching wet walls.
This becomes particularly important if you have children, pets, or other people regularly moving around the space.
Fresh paint needs time.
It is frustrating to spend hours creating a clean finish only to have someone accidentally brush against it before it has properly dried.
My Best Painting Tip for an Old RV
If I had to narrow the actual painting process down to one piece of advice, I would say do not chase perfection while the paint is wet.
It is very easy to keep going back over a section because you notice a tiny roller mark or a spot that looks slightly different.
Sometimes the best thing you can do is leave it alone and let it dry.
Once the paint has dried completely, you can evaluate the surface properly.
Many areas that look questionable while wet blend together beautifully once they have dried.
If there is a genuine problem, you can address it with the next coat.
The Order I Prefer to Follow
When painting an RV interior, I find it helpful to follow the same basic order throughout the project.
- Finish all wall preparation
- Clean away sanding dust
- Protect nearby surfaces
- Apply primer
- Allow the primer to dry properly
- Inspect the primed wall
- Cut in around edges
- Roll the first paint coat
- Allow it to dry completely
- Inspect the first coat
- Apply the second coat
- Allow the final coat to dry and cure properly
Following a consistent process keeps the project from becoming chaotic.
It also makes it easier to figure out where something went wrong if you notice an issue later.
Do Not Rush the Final Drying Time
The walls may feel dry to the touch before the paint has reached its full hardness.
That distinction matters.
An RV interior can experience plenty of contact after the project is finished, especially around doors, hallways, seating areas, and storage spaces.
Give the paint the drying and curing time recommended by the manufacturer before putting the interior back into heavy use.
This is particularly important if you have just painted areas that will be touched frequently.
A little patience at this stage can help protect all the work you have just completed.
Once the second coat is on and the walls are looking even, the hardest part of the transformation is largely finished.
But there are still a few important things to take care of before calling the project done. The final inspection, cleanup, touch ups, curing, maintenance, and a few common mistakes can make the difference between an RV that simply looks freshly painted and one that actually feels like a properly renovated space.
How to Finish and Maintain Painted RV Interior Walls
Once the second coat of paint is on, it is tempting to start putting everything back immediately. The walls finally look fresh, the old color is gone, and the RV starts feeling like a completely different space.
I have found that this final stage deserves just as much attention as the preparation and painting. A few small touchups, careful cleanup, and enough curing time can make the finished project look considerably better and help protect the paint from the everyday wear that comes with using an RV.
Painting the walls is only part of the transformation. The real goal is to create an interior that still looks good after you start using the RV again.
Let the Paint Dry Properly
The first thing I would do after finishing the final coat is leave the walls alone.
Paint can feel dry when you touch it while still being relatively soft underneath. That is why I would not immediately reinstall everything, lean furniture against the walls, or start wiping the surface clean.
Follow the drying and recoat instructions on the specific paint you used.
The drying time can vary depending on temperature, humidity, ventilation, paint type, and the thickness of the coat.
An RV can also behave differently from a large room in a house because the space is much smaller and air movement can be limited.
Give the walls enough time to dry before you start putting the interior back together.
Drying and Curing Are Not the Same Thing
This is an easy detail to overlook.
Dry does not necessarily mean fully cured.
A freshly painted wall may feel dry enough to touch but still be vulnerable to scratches, scuffs, and pressure.
I try to be especially careful during this period because the walls can look perfect one day and then develop an accidental mark when something gets pushed against them.
Follow the paint manufacturer’s recommended curing instructions before subjecting the walls to heavy cleaning or everyday abuse.
If you can give the interior some extra time before returning it to normal use, that is even better.
Inspect the Walls in Natural Light
After the paint has dried, walk around the RV and inspect the walls during daylight.
Natural light can reveal things that are difficult to notice under interior lights.
Look for:
- Thin spots
- Uneven coverage
- Roller marks
- Brush marks
- Drips
- Paint buildup around corners
- Missed areas
- Small splatters
- Visible repairs
- Areas where the old color shows through
I like to inspect the walls from several angles rather than standing directly in front of them.
Light can hit an RV wall differently depending on where you are standing, and an imperfection that is almost invisible from one direction can be obvious from another.
Do Small Touchups Instead of Repainting Everything
If you find a small area that needs attention, there is no reason to panic.
Keep a small amount of leftover paint in a sealed, clearly labeled container.
This is one of the most useful things you can do at the end of an RV painting project.
Small touchups are inevitable.
A wall might get bumped while reinstalling a curtain rod. You might discover a tiny spot you missed near a cabinet. Something may leave a mark while you are moving furniture back into position.
Having the original paint available makes these repairs much easier.
Before storing it, write the room or area where the paint was used on the container and keep the paint information with it.
Remove Painter’s Tape Carefully
If you used painter’s tape around trim, windows, cabinets, or other surfaces, remove it carefully.
I prefer not to leave tape sitting indefinitely after the paint has dried.
Pull it away slowly and at a controlled angle.
If the paint has formed a slight bridge between the wall and tape, rushing can sometimes pull away more paint than intended.
If you notice that the tape is firmly stuck, take your time rather than yanking it off.
Clean edges are one of the things that make a paint job look professional, so there is no reason to rush this last step.
Reinstall Wall Accessories Carefully
Once the paint has had enough time to dry and cure, you can start reinstalling the items you removed.
This includes things such as:
- Curtain hardware
- Switch plates
- Outlet covers
- Shelves
- Hooks
- Small fixtures
- Decorative trim
This is where those photos I recommended taking before the project can come in handy.
Use the original hardware when it is still suitable, and avoid overtightening screws against freshly painted surfaces.
If you need to make a new hole, measure carefully first.
It is much easier to spend a few extra minutes checking the position than to drill into a freshly painted wall in the wrong place.
Be Careful With Electrical Covers
If you removed outlet or switch covers, make sure everything is properly handled before reinstalling them.
Do not paint over electrical components.
The safest approach is to keep paint away from the actual electrical hardware and reinstall the appropriate covers once the surrounding wall is finished.
If you are uncomfortable removing or reinstalling anything electrical, it is better to have someone qualified handle that portion of the project.
Painting an RV should improve the interior, not create a safety problem.
Clean Up the Painting Area
Once everything has dried enough for you to work around the RV, clean the space thoroughly.
Look for paint splatters on:
- Flooring
- Countertops
- Cabinet surfaces
- Window trim
- Hardware
- Furniture
- Appliances
Small splatters are much easier to deal with when you notice them early.
Clean your brushes, rollers, trays, and other reusable tools according to the instructions for the products you used.
Do not leave paint-covered supplies sitting around inside the RV simply because you are tired and want to finish later.
A little cleanup at the end makes the entire project feel much more complete.
Give the Interior a Final Inspection
Before considering the project finished, I like to walk through the RV slowly and look at everything as a whole.
This is different from inspecting individual walls.
Stand near the entrance and look into the main living area.
Then walk through the RV and look at how the new wall color works with the cabinets, flooring, countertops, furniture, curtains, and other finishes.
Sometimes a wall can look beautiful by itself but feel different once all of the original RV features are back in place.
This is the point where you can really see whether the color choice worked.
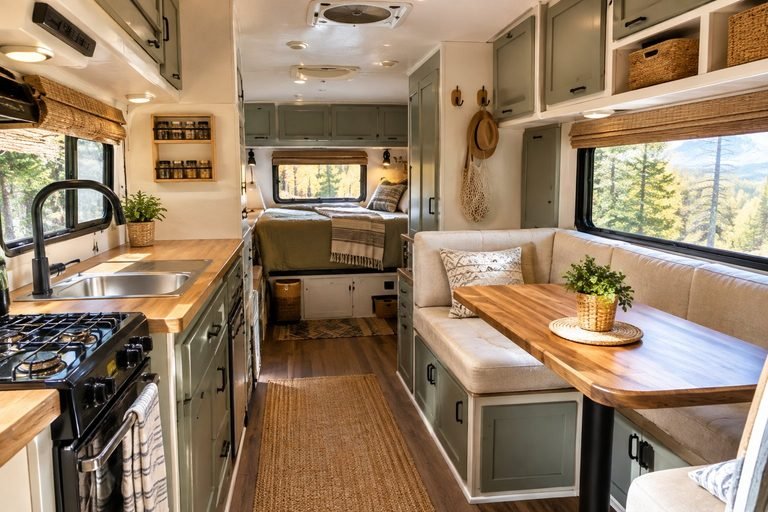
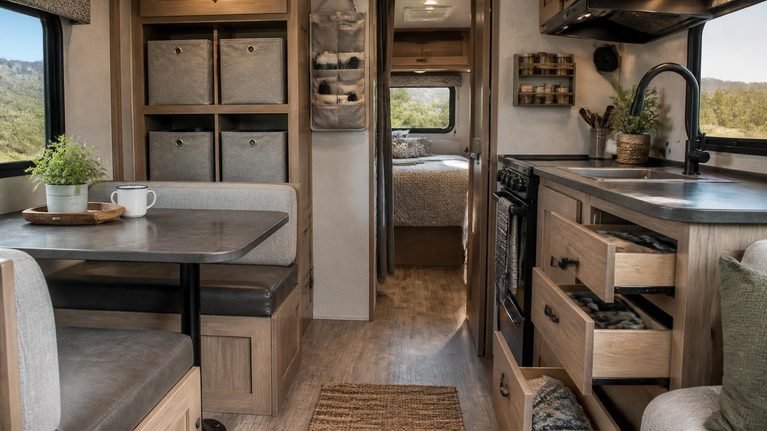
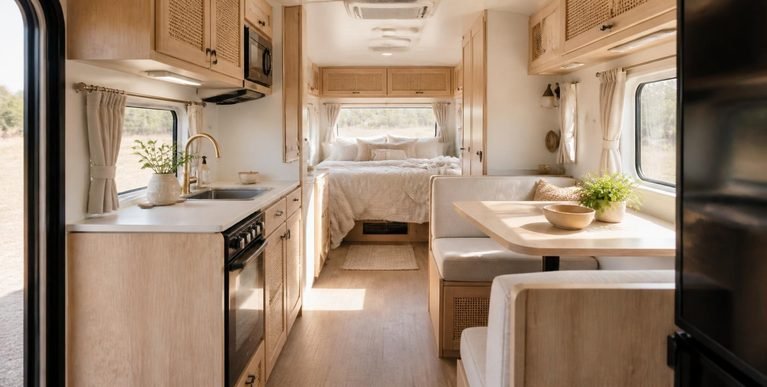
How Light Colors Can Change an Old RV
One of the biggest benefits of repainting an old RV interior is how much lighter and more open the space can feel.
This is particularly noticeable when the original walls are dark beige, brown, or heavily patterned.
A lighter color reflects more available light and can make the interior feel cleaner.
You do not necessarily need to completely remodel the RV to create that effect.
Sometimes the walls are the biggest visual change you can make.
This is one reason I like painting as a renovation project. You can create a significant difference without replacing every surface inside the RV.
What If Your RV Still Feels Dark?
If the walls are already light but the RV still feels dark, look at the other surfaces.
Dark cabinets, heavy curtains, dark flooring, and bulky furniture can still make the interior feel closed in.
You do not have to paint or replace everything at once.
Instead, think about the interior as a whole.
For example, lighter curtains or a brighter rug can complement freshly painted walls without turning the project into a complete renovation.
I prefer making changes gradually because it gives you a chance to see what actually needs changing instead of spending money on things that were perfectly fine.
How to Keep Painted RV Walls Clean
Once the project is finished, regular maintenance becomes important.
The easiest way to keep painted RV walls looking good is to deal with dirt before it builds up.
For normal dust, a soft dry or slightly damp cloth may be enough depending on the paint finish.
For marks or spills, use a gentle cleaning method that is compatible with your particular paint.
Avoid aggressively scrubbing a freshly painted wall.
Even a durable paint can become damaged if you use excessive pressure or harsh cleaning products.
Always follow the paint manufacturer’s cleaning recommendations.
Be Extra Careful Around the Kitchen
The kitchen area will usually need more attention than other parts of the RV.
Cooking can leave grease and residue on nearby walls.
A washable paint finish can make maintenance easier, but it is still better to wipe away buildup regularly rather than allowing it to accumulate.
If your RV has a small kitchen, think about where cooking splashes are most likely to land.
Keeping those areas clean will help the paint stay fresh for longer.
Protect High Traffic Areas
Some parts of an RV naturally experience more contact than others.
Hallways, entry areas, spaces beside beds, and areas near seating can get bumped frequently.
Bags, clothing, shoes, storage bins, and furniture can all come into contact with the walls.
You cannot prevent every mark.
That is part of using an RV.
But you can reduce unnecessary damage by being careful when moving bulky objects and by making sure furniture is not constantly rubbing against freshly painted surfaces.
Common Mistakes to Avoid
After going through the process, there are several mistakes I would avoid if I were doing another old RV interior painting project.
Skipping the Cleaning
This is one of the biggest mistakes.
Paint needs a clean surface.
Even if the walls look reasonably clean, old RV interiors can have oils and residue that are difficult to see.
Skipping Primer
If you are dealing with glossy, vinyl, laminate, stained, or otherwise difficult surfaces, the correct primer can be extremely important.
Do not assume that ordinary wall paint will automatically bond to every RV surface.
Painting Over Loose Material
If the existing wall covering is peeling or bubbling, painting over it will not make the underlying problem disappear.
Repair unstable areas first.
Applying One Extremely Thick Coat
A thick coat may seem like a shortcut, but it can create drips, uneven coverage, and longer drying times.
Controlled coats generally give you more control over the final finish.
Rushing Between Coats
If the first coat has not dried properly, adding another coat too soon can cause problems.
Follow the manufacturer’s recoat instructions.
Ignoring Water Damage
This is perhaps the most important mistake to avoid.
If you discover staining, bubbling, swelling, or other signs of moisture damage, investigate the cause before painting.
Using the Wrong Roller
A roller designed for a heavily textured wall can leave unnecessary texture on a smooth RV panel.
Choose your tools based on the surface.
Forgetting the Small Details
Edges around windows, doors, cabinets, trim, and ceiling lines can make a major difference to the finished appearance.
Take your time around these areas.
How Long Does It Take to Paint an Old RV Interior?
There is no single answer because RV sizes and wall conditions vary considerably.
A small RV with relatively clean walls may take significantly less time than a larger older RV that needs extensive cleaning and repairs.
I would break the project into several stages rather than thinking of it as one single painting job.
Preparation can take a substantial amount of time.
That includes cleaning, removing accessories, repairing imperfections, sanding, protecting surfaces, and priming.
The actual painting may be faster, but you still need to allow enough time between coats.
Then there is the drying and curing period.
If you are doing the project yourself, I would rather plan for extra time than create pressure to finish everything in one day.
Can You Paint an RV Interior in a Weekend?
It is possible for some smaller projects, but I would not make a weekend deadline the priority.
If the walls are already in good condition and require minimal preparation, you may be able to make significant progress in a weekend.
An older RV that needs substantial cleaning, repairs, sanding, and priming may require considerably more time.
The condition of the walls matters more than the calendar.
If you rush preparation because you want to finish by Sunday evening, you may spend much longer fixing problems later.
Is Painting an Old RV Interior Worth It?
For me, painting is one of the most worthwhile ways to refresh an older RV interior.
It can completely change the atmosphere without requiring you to replace every cabinet, countertop, wall panel, and piece of furniture.
The biggest benefit is visual.
A dated interior can suddenly feel brighter, cleaner, and more modern.
But there is also something satisfying about taking an older space that feels tired and giving it a fresh identity.
You do not necessarily need a huge renovation budget to make an RV feel more comfortable.
Sometimes a carefully chosen paint color and a properly prepared wall are enough to make you excited about using the space again.
What I Would Do Differently Next Time
If I were starting another old RV painting project, I would put even more emphasis on planning before opening the paint.
I would spend extra time identifying which walls actually need repair, deciding which accessories should come off, testing the paint color under different lighting conditions, and making sure I had all the necessary supplies before starting.
I would also avoid trying to accomplish too many other renovation projects at the same time.
It is easy to start thinking about painting the walls and suddenly decide that the cabinets, ceiling, flooring, countertops, curtains, and furniture all need to be changed too.
That can turn a manageable project into a much bigger one.
There is nothing wrong with improving the RV gradually.
Finish one project properly before moving on to the next.
My Final Advice for Painting an Old RV
Painting the interior walls of an old RV is not difficult because the actual painting technique is complicated.
The challenge is working with an older, smaller, more unusual space and making sure the surface underneath the paint is ready for a new finish.
If you remember nothing else from this guide, remember these steps:
- Inspect the walls before starting
- Find and address moisture problems
- Clean away years of dirt and residue
- Repair damaged areas
- Lightly prepare glossy surfaces
- Use a suitable bonding primer
- Choose durable interior paint
- Test your color before committing
- Use the right roller and brushes
- Apply controlled coats
- Allow enough drying time
- Inspect the finished walls in natural light
- Keep leftover paint for future touchups
- Give the paint enough time to cure
- Maintain the walls with gentle cleaning
The preparation may not be the most exciting part of an RV renovation, but it is what gives you the foundation for a finish that looks good and lasts.
When you step back and see the completed interior, the difference can be remarkable. What once looked like an outdated RV can feel brighter, cleaner, and much more like a space you actually want to spend time in.
For me, that is what makes these smaller renovation projects worthwhile. You do not always need to replace everything to make an old RV feel new again. Sometimes the biggest transformation starts with something as simple as giving the walls a fresh coat of paint and taking the time to do the job properly.
If you are planning your own RV renovation, start with the condition of the walls rather than the paint color. Once the surface is clean, stable, repaired, and properly primed, the rest of the project becomes much easier to control.
And when the final coat has dried and the RV is put back together, you will be able to appreciate the difference that all that preparation made.