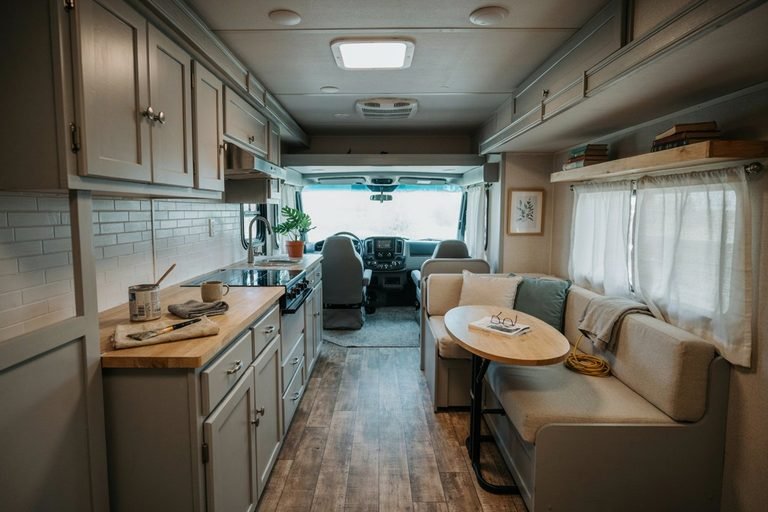
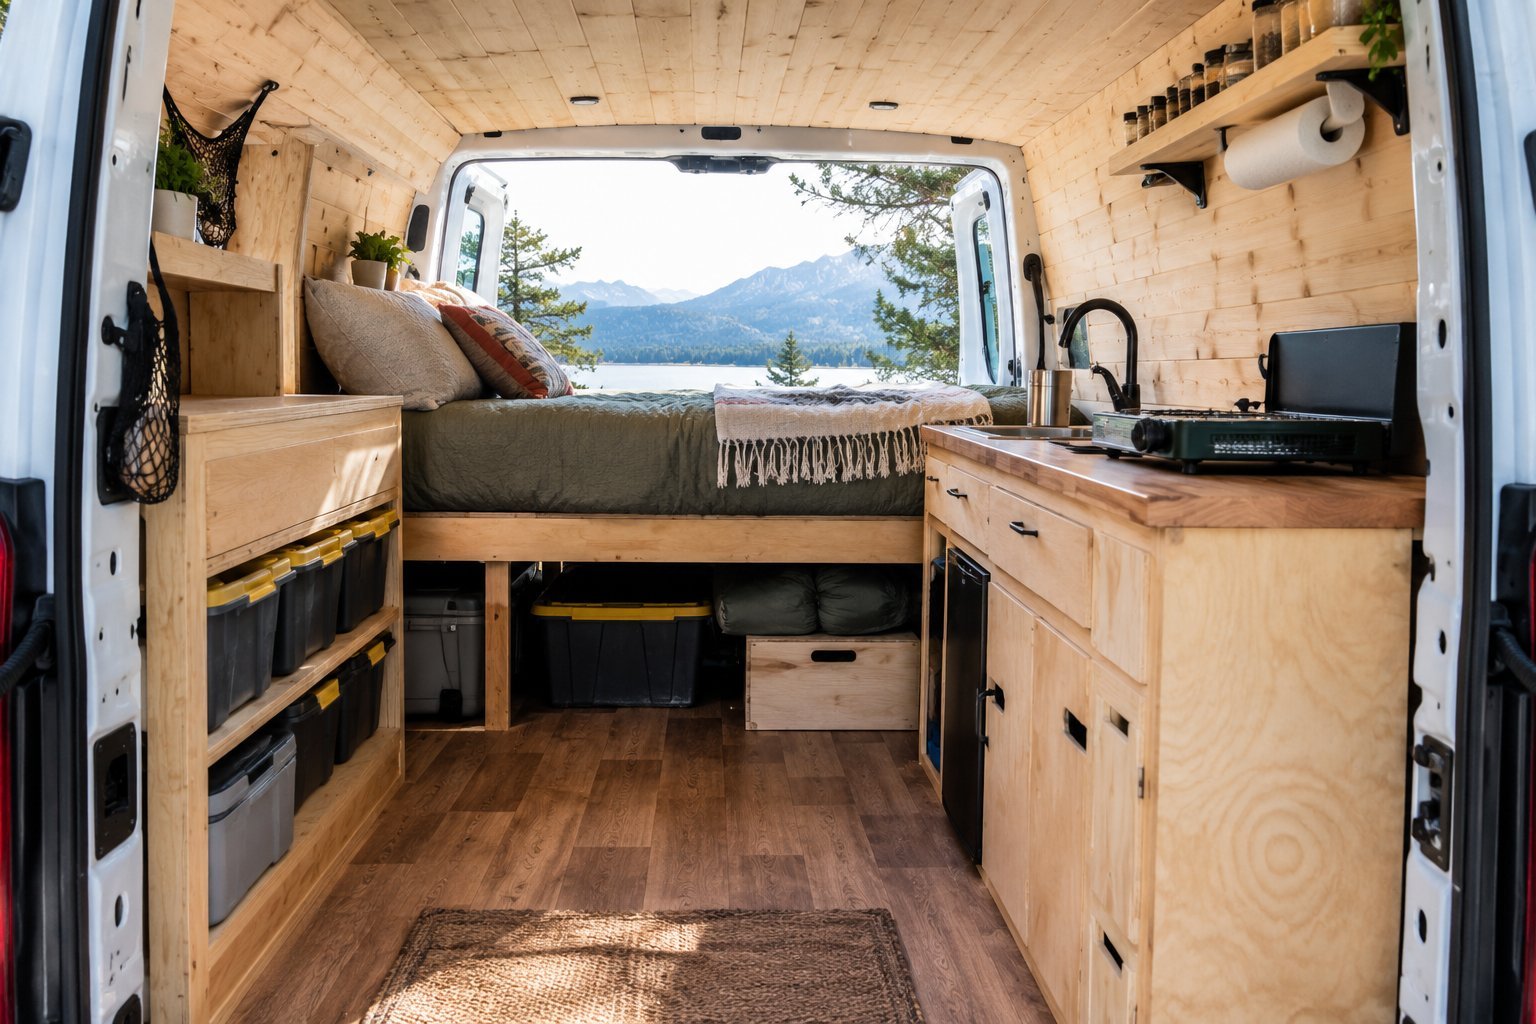
Cheap DIY Campervan Conversion Guide
A campervan conversion can get expensive very quickly when you start looking at finished builds, custom cabinets, electrical systems, kitchen setups, and all the little accessories that seem impossible to live without.
When I started looking at ways to keep a campervan conversion affordable, I realized that the biggest savings came from making a plan before buying anything.
A cheap campervan does not have to feel unfinished or uncomfortable. With the right layout, secondhand materials, simple storage ideas, and a realistic list of what you actually need, it is possible to create a practical space without spending a fortune.

I prefer putting money into the parts that affect safety, comfort, and everyday use while finding cheaper solutions for things that do not need to be complicated.
In this guide, I’ll walk through the approach I use for planning an affordable campervan conversion, choosing a suitable van, setting a realistic budget, and deciding which projects are worth doing yourself.
The goal is a simple camper that works well on the road without turning the conversion into an endless expensive project.
Start With a Realistic Campervan Conversion Budget
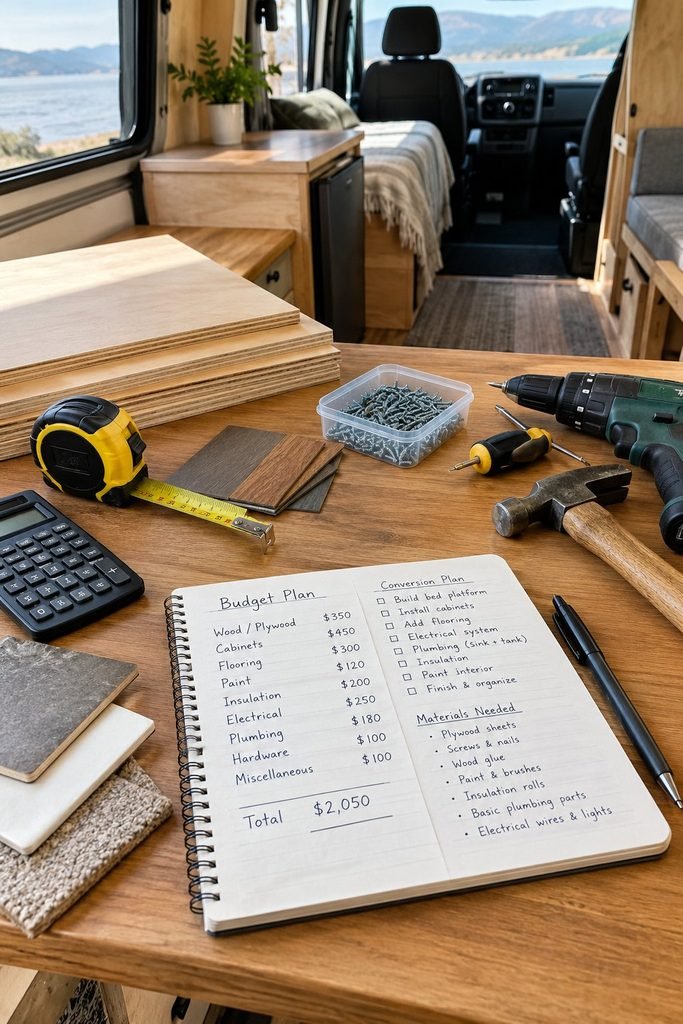
Before buying materials, I like to work out the total amount I can realistically spend on the conversion.
This sounds obvious, but it is one of the easiest parts of a DIY build to overlook. A few inexpensive purchases can quickly turn into hundreds of dollars once you start adding plywood, insulation, flooring, wiring, lights, storage hardware, paint, mattresses, curtains, and camping equipment.
I find it much easier to divide the budget into separate categories rather than treating the conversion as one large expense.
A basic budget can include:
Van purchase: Your starting vehicle and any immediate repairs.
Insulation: Insulation material, reflective layers, adhesive, and sealing products.
Flooring: Plywood or another suitable subfloor and the finished flooring material.
Walls and ceiling: Plywood, panels, trim, fasteners, and finishing materials.
Bed: Mattress, bed frame, hinges, brackets, or storage components.
Electrical: Battery, wiring, fuses, lights, switches, and charging equipment.
Kitchen: Countertop, storage, water containers, cooking equipment, and a simple sink if needed.
Storage: Cabinets, drawers, shelves, bins, hooks, and other organization systems.
Ventilation: Roof vent, window ventilation, fans, or other airflow solutions.
Comfort: Curtains, bedding, cushions, rugs, and small interior items.
Tools: Any tools you do not already own.
I also leave a little money aside for unexpected costs.
That part matters because an older van can easily reveal problems once you begin removing panels or flooring. You may discover rust, damaged wiring, leaks, worn seals, or other repairs that were not obvious when you bought the vehicle.
I would rather have money available for those problems than spend the entire budget on interior upgrades.
Choose the Right Van Before Thinking About the Interior
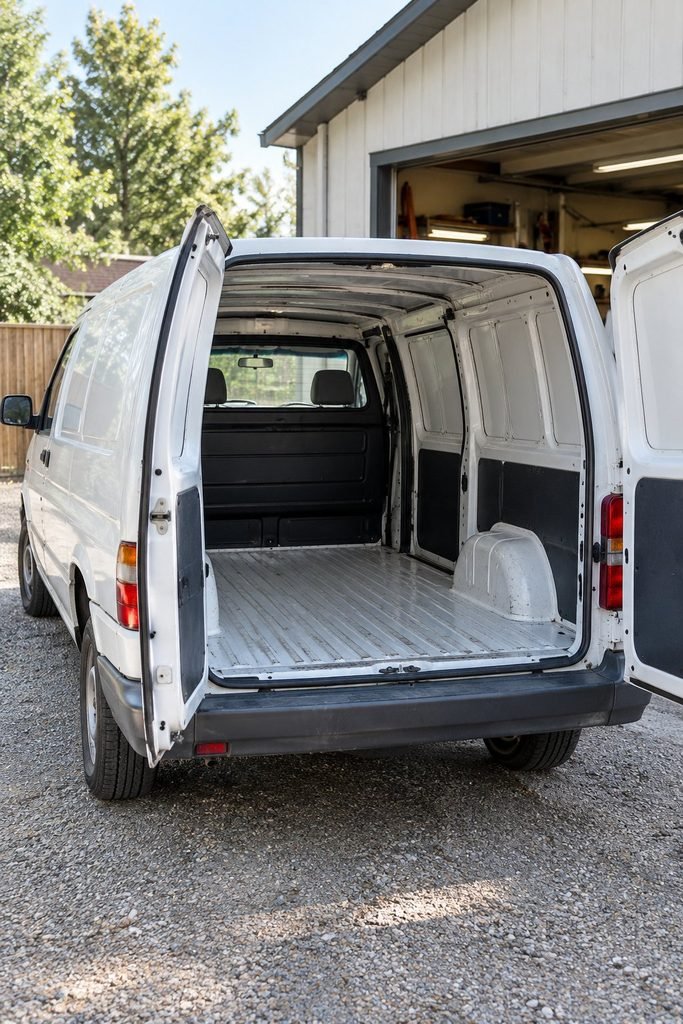
The cheapest conversion is not always the cheapest van.
A vehicle that looks like a bargain can become expensive if it needs major mechanical work, has serious rust, or requires constant repairs.
When looking at a van for a DIY conversion, I pay attention to the condition of the vehicle before getting excited about the interior possibilities.
Check the body carefully for rust, previous accident repairs, water leaks, damaged doors, and signs of poor repairs.
The mechanical condition matters even more.
Look at the engine, transmission, brakes, tires, suspension, cooling system, and electrical system. If you are not confident checking these yourself, paying a mechanic for an inspection can save you from a much larger expense later.
I also measure the interior before making any conversion plans.
A van can look surprisingly spacious from the outside but feel completely different once you start planning a bed, kitchen, storage, and walking space.
Measure the length, width, and height of the usable interior.
Pay attention to wheel arches because they can affect where your bed, cabinets, or storage boxes can sit.
I also recommend measuring the rear and side doors. Getting large pieces of furniture or equipment inside becomes much easier when you know exactly what will fit through the openings.
Decide How You Actually Plan to Use the Camper
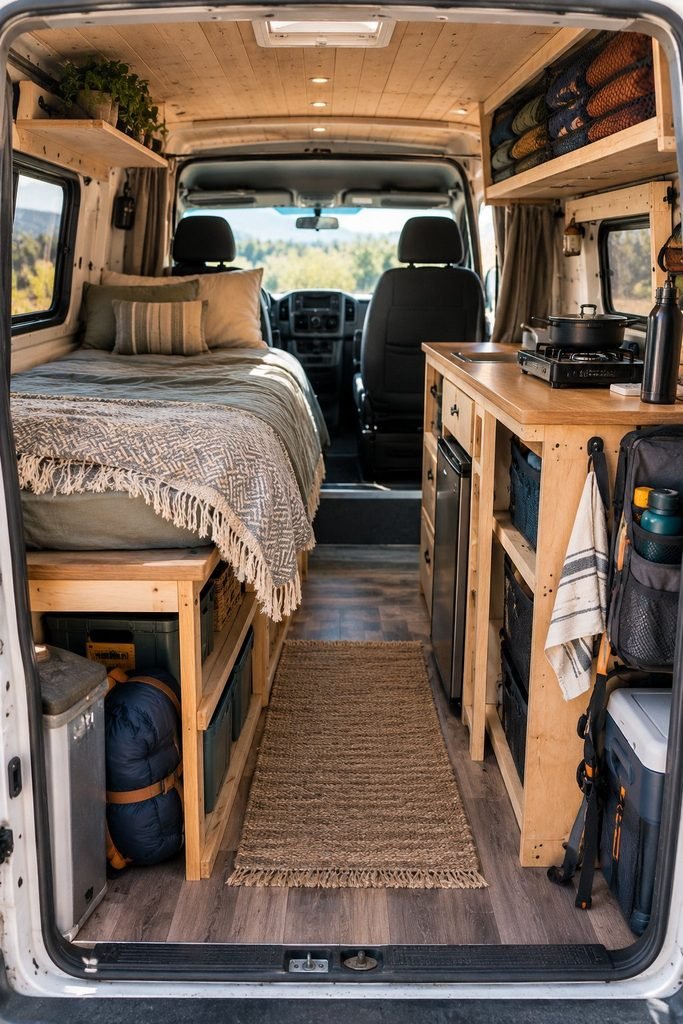
One of the biggest money saving decisions is figuring out what you actually need.
A campervan used for weekend trips does not need the same setup as one designed for several months of full time travel.
I would start by asking a few practical questions.
How many people will sleep inside?
Will you cook every day?
Do you need an indoor shower?
Will you work from the van?
Do you need a refrigerator?
How much clothing and equipment will you carry?
Will you camp mainly in warm weather or colder conditions?
Will you stay at campsites with electricity or spend most nights off grid?
Your answers determine where your money should go.
For example, someone who mostly takes short weekend trips may be perfectly comfortable with a simple bed, portable cooking setup, water containers, basic lighting, and several storage boxes.
Someone living in the van for months at a time may need better insulation, a larger electrical system, more water storage, better ventilation, and a more permanent kitchen.
I try not to build around what looks impressive in other people’s campervans.
Build around what you will actually use.
That approach can save a surprising amount of money.
Plan the Layout Before Buying Materials
I would not start cutting plywood until the layout is decided.
Even a simple sketch can prevent expensive mistakes.
Draw the van from above and mark the major areas first.
Start with the bed because it usually takes up the largest amount of space. Then decide where storage, cooking equipment, water, electrical components, and seating will go.
Think about how you will move around the van when everything is installed.
A layout can look great on paper but become frustrating when you realize you cannot open a cabinet without blocking the walkway or cannot access your storage without moving the bed.
I like to keep frequently used items within easy reach.
Things such as cooking equipment, water, clothing, shoes, and everyday supplies should not be buried underneath everything else.
For a budget build, simple furniture is usually easier to work with than complicated custom cabinetry.
A basic plywood platform with storage underneath can be much more practical than a large built in bedroom structure.
The same applies to kitchen storage.
Simple shelves, crates, drawers, and removable boxes can give you plenty of useful storage without requiring advanced woodworking skills.
Save Money by Keeping the Build Simple
One thing I have learned with DIY projects is that every extra feature creates another cost.
A simple campervan conversion can be surprisingly comfortable without trying to recreate a luxury motorhome.
You do not necessarily need expensive built in appliances, elaborate cabinetry, a huge electrical system, or complicated plumbing.
For example, instead of building a permanent kitchen immediately, you could start with a compact countertop and portable cooking equipment.
Instead of installing a complicated water system, you could begin with removable water containers.
Instead of building drawers throughout the entire van, storage boxes can provide an inexpensive alternative.
This also makes the conversion easier to change later.
That is something I appreciate about a budget build. You can live with the setup for a while and discover what actually works before spending more money on permanent upgrades.
Buy Materials With the Whole Build in Mind
Another way I keep costs under control is by choosing materials based on their purpose rather than simply buying whatever looks nicest.
Plywood is useful because it can be cut into many different components, including walls, shelves, bed platforms, cabinet faces, and storage areas.
You also do not need every surface to have an expensive finish.
Some areas can remain simple if they are functional and protected properly.
I also look at what I already have before buying anything.
Old storage containers, unused shelves, leftover timber, fabric, hardware, and household organization products can sometimes be repurposed for the conversion.
Secondhand materials can also be useful when they are in good condition.
The important part is checking everything carefully before installing it. Saving money is not worth bringing damaged, unsafe, moldy, or unsuitable materials into the van.
Know Where Not to Cut Costs
Saving money is important, but I would never treat every part of the conversion as an opportunity to buy the cheapest option.
Some areas deserve more attention because a mistake can affect safety, reliability, or the long term condition of the van.
Electrical components are one example.
If you are installing a permanent electrical system, use appropriately rated components, proper fusing, suitable cable sizes, and secure connections. If you are unsure about electrical work, getting professional help is worth considering.
Ventilation is another area I would not ignore.
A small enclosed vehicle can become hot, humid, and uncomfortable surprisingly quickly. Good airflow helps with condensation and everyday comfort.
The same applies to securing heavy equipment.
Batteries, water containers, storage boxes, and furniture should not simply be placed inside the van and left unsecured. Everything needs to remain stable while the vehicle is moving.
A cheap conversion should mean simpler, not unsafe.
What I Would Build First
If I were keeping the conversion budget as low as possible, I would focus on the parts that make the van immediately usable.
My basic order would be:
- Inspect and repair the van
- Clean and prepare the interior
- Plan the layout
- Install insulation where appropriate
- Build the floor
- Add basic wall and ceiling finishes
- Build the bed
- Create simple storage
- Add basic ventilation
- Install the electrical system if needed
- Add a simple cooking area
- Add comfort items after the main build is finished
This order helps prevent spending money on decorative items before the important parts are complete.
I also like leaving the small finishing touches until the end because you learn a lot about the space while building it.
Once you actually use the van, you may discover that the shelf you planned is too high, the storage box is difficult to reach, or the kitchen needs to be moved slightly.
A flexible build gives you room to make those changes without tearing apart an expensive interior.
Building the Campervan on a Budget
Once the layout and budget are sorted, the actual conversion becomes much easier to manage. I like to work from the inside out and finish one stage properly before moving on to the next. This keeps the van organized while you work and makes it easier to notice problems before they get covered by walls or furniture.
For a cheap campervan conversion, the goal is not to make every surface perfect. The goal is to create a space that is comfortable, practical, secure, and easy to maintain.
Start With a Thorough Clean
Before installing anything, I would strip out anything that does not belong in the finished build.
Remove old panels, damaged flooring, unnecessary brackets, loose trim, and anything else taking up space. Then vacuum and wash the interior properly.
This is also the stage where I would inspect the metal floor and walls carefully.
Look for rust, holes, water damage, old wiring, and areas where water may be entering. It is much easier to deal with these problems while the van is empty.
I would not rush this stage just because it is not exciting. Once the insulation, flooring, and furniture go in, access becomes much more difficult.
Affordable Campervan Insulation
Insulation is one area where I would spend some time researching before buying materials because the right approach depends on your climate, van construction, and budget.
The purpose is not simply to make the van warmer. Good insulation can also help with temperature control, condensation, and overall comfort.
Before installing insulation, make sure the interior is dry and any leaks have been dealt with.
You can then work around the walls, ceiling, and other suitable areas while keeping doors, ventilation points, wiring routes, and drainage areas accessible.
I would avoid filling every available gap without thinking about moisture. A campervan is a small enclosed environment, and trapped moisture can eventually create bigger problems.
For a budget build, you do not necessarily need to turn the entire van into a highly engineered insulated box. Concentrate on the areas that will make the biggest difference for how you actually use the vehicle.
Build a Simple Campervan Floor
The floor gets a lot of abuse, so I prefer keeping it straightforward and durable.
Start by making sure the existing floor is clean, dry, and in good condition.
A plywood subfloor can provide a solid surface for the finished flooring while also giving you something suitable to attach certain interior components to.
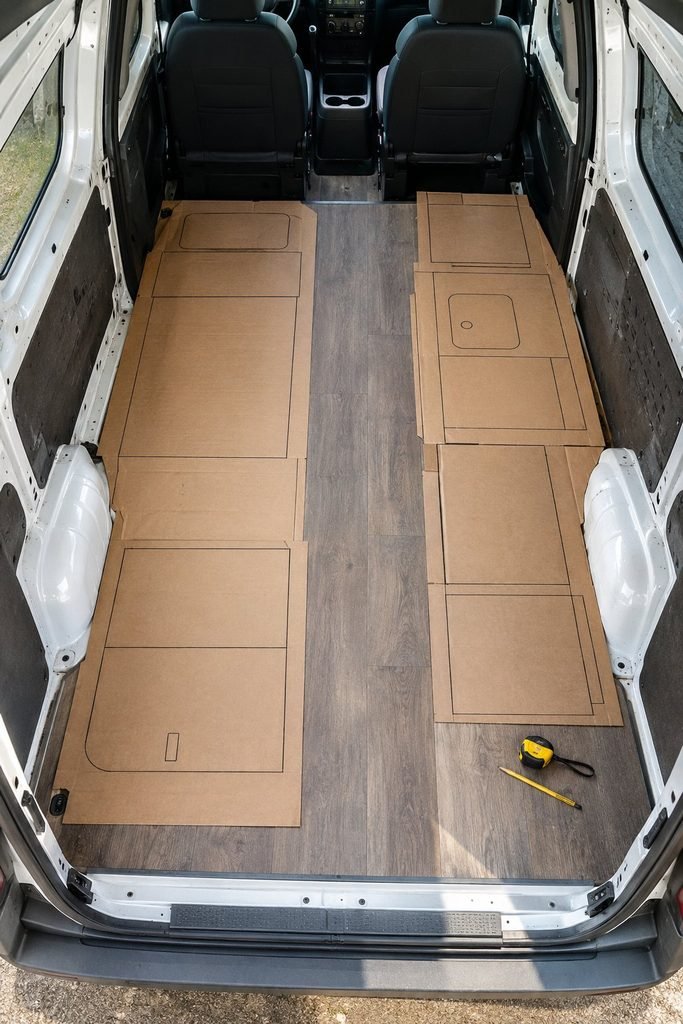
Before cutting anything, make a template of the floor.
Cardboard can be useful here because it allows you to work out awkward corners and wheel arch shapes before wasting plywood.
Once the template fits properly, transfer the shape to the plywood and cut it carefully.
For the finished surface, vinyl flooring can be a practical choice for a budget conversion because it is relatively easy to clean and works well for everyday camper use.
I would choose something that can handle dirt, water, and regular foot traffic rather than choosing flooring purely because it looks attractive.
Keep the Walls Simple
You do not need complicated wall panels to make a campervan feel finished.
Simple plywood panels can create a clean base for the interior while giving you places to attach shelves, hooks, trim, and other lightweight components.
Before fixing the panels permanently, mark where important wiring, supports, and other components will sit.
This is one of those small planning steps that can save a lot of frustration later.
I also like keeping access to important areas whenever possible.
If something needs servicing later, you do not want to remove half the interior just to reach it.
A simple wall finish can actually make the van feel more spacious because it avoids filling the interior with bulky furniture.
Build the Bed Before Most of the Furniture
The bed is usually the most important piece of furniture in a campervan, so I would build this early.
For a cheap conversion, a raised platform with storage underneath is one of the simplest options.
The space underneath can hold clothing, cooking equipment, camping gear, shoes, water containers, tools, and other items that would otherwise clutter the living area.
Another option is a folding or sliding bed if you need more daytime floor space.
I would choose the design based on how you expect to use the van rather than copying a complicated conversion from another build.
Before permanently fixing the bed, test the sleeping position.
Lie down on the mattress and check whether you have enough length and width. Sit upright where possible and make sure the ceiling height feels comfortable.
Small measurements can make a huge difference to how enjoyable the finished van is.
Use Simple Storage Instead of Expensive Cabinets
Storage is where I think a budget campervan can really save money.
You do not need a traditional kitchen cabinet for every item.
Plastic storage boxes, stackable containers, fabric organizers, crates, baskets, and simple plywood shelves can all be useful.
I like assigning different storage areas to different categories.
One area can hold clothing, another cooking equipment, another tools, and another outdoor gear.
This makes it much easier to keep track of everything while traveling.
Open shelves can also be useful for items you reach for frequently, while closed boxes work better for things you do not need every day.
If you build cabinets, keep them simple.
A basic rectangular cabinet is easier to measure, cut, assemble, and repair than complicated curved furniture.
Make Use of Vertical Space
Small campervans often have more usable space than they initially appear to have because people focus heavily on floor space.
Walls and doors can provide additional storage opportunities.
Lightweight shelves, hooks, hanging organizers, and small compartments can help keep everyday items off the floor.
I would be careful about putting too much weight high up, though.
Heavy objects should stay low and should be secured properly so they do not become dangerous while driving.
The best storage system is the one that keeps the things you use most accessible without making the van feel crowded.
Create a Simple Kitchen
A campervan kitchen does not have to look like a residential kitchen.
For my budget approach, I would start with the basics.
You need a safe place to prepare food, somewhere to store cooking equipment, a way to cook, and access to water.
A simple countertop can be built from plywood or another suitable material.
A portable stove can eliminate the need for a complicated built in cooking system, depending on your setup and local safety requirements.
For water, removable containers can be much cheaper and easier to maintain than a large permanent plumbing system.
You can always upgrade later if your travel style changes.
The important thing is keeping cooking equipment secure when the vehicle is moving and making sure any fuel or cooking system is installed and used according to its safety requirements.
Do Not Overbuild the Electrical System
Electrical systems can become one of the most expensive parts of a campervan conversion.
Before buying batteries, solar panels, inverters, lights, and other equipment, work out what you actually need to power.
Make a list of every device you expect to use and estimate its energy requirements.
You may discover that your needs are much smaller than you initially thought.
For a simple setup, you might only need lighting, phone charging, a small fan, and a few other low power devices.
If you plan to run larger appliances, your electrical requirements will be very different.
This is an area where I would prioritize proper planning over simply choosing the cheapest components.
Use correctly rated wiring and protection devices, secure all connections, and keep electrical components protected from damage and moisture.
If you are unfamiliar with vehicle electrical systems, getting qualified help is a much better option than experimenting with wiring just to save money.
Add Ventilation Early
Ventilation is easy to overlook when you are concentrating on furniture and decoration.
Once you start sleeping, cooking, and spending time inside the van, you quickly notice how important airflow is.
A small fan or properly planned ventilation system can make the interior much more comfortable.
Ventilation can also help manage condensation.
I would plan ventilation before finishing the ceiling because installing it afterward can mean cutting through finished materials.
Think carefully about where air will enter and leave the van and how the system will work when you are sleeping inside.
Use Secondhand Items Carefully
Buying secondhand can make a major difference to the overall cost.
Furniture hardware, storage boxes, countertops, camping equipment, curtains, cushions, and other suitable items can sometimes be found cheaply.
I would be more cautious with safety critical components.
For anything involving electricity, gas, structural support, or vehicle safety, I prefer knowing exactly what I am installing and whether it is suitable for the job.
Secondhand furniture can also be modified.
A small cabinet that is the wrong size might become useful after removing a section or changing the doors.
The trick is to look at an item for what it could become rather than what it was originally designed for.
Do Not Forget Weight
One mistake that can happen during a budget conversion is adding too many materials simply because they are inexpensive.
A few pieces of plywood do not feel heavy individually, but the total weight can become significant once you add furniture, batteries, water, cooking equipment, tools, clothing, food, and camping gear.
Before loading the van, consider the vehicle’s permitted weight and payload limits.
Keep heavy items low and secure them properly.
This is another reason I prefer simple furniture.
You can create useful storage without filling the entire van with heavy cabinets.
Make the Interior Comfortable Without Spending Much
Once the main construction is finished, small additions can make the biggest difference.
A comfortable mattress, decent bedding, simple curtains, warm lighting, and a few practical storage solutions can make the van feel much more inviting.
You do not need expensive decorations.
I would rather spend money on a mattress that I will use every night than on decorative items that take up valuable space.
A neutral interior can also make a small van feel larger.
Light colored walls, simple flooring, and limited visual clutter can make the space feel cleaner and more open.
Test the Van Before Calling the Conversion Finished
This is one of the most useful things I would recommend.
Do not wait until your first long road trip to discover that the layout does not work.
Take the van out for a short trip.
Cook inside it.
Sleep in it.
Use the storage.
Charge your devices.
Try getting dressed inside.
Move things around.
After a few days, you will notice problems that were impossible to see while the van was sitting in the driveway.
Maybe the kitchen storage is difficult to reach.
Maybe the bed needs better ventilation.
Maybe you have too many storage boxes.
Maybe something rattles while driving.
Those small discoveries are exactly what help turn a basic DIY conversion into a practical camper.
Spend Money on Improvements After You Have Used the Van
I would leave some of the conversion budget untouched until after the first few trips.
Living with the finished setup tells you much more than looking at other people’s builds online.
Once you know what you actually need, you can spend money on upgrades that solve real problems.
You might decide you need better lighting, additional storage, a larger battery, improved ventilation, a different mattress, or a more permanent kitchen.
That approach prevents you from spending hundreds on features that sound useful but rarely get used.
A cheap campervan conversion does not have to be completed all at once.
It can grow with you.
That is one of the biggest advantages of doing the work yourself. You can build the essentials, use the van, learn what works, and improve it gradually without taking on the cost of a complete luxury conversion all at once.
Finishing Your Cheap DIY Campervan Conversion
By the time the main structure is finished, the van should already be functional. Part 3 is where I would focus on the details that make the camper easier to live in, easier to maintain, and more enjoyable on longer trips. I would still keep the same rule I followed throughout the build: spend money where it improves safety or everyday comfort, and keep everything else as simple as possible.
Make a List of What You Actually Need
Before buying the final accessories, I like to make a simple list based on how I plan to use the camper.
Think about sleeping, cooking, eating, cleaning, storage, charging devices, ventilation, lighting, and staying organized.
For example, you may need:
A comfortable mattress
Basic bedding
Cooking utensils
Plates and bowls
Water containers
Food storage containers
A small trash bin
Cleaning supplies
LED lighting
Charging points
Curtains or window coverings
A first aid kit
A fire extinguisher
Basic tools
Outdoor camping equipment
Keeping this list practical helps prevent the common problem of filling a small camper with things that rarely get used.
Add Simple Lighting
Good lighting can make a surprisingly big difference in a small camper.
I prefer using several small lights instead of relying on one bright light in the middle of the van.
A light near the bed is useful at night, while another near the kitchen or seating area makes cooking and preparing food easier.
LED lights are a practical choice because they generally use relatively little power.
If you are installing permanent lighting, plan the wiring before the walls and ceiling are completely finished.
For an extremely simple conversion, rechargeable lights can also work, especially if you do not want to install a complicated electrical system immediately.
Create a Comfortable Sleeping Area
A good sleeping setup is one of the places where I would spend money if the budget allows.
You can build a beautiful camper interior and still have a miserable trip if the bed is uncomfortable.
The mattress should fit the platform properly without leaving large gaps around the edges.
If the bed folds away during the day, make sure the mechanism is easy enough to use regularly. A clever design that takes ten minutes to assemble every morning can become frustrating very quickly.
I also like having somewhere to store bedding during the day if the bed converts into seating.
A simple storage compartment underneath can work well.
Organize the Kitchen Around Your Routine
Once you have used the camper a few times, you will quickly discover which kitchen items you reach for constantly.
Keep those items close.
Cooking utensils, plates, cups, spices, and everyday ingredients should not be hidden underneath several other containers.
I also recommend keeping food separate from cleaning products and other potentially messy equipment.
Small containers can make a big difference here.
Instead of having loose packets and bottles moving around while you drive, use containers that can be closed and secured.
This keeps the kitchen cleaner and makes it easier to find things.
Create a Practical Water Setup
A simple water system can be enough for many budget campers.
Separate containers for fresh water and wastewater can keep the setup inexpensive and easy to understand.
The amount of water you need depends heavily on how you travel.
Someone using campsites regularly may need much less onboard water than someone staying off grid for several days.
I would avoid carrying more water than necessary because water is heavy and contributes to the overall weight of the vehicle.
Keep containers secured so they cannot move while driving.
Think About Condensation
Condensation is one of those problems that may not become obvious until you actually sleep inside the camper.
Warm, humid air from breathing, cooking, and wet clothing can meet colder surfaces and create moisture.
Good ventilation is one of the most useful ways to manage this.
I also avoid bringing unnecessary wet items into the sleeping area.
If clothing or towels become damp, give them a way to dry properly instead of leaving them piled up inside the van.
Checking the interior regularly also helps you catch moisture problems before they become serious.
Keep Everything Secure While Driving
A campervan can feel completely different once it starts moving.
Cupboards rattle.
Containers slide.
Doors open.
Loose equipment moves around.
Anything that can move should have a way of staying in place.
Use latches, straps, brackets, storage bins, or other appropriate methods depending on the item.
Heavy objects deserve particular attention.
Batteries, water containers, cooking equipment, tools, and furniture should be properly secured.
I would take the van for a short drive after completing each major section and listen for rattles or movement.
It is much easier to fix these issues at home than after arriving at a campsite.
Keep a Small Repair Kit in the Van
One thing I would always leave room for is a basic repair kit.
You do not need a huge workshop.
A few useful tools and supplies can handle many of the small problems that happen during normal travel.
I would consider carrying items such as:
Basic screwdrivers
Pliers
Adjustable wrench
Socket set
Electrical tape
Cable ties
Spare fuses
A flashlight
Work gloves
A small hammer
A tire pressure gauge
Basic repair materials appropriate for your vehicle
The exact tools depend on the van and the type of travel you do.
The point is to have enough to deal with simple problems without turning the camper into a storage room for tools.
Make a Simple Safety Checklist
Before taking a newly converted camper on a long trip, I would go through the entire vehicle carefully.
Check that furniture is secure.
Check that doors and storage compartments close properly.
Check that electrical connections are protected.
Check that ventilation works.
Check that cooking equipment is safely installed and stored.
Check tire condition and pressure.
Check fluid levels.
Check that emergency equipment is accessible.
If you have installed gas equipment, electrical equipment, or other systems that require specialist installation or inspection, follow the relevant manufacturer’s instructions and local requirements.
This is one part of a DIY build where saving money should never mean skipping basic safety.
Do a Weekend Test Trip
I strongly recommend testing the completed camper close to home before committing to a long road trip.
You do not need to travel hundreds of miles.
Find a suitable campsite or safe overnight location and spend a full night using the van exactly as you intend to use it.
Cook your meals.
Sleep in the bed.
Use the storage.
Charge your devices.
Use the bathroom arrangements.
Open and close the cabinets.
Try getting ready in the morning.
Pay attention to what annoys you.
Those little frustrations are valuable information.
Maybe you discover that your shoes have nowhere to go.
Maybe the cooking area is too small.
Maybe you need somewhere to hang wet clothes.
Maybe the mattress is uncomfortable.
Maybe you packed far too much.
A short test trip gives you the opportunity to fix these problems before a longer journey.
Cheap Campervan Upgrades Worth Considering
After living with the basic conversion, there are several upgrades that can be added gradually.
You might add better window coverings for privacy and temperature control.
You could improve the storage system.
You could add a better mattress.
You could upgrade the lighting.
You could install additional ventilation.
You could add a larger electrical system if your travel style requires it.
You could improve the kitchen.
You could add exterior storage if the vehicle and design allow for it.
The important thing is not adding upgrades simply because another camper has them.
Every upgrade should solve a problem you have actually experienced.
That keeps the conversion affordable even after the initial build is finished.
Where I Would Save the Most Money
If I had to reduce the cost of a campervan conversion, I would focus on simplifying the interior rather than cutting corners on important systems.
I would look for secondhand furniture and suitable materials.
I would use simple plywood construction.
I would consider portable equipment before permanently installing everything.
I would reuse storage containers where practical.
I would avoid unnecessary decorative features.
I would buy accessories gradually.
I would also compare prices before buying large quantities of materials because the difference between suppliers can add up quickly.
The biggest savings usually come from deciding what not to build.
Where I Would Spend More
There are a few areas where spending a little more can make sense.
The vehicle itself is important because reliability affects the entire trip.
A comfortable mattress matters because you use it every night.
Good ventilation affects both comfort and moisture management.
Electrical components need to be appropriate for the system.
Safety equipment should be reliable and accessible.
Structural components and anything that secures heavy equipment should also be treated seriously.
I would rather have a simple interior with dependable essentials than an impressive looking camper filled with unnecessary features.
How to Keep the Camper Looking Good on a Budget
You do not need expensive materials to make a small camper feel finished.
I find that consistency makes more difference than price.
Using similar colors, keeping the walls uncluttered, choosing simple storage containers, and avoiding too many different finishes can make the interior look much more organized.
A clean mattress cover, simple curtains, a small rug, and warm lighting can also make a basic build feel much more comfortable.
The key is avoiding clutter.
In a small camper, every item is visible, so organization becomes part of the design.
Keep Improving the Camper as You Travel
One of my favorite things about a DIY campervan is that the conversion does not have to end when the construction is finished.
Your first version is simply the starting point.
After several trips, you will understand how you actually use the space.
You will know which storage areas work, which equipment gets used constantly, and which things you thought you needed but barely touch.
That experience is much more useful than trying to create the perfect camper before you have even spent a night inside it.
Make changes gradually.
Fix the problems that bother you most.
Reuse what you can.
Only buy an upgrade when you know why you need it.
That approach keeps the project affordable and makes the finished camper feel genuinely personal.
Final Thoughts
A cheap DIY campervan conversion does not mean settling for an uncomfortable or poorly planned space. It means being intentional about where your money goes.
Start with a reliable van, create a realistic budget, plan the layout carefully, and build around the way you actually travel.
Keep the furniture simple, use storage intelligently, consider secondhand materials where appropriate, and avoid adding complicated systems simply because they look impressive in other campervans.
The biggest lesson I take from a budget conversion is that you do not need everything at once.
Build the essentials.
Use the camper.
Notice what works.
Notice what does not.
Then make improvements when they are genuinely useful.
That approach can turn a basic van into a comfortable little home on wheels without turning the conversion into a project that consumes your entire budget.