DIY Camper Makeover Ideas for Beginners: Transform Your Camper on a Budget
A camper can feel completely different without spending thousands of dollars on a full renovation. I have found that the biggest changes often come from simple updates such as fresh paint, better lighting, new fabrics, improved storage, and small decorative details that make the space feel more like home.
When I work on a camper makeover, I like to focus on changes that improve both appearance and everyday comfort instead of spending money on things that only look good in photographs. This approach also makes the project much less overwhelming for beginners.
The best part about a budget camper makeover is that you do not need advanced woodworking skills or a huge renovation budget.
A few carefully chosen projects can brighten a dark interior, make a small space feel larger, and give an older camper a much more personal style.
In this guide, I am sharing the DIY camper makeover ideas I would actually consider for a beginner, including where I would spend money, where I would save, and which updates can make the biggest difference.
Start With a Simple Camper Makeover Plan
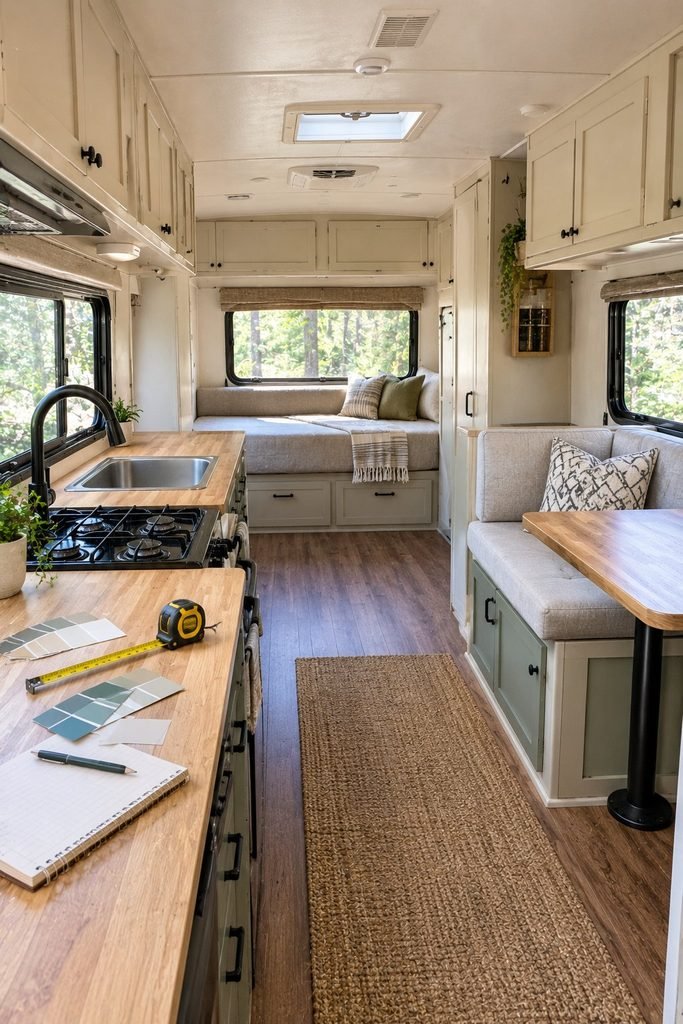
Before buying paint, cushions, decorations, or storage baskets, I recommend spending some time inside the camper and looking at what actually bothers you about the space.
When I plan a camper makeover, I like to separate the problems into three categories: appearance, functionality, and comfort.
Appearance includes things such as outdated cabinets, dark walls, old curtains, worn flooring, and mismatched colors.
Functionality includes poor storage, cluttered countertops, awkward cabinet space, and areas that are difficult to access.
Comfort includes lighting, seating, bedding, temperature control, and the little details that make the camper more enjoyable to spend time in.
This simple approach keeps the makeover focused. Instead of buying random decorations because they look good online, you can spend your budget on improvements that will actually make a difference.
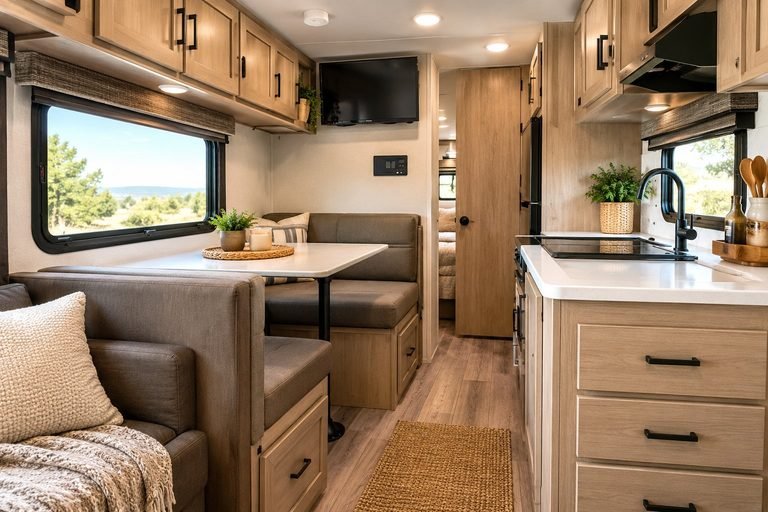
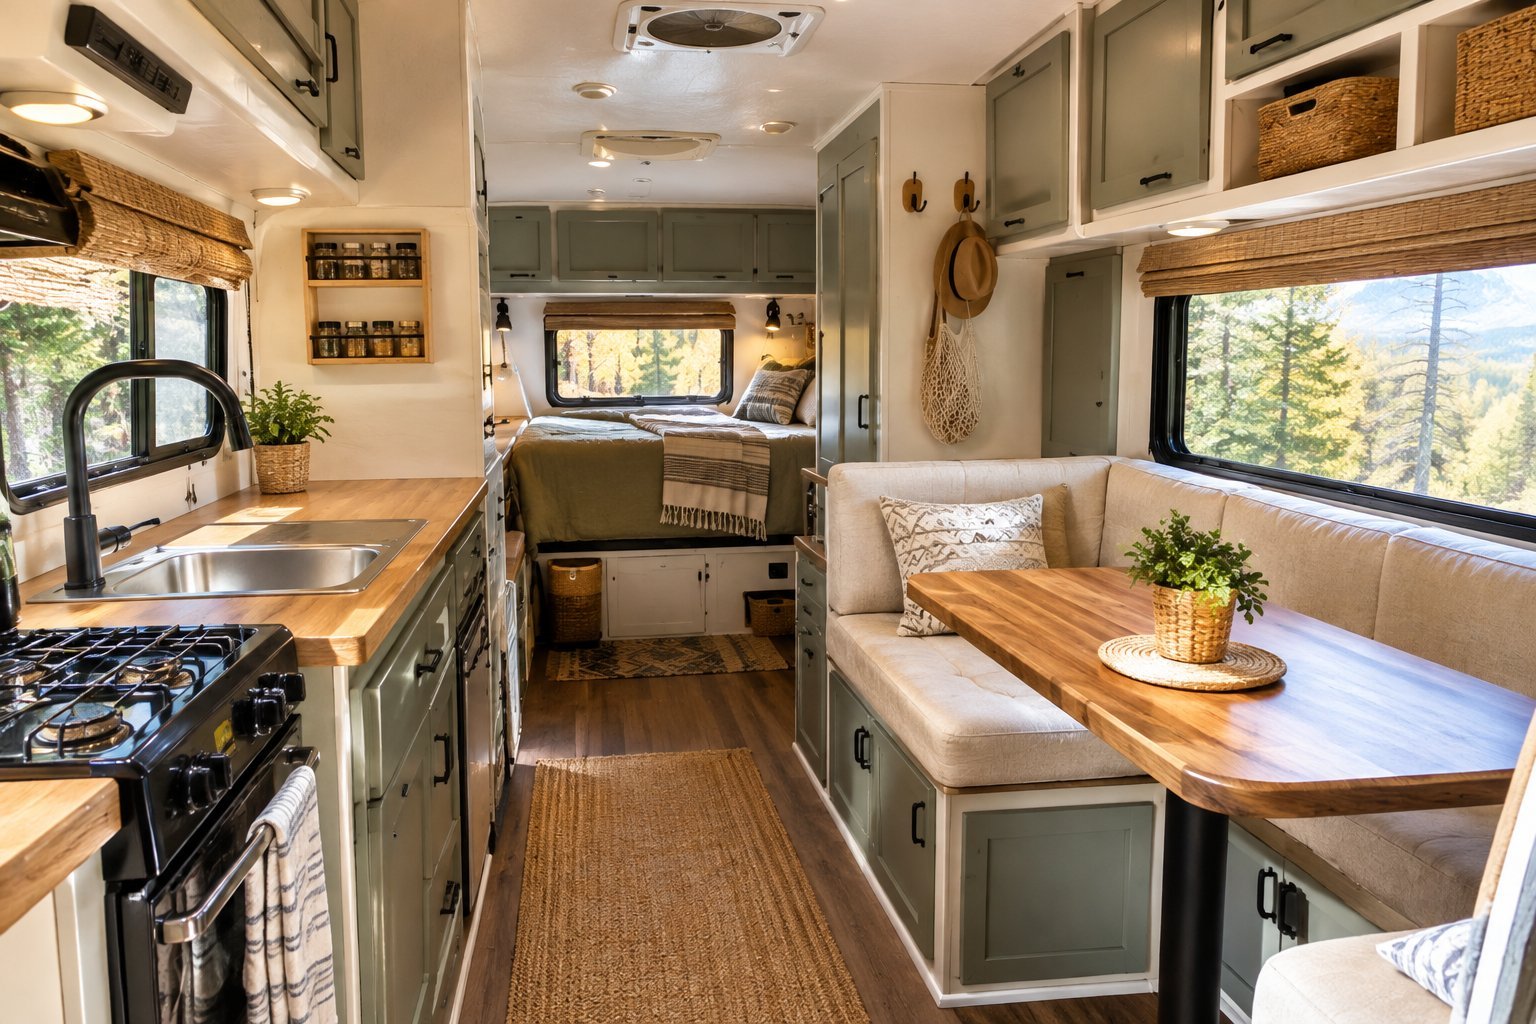
I also recommend choosing a general style before starting. You do not need a complicated design plan. A simple combination such as warm wood and cream, white and natural tones, or neutral colors with a few darker accents is enough to create a cohesive look.
Give the Interior a Fresh Coat of Paint
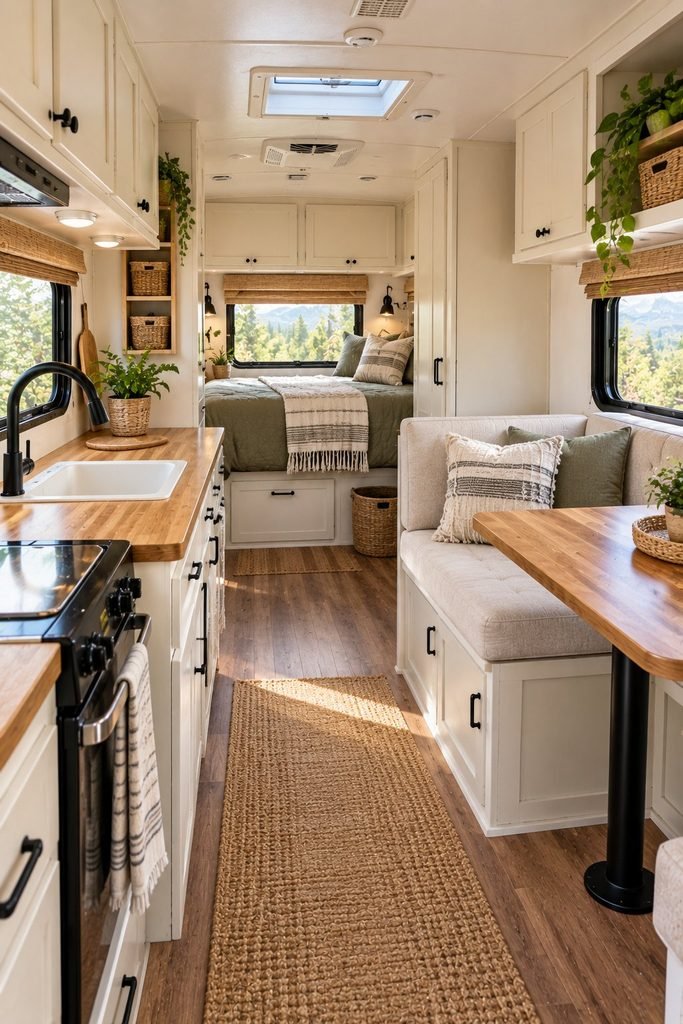
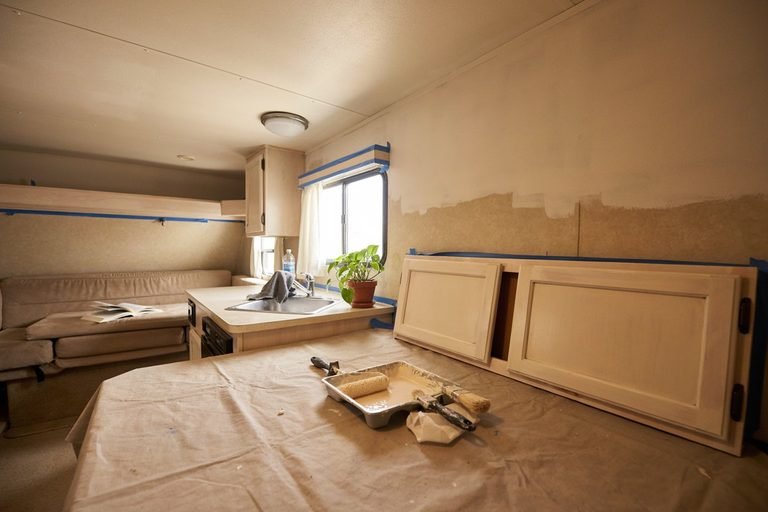
Paint is one of the easiest ways to change the appearance of an older camper, especially when the existing interior feels dark or dated.
I would start with the walls and cabinets that take up the most visual space. Light colors can make a compact camper feel brighter and more open, which is particularly useful when there are only a few windows providing natural light.
White is an obvious choice, but it is not the only option. Soft cream, warm beige, light gray, muted green, and other gentle neutral shades can work beautifully in a camper.
Before painting, clean the surfaces thoroughly and make sure they are suitable for the type of paint you plan to use. Camper interiors can contain laminate, finished wood, vinyl, and other materials that do not always accept paint well without proper preparation.
For cabinets, I would not rush straight into painting. Cleaning, lightly sanding where appropriate, and using the right primer can make a major difference in how durable the finished surface becomes.
I also prefer painting in stages rather than trying to transform the entire camper in one weekend. Removing cabinet doors and working on them separately can make the process easier and help produce a cleaner finish.
Update the Cabinet Hardware
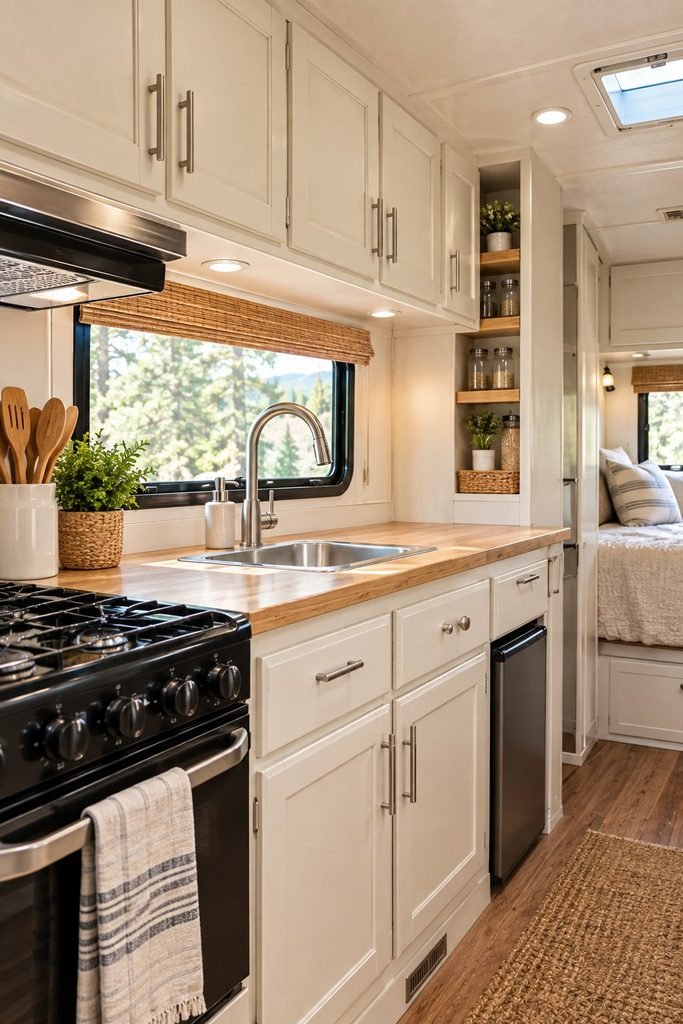
If replacing or repainting the cabinets feels like too much work, changing the cabinet hardware can still create a noticeable difference.
Old handles and knobs can make an otherwise attractive camper feel dated. Replacing them with simple modern hardware is a relatively inexpensive project, and it does not require major construction.
I like hardware that is easy to grip and practical for everyday use. In a camper, appearance matters, but functionality matters just as much because cabinets and drawers are opened constantly while traveling.
Before purchasing new hardware, measure the existing holes carefully. Cabinet pulls often have specific hole spacing, and buying the wrong size can turn a simple project into an unnecessary repair job.
For a budget makeover, this is one of the projects I would prioritize because you can change the overall look without replacing the cabinetry itself.
Replace Old Curtains
Curtains can have a surprisingly large effect on a small camper.
Old curtains often make the interior feel darker and more dated than it actually is. Replacing them with lighter fabric can immediately make the space feel cleaner and brighter.
For a camper, I prefer fabrics that are practical rather than extremely delicate. You want something that can handle regular use and can be cleaned without becoming a major project.
If you already know how to sew, making simple curtains yourself can reduce the cost even further. You can also look for ready made curtains that can be adjusted to fit your windows.
Another option is using simple fabric panels or removable window treatments that allow you to change the look later without committing to a permanent renovation.
I would keep the curtain pattern fairly simple if the rest of the camper already has several visual elements. A neutral curtain can make the space feel larger and allows you to add personality through cushions, rugs, artwork, and other smaller details.
Improve the Camper Lighting
Lighting is one of those changes that can completely alter the mood of a camper without requiring a major renovation.
Many older campers have harsh overhead lighting that works well enough for practical tasks but does not make the interior feel particularly cozy.
I like combining the existing practical lighting with softer accent lighting. Battery powered lights, small rechargeable lamps, and strategically placed LED lighting can add warmth without requiring complicated electrical work.
Under cabinet lighting can also be useful around the kitchen area. It gives you better visibility when preparing food while adding another layer of lighting to the interior.
For beginners, I recommend starting with simple options that do not require modifying the camper’s electrical system. This keeps the project inexpensive and reduces the chance of creating an electrical problem.
The goal is not to fill every corner with lights. A few well placed sources can make a compact camper feel much more comfortable in the evening.
Add a Comfortable Rug
A rug can make a camper feel much less like a vehicle and much more like a small living space.
It can also help visually define different areas inside an open camper. For example, a rug beneath the seating area can make that section feel more intentional, while a smaller washable rug near the kitchen can add warmth and protect the floor from everyday messes.
For a camper, I would choose something lightweight, easy to clean, and appropriately sized for the available floor space.
One mistake I would avoid is buying a rug that is too large. A camper already has limited floor space, so an oversized rug can make the interior feel cramped and become difficult to move around.
A simple neutral rug is also easier to work with if you plan to change your camper’s colors later.
Refresh the Seating Area
You do not necessarily need to replace an entire camper sofa to make the seating area look better.
Sometimes the cushions are structurally fine but simply look tired. New cushion covers, washable throws, and a few comfortable pillows can completely change the appearance.
If the existing upholstery is in reasonable condition, I would consider using fitted covers rather than paying for full reupholstery. This can be especially useful when working with a limited budget because you can change the covers again later if your style changes.
I also like adding a few cushions in different textures rather than using many different patterns. This creates visual interest without making a small space look cluttered.
Comfort should remain the priority. A beautiful seating area is not much use if you cannot comfortably sit there after a long day of driving or exploring.
Make Small Storage Improvements
One of the most valuable parts of a camper makeover is improving storage.
A camper can look beautiful when everything is put away for photographs, but everyday travel quickly exposes storage problems. I would rather spend part of the makeover budget on practical organizers than fill every available surface with decorations.
Start by looking at unused spaces.
The inside of cabinet doors can sometimes hold small organizers. Open shelves can benefit from baskets or bins. Narrow gaps can sometimes accommodate slim storage containers.
I also like using matching or coordinating baskets because they make everyday clutter look more organized without requiring permanent changes to the camper.
The key is to avoid adding storage simply for the sake of having more containers. Every organizer should have a purpose.
If a storage solution makes it harder to access the things you use regularly, it may actually make the camper less functional.
Add Personality With Small Decorative Changes
Once the larger changes are finished, this is where I would have fun with the design.
You can add personality with framed prints, small plants, decorative baskets, throw pillows, blankets, simple wall art, or a few travel related pieces that have personal meaning.
I prefer using a small number of intentional decorations rather than filling every available wall and shelf.
A camper already has limited space, so visual clutter can build up quickly.
One of my favorite approaches is choosing two or three main colors and repeating them throughout the interior. For example, you might use cream as the main color, natural wood tones as an accent, and muted green through pillows, artwork, or small accessories.
This makes inexpensive pieces look more coordinated because they all belong to the same overall design.
Do Not Forget the Camper Exterior
A makeover does not have to stop at the interior.
Small exterior changes can make an older camper feel much more personal without requiring a complete repaint.
You might refresh the entry area, add an outdoor mat, improve the exterior lighting, replace worn decals where appropriate, or create a more comfortable outdoor sitting area.
I especially like focusing on the entrance because it is the transition between your campsite and your living space.
A simple outdoor mat, a comfortable chair, and a small storage solution for shoes or outdoor gear can make the entrance much more functional.
The best exterior projects are the ones that improve how you actually use the camper rather than simply adding decoration.
Give the Kitchen a Budget Friendly Refresh
The camper kitchen can make a big difference to the overall feel of the interior because it is usually one of the most visible areas. You do not need to replace the cabinets, countertop, and appliances to make it look completely different.
I would start by clearing everything from the counters and deciding what you actually use. A small kitchen can quickly feel crowded when appliances, cooking tools, food containers, and decorations are all competing for the same limited space.
After decluttering, look at the backsplash, cabinet hardware, countertop, and storage.
A removable backsplash can add color and personality without the commitment of a permanent renovation. Peel and stick options can also be useful for beginners because they are relatively simple to install and can be changed later.
If the countertop looks worn, give it a thorough cleaning before deciding that it needs to be replaced. Sometimes a good clean and a few carefully chosen accessories can make a bigger difference than expected.
I also like keeping the kitchen accessories coordinated. Matching containers, a simple utensil holder, and one or two attractive pieces can make the area feel organized without taking up much room.
Create a More Functional Entryway
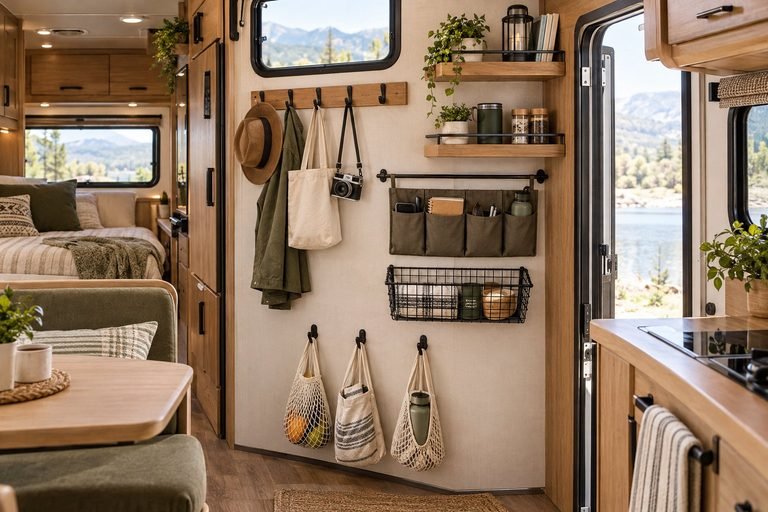
The entrance of a camper tends to become a drop zone for shoes, bags, jackets, keys, and outdoor equipment.
When I am trying to make a small camper more practical, I pay attention to this area because even a little organization can prevent clutter from spreading throughout the rest of the space.
A narrow shoe organizer, hooks, a small basket, or a compact storage bench can give frequently used items a designated place.
Wall hooks are particularly useful because they take advantage of vertical space instead of using valuable floor space.
I would keep the number of hooks and organizers appropriate for the size of the camper. Adding too many can make the entrance feel crowded and can also create obstacles when moving around.
The goal is simple. Everything you regularly bring inside should have an obvious place to go.
Replace or Refresh the Flooring
Flooring can completely change the appearance of an older camper, but it is also one of the projects where I would slow down and plan carefully.
If the existing floor is structurally sound, you may not need to remove it. Depending on the material and condition, you may be able to install a suitable new flooring product over the existing surface after proper preparation.
Luxury vinyl planks, vinyl flooring, and other practical flooring options can create a much cleaner appearance than old worn flooring.
For a beginner makeover, I would choose something that is durable, easy to clean, and appropriate for the amount of moisture and traffic the camper will experience.
Light wood tones can make a small interior feel brighter, while darker flooring can create contrast with light walls and cabinets.
Before buying anything, measure the floor carefully and account for areas around cabinets, furniture, and other fixed components.
This is also a project where rushing preparation can cause problems later. A clean, level, properly prepared surface will give you a much better result.
Update the Backsplash
A backsplash is another small area where you can introduce personality without renovating the entire kitchen.
I like using the backsplash as an opportunity to bring in a little contrast. If the cabinets and walls are light, a subtle pattern or natural looking texture can give the kitchen more character.
Peel and stick backsplash materials are especially attractive for beginner projects because they can be easier to work with than traditional tile.
Before installing anything, make sure the surface is clean, dry, and suitable for the product. Measure carefully and plan how the pieces will meet around corners, outlets, and fixtures.
I would also avoid choosing an extremely busy pattern just because it looks impressive in a large kitchen photograph. A camper kitchen is much smaller, so a simple design can often have a better visual effect.
Make the Bedroom Feel More Comfortable
The sleeping area deserves attention because it is one of the places where you notice the quality of the camper most.
You do not necessarily need a new mattress or a complete bedroom renovation. New bedding, pillows, curtains, and a small amount of wall decor can make the space feel considerably more comfortable.
I like using light bedding with one or two accent colors. This keeps the sleeping area calm and prevents the small space from feeling visually crowded.
If the existing mattress is uncomfortable, however, I would prioritize that over decorative changes. A beautiful bedroom does not make up for poor sleeping comfort.
A mattress topper can sometimes provide an affordable improvement when replacing the mattress is outside the makeover budget.
You can also add storage underneath the bed if the existing space is difficult to use. Storage bags or appropriately sized containers can keep clothing, bedding, and less frequently used items organized.
Use Removable Wallpaper Carefully
Removable wallpaper can completely change a camper wall, but I would use it selectively.
Rather than covering every wall, consider using it on one accent wall, inside a cabinet, behind the bed, or around a small dining area.
This gives you the visual impact without making the interior feel overly busy.
Before committing to the entire surface, test the wallpaper in a small area. Camper walls can be made from different materials, and the adhesive may behave differently depending on the surface.
This is also important if you are renting the camper or plan to sell it later. A temporary design choice should not create expensive repairs.
I prefer subtle patterns and textured designs for small spaces. They can add interest while still allowing the rest of the interior to remain simple.
Improve the Dining Area
The dining area is another place where small changes can have a big effect.
If the existing table is structurally sound, you may only need to refresh its appearance. Depending on the material, sanding and refinishing or applying an appropriate finish can give an older table a completely different look.
You can also update the seating with new cushions or washable covers.
For a small camper, I like dining areas that can serve more than one purpose. The table might be used for meals, working, planning a route, preparing food, or simply sitting down with a cup of coffee.
Keeping this area relatively clear makes it much easier to switch between those activities.
If you are replacing the table, pay close attention to its dimensions. A few extra inches can make a surprising difference when you are trying to move around a compact camper.
Add Mirrors to Make the Space Feel Larger
A strategically placed mirror can make a small camper feel brighter and more open.
I would place one where it can reflect natural light or visually extend the room. A mirror near a window can help bounce light through the interior during the day.
You do not need a huge mirror. Even a smaller decorative piece can add depth to a compact area.
The main thing I would consider is how securely it is mounted. A camper moves constantly when traveling, so anything attached to a wall needs to be appropriate for that environment.
For the same reason, I would avoid hanging heavy decorative objects unless they are properly secured.
Turn Awkward Spaces Into Useful Storage
Small campers often have strange corners, narrow gaps, and areas that are difficult to use.
Instead of ignoring these spaces, look at whether they can serve a practical purpose.
A narrow gap might hold cleaning supplies. An unused corner could accommodate a small basket. The space beneath a bench may be perfect for seasonal clothing or outdoor equipment.
I have found that the most useful camper storage solutions are often very simple. You do not always need custom cabinetry.
Before purchasing an organizer, measure the available space and think about what you want to store there.
This prevents the common problem of buying storage containers first and then discovering that they do not fit where you need them.
Refresh the Bathroom Without a Full Renovation
A camper bathroom can also benefit from small updates.
Start with the basics. Replace worn shower curtains, add fresh towels, organize toiletries, and clean areas that may have accumulated dirt or buildup.
A new shower curtain can change the appearance of the entire bathroom for very little money.
You can also use small adhesive organizers for toiletries, provided they are suitable for the surface and can withstand the movement of the camper.
I would avoid adding too many decorative pieces to the bathroom because moisture and limited space make practicality especially important here.
A clean, organized bathroom will usually feel more updated than one filled with unnecessary accessories.
Choose Projects Based on Your Budget
One of the biggest mistakes beginners can make is trying to complete every makeover idea at once.
A camper renovation can become expensive very quickly when you start adding paint, flooring, hardware, fabrics, lighting, storage, and decorative accessories to the same shopping list.
I prefer breaking the makeover into stages.
Start with the changes that have the biggest visual or practical impact. Paint and lighting might come first. Storage and textiles can follow. Decorative upgrades can be added gradually.
This also gives you time to live with each change before deciding what needs to be done next.
You may discover that once the cabinets are painted and the lighting is improved, you no longer need to replace as many other things as you originally thought.
Know Where to Save and Where to Spend
A budget makeover does not mean choosing the cheapest option for everything.
I am comfortable saving money on decorative accessories, baskets, throw pillows, artwork, and other items that can easily be replaced.
I would be much more careful about saving money on things related to safety, electrical work, structural repairs, water damage, or anything that needs to withstand constant movement.
If a project involves an important mechanical or electrical system and you are not confident about the work, it is better to get appropriate professional help than turn a budget makeover into a much larger repair.
The goal is to spend your money where it improves the camper while protecting the parts that keep it safe and functional.
Make Your Camper Feel Personal
A good camper makeover should not look like you copied a showroom exactly.
I like adding small details that connect the space to the way I actually travel. A favorite blanket, a few meaningful photographs, travel souvenirs, a particular color scheme, or artwork from places you have visited can make the camper feel much more personal.
These details do not need to cost much.
In fact, some of the most meaningful additions can be things you already own.
That is one of the reasons I like budget camper makeovers. The goal is not to create the most expensive interior possible. The goal is to create a space that feels comfortable, organized, practical, and genuinely yours.
DIY Camper Makeover Mistakes I Would Avoid
A budget camper makeover can quickly become expensive when you start changing things without a plan. I have found that the easiest way to stay on budget is to think about the entire space before committing to individual projects.
One mistake I would avoid is buying too many decorative items before deciding on the overall style. Small spaces show clutter much faster than houses do, so every item needs to earn its place.
I would also avoid starting several large projects at once. Painting the cabinets, replacing the flooring, updating the bathroom, changing the lighting, and renovating the kitchen can quickly turn a simple makeover into a major renovation.
Another mistake is choosing appearance over practicality. A beautiful rug that is difficult to clean or storage that looks good but makes everyday items harder to reach will eventually become frustrating.
I also recommend avoiding permanent changes until you are certain about the design. Temporary solutions are useful when experimenting with colors, layouts, and storage ideas.
Create a Camper Makeover Budget
Before buying anything, decide how much you are comfortable spending on the entire project.
I like dividing the budget into categories rather than having one large amount that slowly disappears through small purchases.
You might set aside money for paint, flooring, lighting, textiles, storage, hardware, and decorative items.
Leave a little room for unexpected expenses too. Older campers can reveal problems once you start moving furniture or removing old materials.
A budget also makes it easier to decide which projects can wait.
For example, if new flooring uses a large portion of your budget, you may decide to keep the existing curtains for now and replace them later.
This approach helps you avoid spending the entire budget on the first few projects and then running out of money before the makeover is finished.
Shop Your Own Home First
One of my favorite ways to save money during a camper makeover is to look around the house before buying new accessories.
You may already have blankets, baskets, pillows, small lamps, artwork, storage containers, or other pieces that would work perfectly inside the camper.
Even furniture accessories that do not match perfectly can sometimes be refreshed with new covers or a different arrangement.
This is also a good way to figure out what style you actually like before spending money.
Try placing a few existing pieces inside the camper and see how they work together. You might discover that you need far fewer new items than you expected.
Give Old Pieces a Second Life
Not every outdated camper item needs to go into the trash.
An old cabinet can sometimes be refreshed with paint and new hardware. A worn table may look completely different after refinishing. Existing cushions can sometimes be covered with new fabric instead of replaced.
Repurposing also helps maintain the character of the camper.
I particularly like keeping one or two original features when they are still in good condition. A complete makeover does not have to erase everything that made the camper unique.
The key is deciding which pieces are worth saving and which ones have reached the end of their useful life.
Use Vertical Space
When floor space is limited, look upward.
Wall mounted hooks, shelves, hanging organizers, and cabinet door storage can give you additional storage without taking away valuable walking space.
Vertical storage works particularly well in the kitchen, bathroom, bedroom, and entryway.
I would still keep safety in mind. Anything mounted inside a moving camper needs to be securely attached and appropriate for the wall material.
Avoid placing heavy objects high above seating or sleeping areas unless they are properly secured.
The best vertical storage is easy to reach and does not interfere with normal movement.
Make the Camper Easier to Keep Clean
A makeover should make your life easier, not create more cleaning.
When choosing fabrics, rugs, storage baskets, and decorative pieces, I think about how they will hold up during normal travel.
Washable cushion covers are more practical than delicate fabrics. Easy to clean flooring is preferable to something that requires special treatment. Storage containers with simple surfaces are easier to wipe down.
I also like leaving some open space instead of filling every shelf.
A camper gets dirty simply because it is being used outdoors and moved from place to place. A practical design makes cleaning much less frustrating.
Think About Travel Day
A camper may look perfect when it is parked, but everything changes once you start driving.
Before finishing the makeover, walk through the interior and think about what happens when the camper is moving.
Can cabinet doors stay closed?
Will decorations fall?
Are containers secure?
Could anything slide off a shelf?
Are there loose objects that could become a problem?
These are simple questions, but they are important.
I like keeping decorative pieces easy to remove or secure before traveling. Items that look beautiful while parked may need to be stored away during transit.
Designing for both stationary and travel conditions is what makes a camper makeover genuinely practical.
Add Outdoor Living Space
One of the easiest ways to make a camper feel larger is to make better use of the area outside.
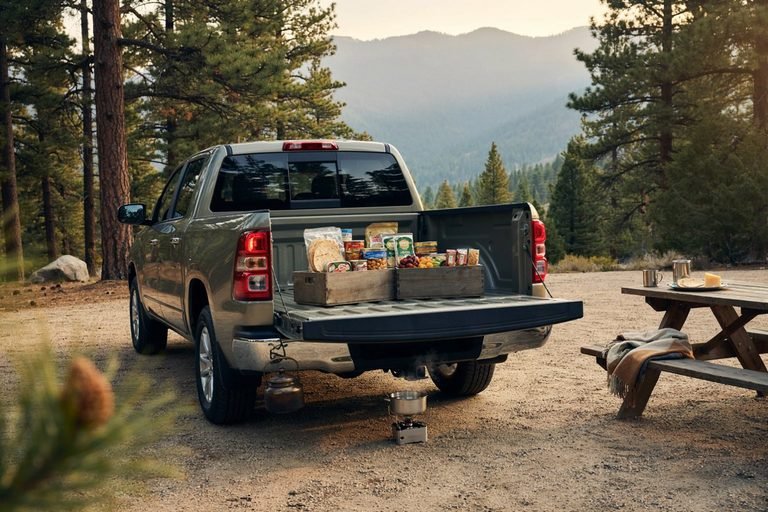
A comfortable outdoor chair, small folding table, outdoor rug, lantern, and compact storage solution can create an additional living area without changing the camper itself.
This is especially useful when the interior is small.
I would choose outdoor pieces that fold or store easily so they do not take up unnecessary space during travel.
You can also create a simple outdoor color scheme that complements the interior. Repeating one or two colors can make the whole setup feel intentional.
Give the Makeover Time
You do not have to finish everything in one weekend.
Some of the best camper makeover decisions come after actually using the space.
Spend a few trips in the camper and pay attention to what annoys you.
Maybe the kitchen needs more counter space. Perhaps the lighting is still too harsh. Maybe the storage beneath the bed is difficult to access. You might discover that the table is taking up more space than you expected.
These observations are more valuable than guessing before the camper is being used.
I prefer making improvements gradually because every trip gives me more information about what the space actually needs.
A Simple Budget Camper Makeover Order
If you are unsure where to begin, I would work through the makeover in this order.
1. Declutter
Remove anything you do not use and clear the space before making design decisions.
2. Clean
Give the entire camper a thorough cleaning so you can properly see what needs attention.
3. Repair
Deal with damaged, loose, leaking, or unsafe areas before focusing on appearance.
4. Paint
Refresh the largest visual surfaces first, especially walls and cabinets that are suitable for painting.
5. Improve Lighting
Add practical and softer lighting where needed.
6. Update Flooring
Consider replacing worn flooring if the existing surface needs attention and your budget allows it.
7. Refresh Textiles
Update curtains, cushions, bedding, rugs, and towels.
8. Improve Storage
Use baskets, organizers, hooks, and unused spaces to make everyday items easier to manage.
9. Update Hardware
Replace cabinet handles, knobs, and other small details that make the interior look dated.
10. Add Decor
Finish with artwork, plants, accessories, and personal items that make the camper feel like yours.
This order also prevents you from decorating around problems that you later have to remove.
How Much Can a DIY Camper Makeover Cost?
The cost can vary dramatically depending on the camper’s condition, its size, the materials you choose, and how much work you do yourself.
A very simple refresh can focus on cleaning, decluttering, paint, hardware, textiles, and small storage improvements.
A more involved makeover may include flooring, backsplash work, upgraded lighting, furniture changes, and larger cosmetic renovations.
I would avoid setting a single fixed budget for every camper because two campers can require completely different amounts of work.
Instead, decide which improvements matter most to you and price those projects individually.
This also makes it easier to control spending because you can postpone lower priority projects when necessary.
Final Thoughts
A camper makeover does not need to involve a complete renovation to feel transformative. The biggest difference often comes from improving the things you interact with every day.
Fresh paint can brighten the interior. Better lighting can change the atmosphere. New fabrics can make the space more comfortable. Practical storage can reduce clutter. Small personal details can make the camper feel like your own little home on the road.
My biggest recommendation is to start with how you actually use the camper rather than copying a particular design trend. Think about where clutter collects, what feels uncomfortable, which areas look dated, and what would make everyday travel easier.
Then tackle those problems one project at a time.
A budget makeover is much more rewarding when every change has a purpose. You do not need expensive materials or professional renovation skills to create a camper that feels clean, comfortable, organized, and personal.
Start with the changes that matter most, work within your budget, and let the rest develop as you spend more time on the road.