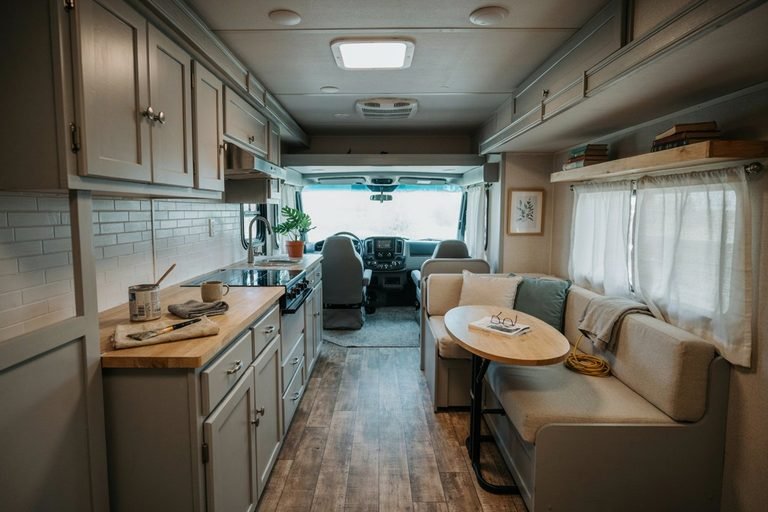
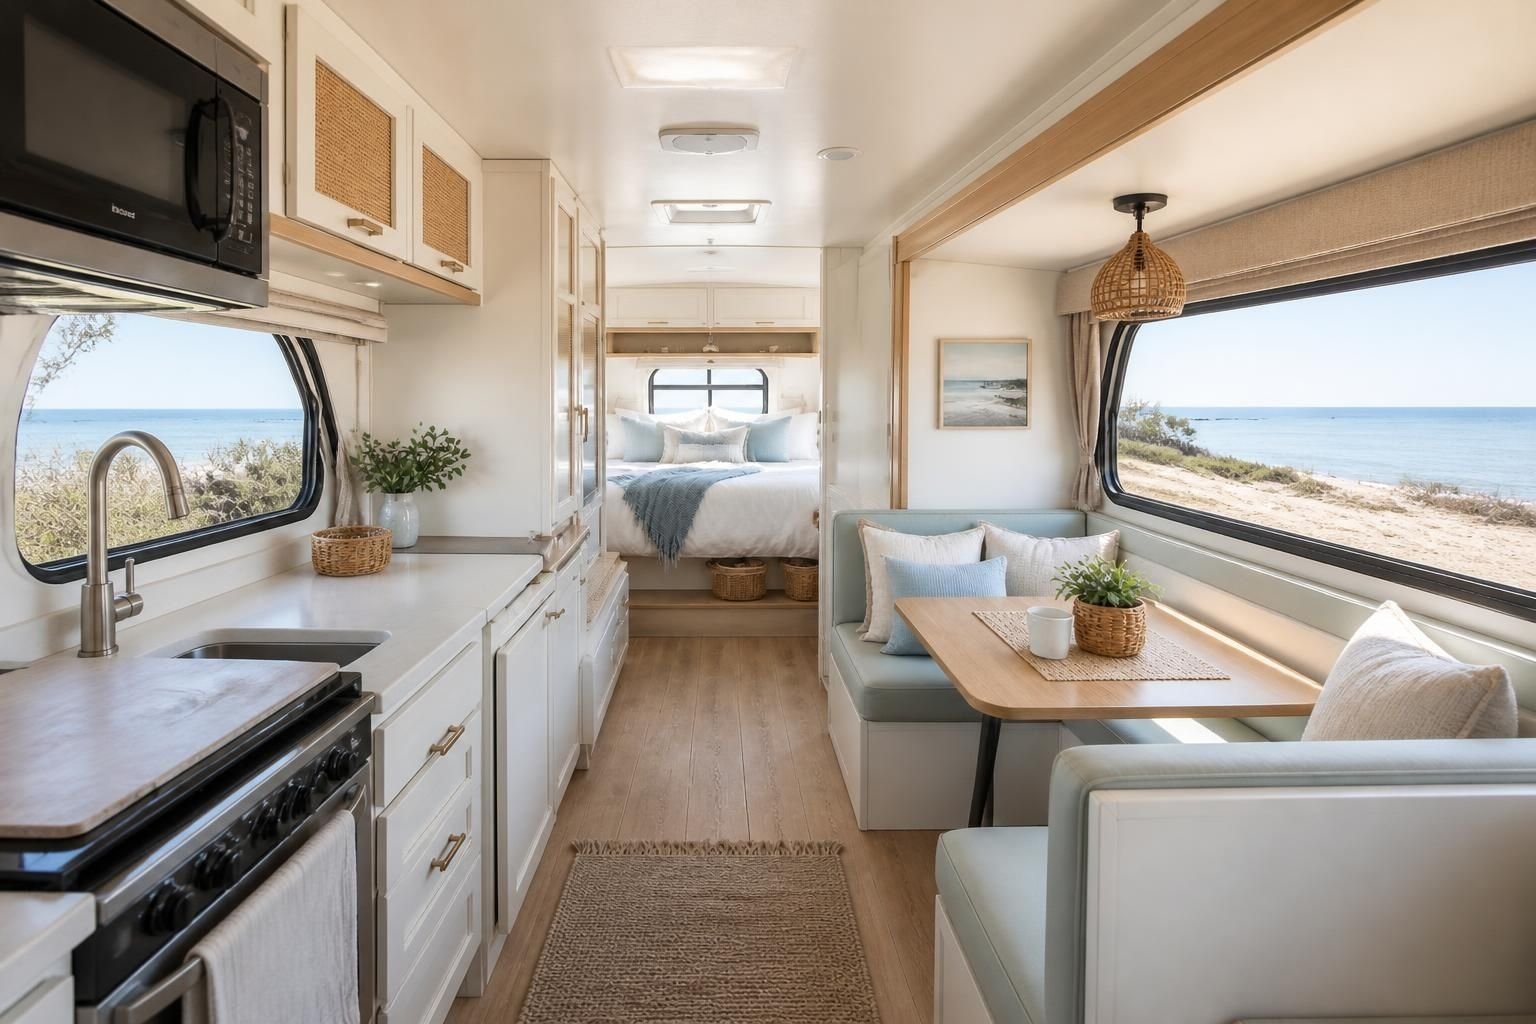
How to Remodel a Coastal Camper
Remodeling a camper with a coastal style is one of my favorite ways to make a small space feel brighter, calmer, and much more inviting without losing the practicality that makes camping so enjoyable.
I wanted my camper to have that relaxed beach house feeling, but I also knew everything needed to work for real trips. Sand, wet towels, cooking, limited storage, and everyday messes are part of camper life, so I focused on choices that looked beautiful while still being easy to clean and maintain.
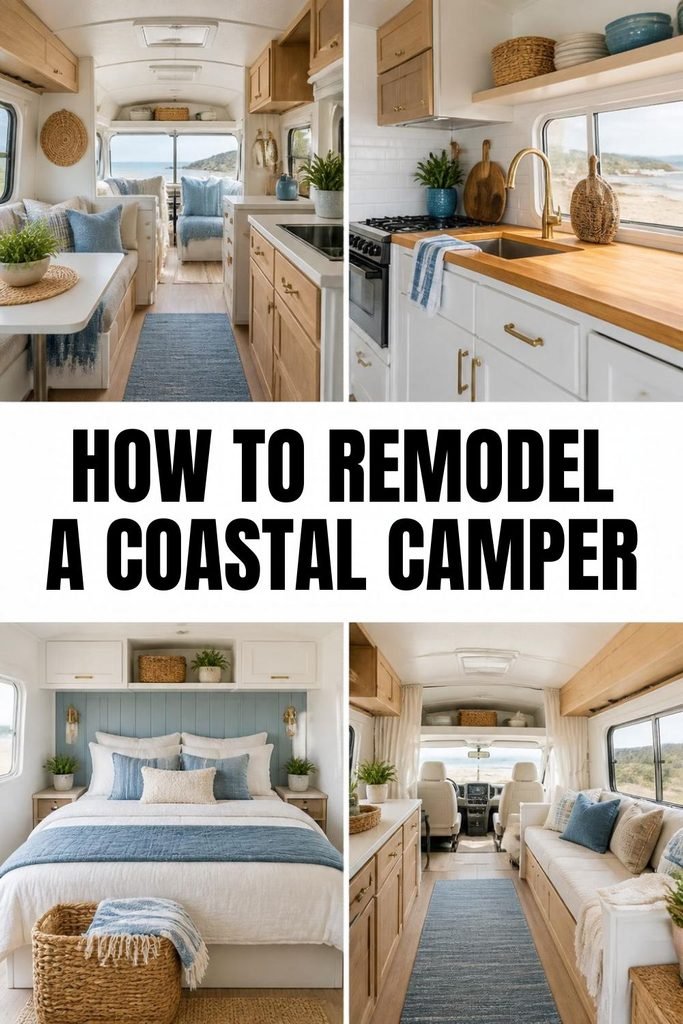
A coastal camper remodel does not have to mean covering everything in blue and adding seashell decorations. For me, the biggest transformation came from changing the overall color palette, improving the storage, replacing dated finishes, and bringing in lighter textures.
Before buying paint or new decor, I spent time looking at what was already working and what needed to change. That made the remodel much more affordable and helped me create a space that felt intentional instead of overcrowded.
Start With a Clear Coastal Camper Vision
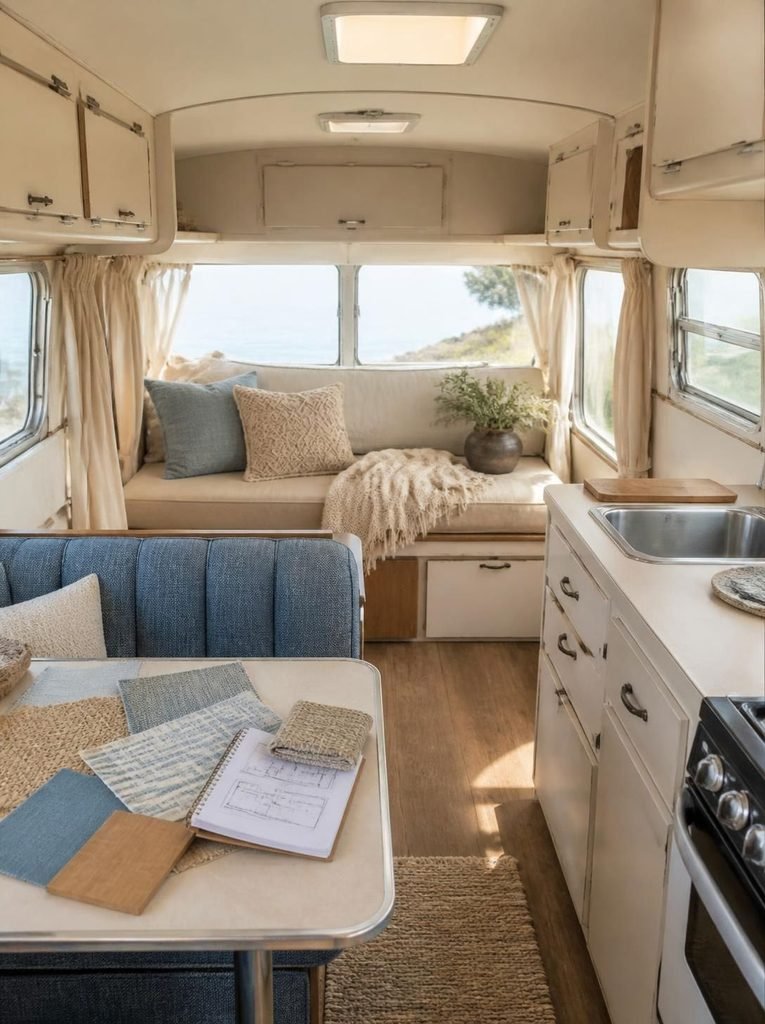
Before taking anything apart, I like to decide exactly how I want the finished camper to feel. This step sounds simple, but it can prevent a lot of unnecessary spending later.
For my coastal camper remodel, I wanted a space that felt light, relaxed, warm, and slightly beachy without looking overly themed. I preferred soft whites, warm wood tones, natural textures, and small touches of blue rather than making blue the main color throughout the camper.
A good coastal color palette can include:
Soft white
Warm cream
Light beige
Natural wood
Soft blue
Muted sea glass green
Light gray
The key is to choose two or three main colors and repeat them throughout the camper. This creates a more finished appearance, especially in a small space where too many colors can quickly make the interior feel busy.
I also recommend choosing your larger finishes before buying accessories. Paint, flooring, curtains, countertops, and upholstery have a much bigger visual impact than decorative pieces, so those decisions should guide everything else.
Decide What Needs to Be Remodeled
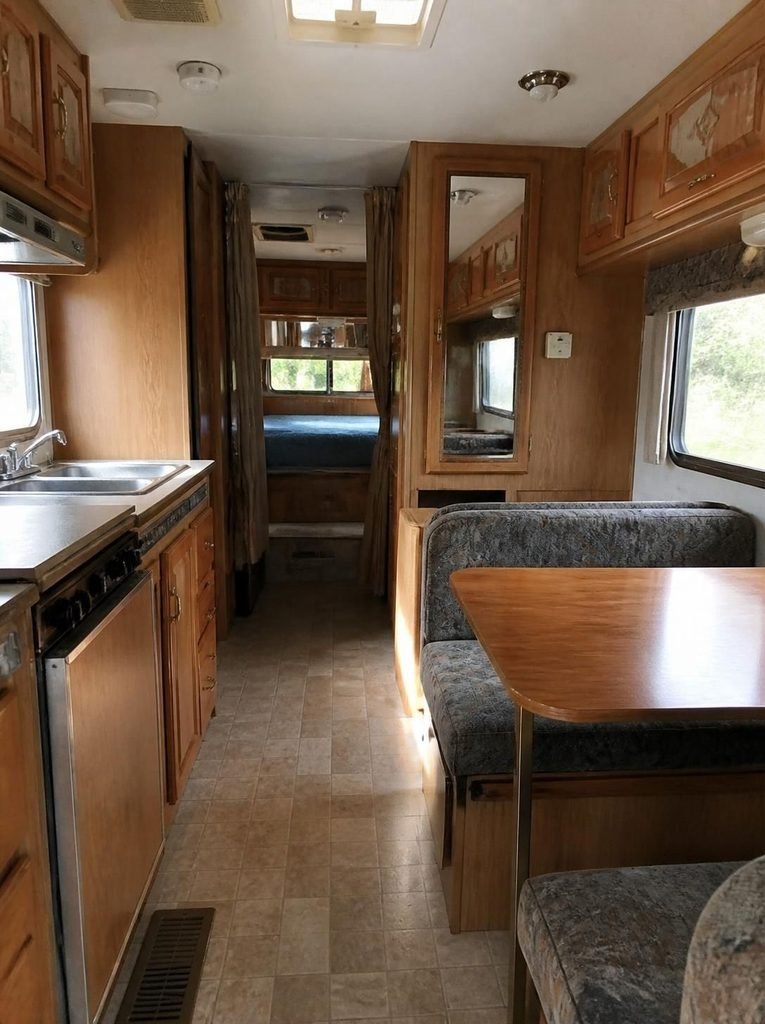
One mistake I wanted to avoid was remodeling everything simply because the camper looked dated.
Before starting, I went through the entire interior and separated the things that genuinely needed replacing from the things that could stay. This made a noticeable difference in the overall budget.
Walk through the camper and look closely at:
Cabinet doors
Cabinet hardware
Walls
Ceiling
Flooring
Countertops
Dinette cushions
Curtains
Lighting
Bathroom finishes
Kitchen storage
Mattress and bedding
Existing appliances
You may discover that perfectly usable cabinets only need fresh paint and new hardware. The same can be true for countertops, curtains, and furniture.
I always prefer to spend money where it creates the biggest improvement. If the existing structure is sound, there is little reason to remove it just to make the camper look different.
Check for Water Damage Before Decorating
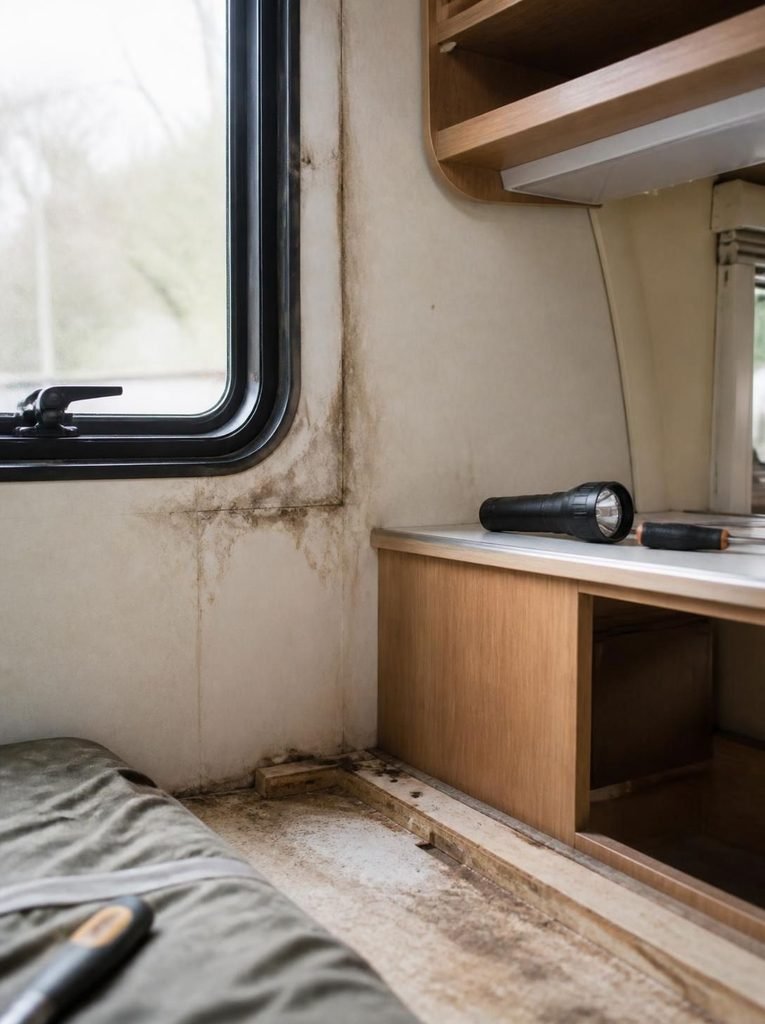
This is one area I would never skip during a camper remodel.
Before thinking about paint colors, coastal decor, or new flooring, inspect the camper carefully for signs of moisture or water damage. A beautiful remodel will not solve a hidden leak.
Check around windows, roof vents, exterior doors, plumbing connections, bathroom areas, and any place where water could potentially enter.
Look for:
Soft walls
Discolored wood
Peeling finishes
Musty smells
Stained ceiling panels
Swollen cabinetry
Soft flooring
Cracked sealant
I also recommend checking the exterior seals if you have access to the camper. Coastal styling is about the appearance of the finished space, but moisture resistance is much more important than decoration.
If you find a leak or structural problem, deal with that before continuing with cosmetic work.
Choose Materials That Can Handle Camper Life
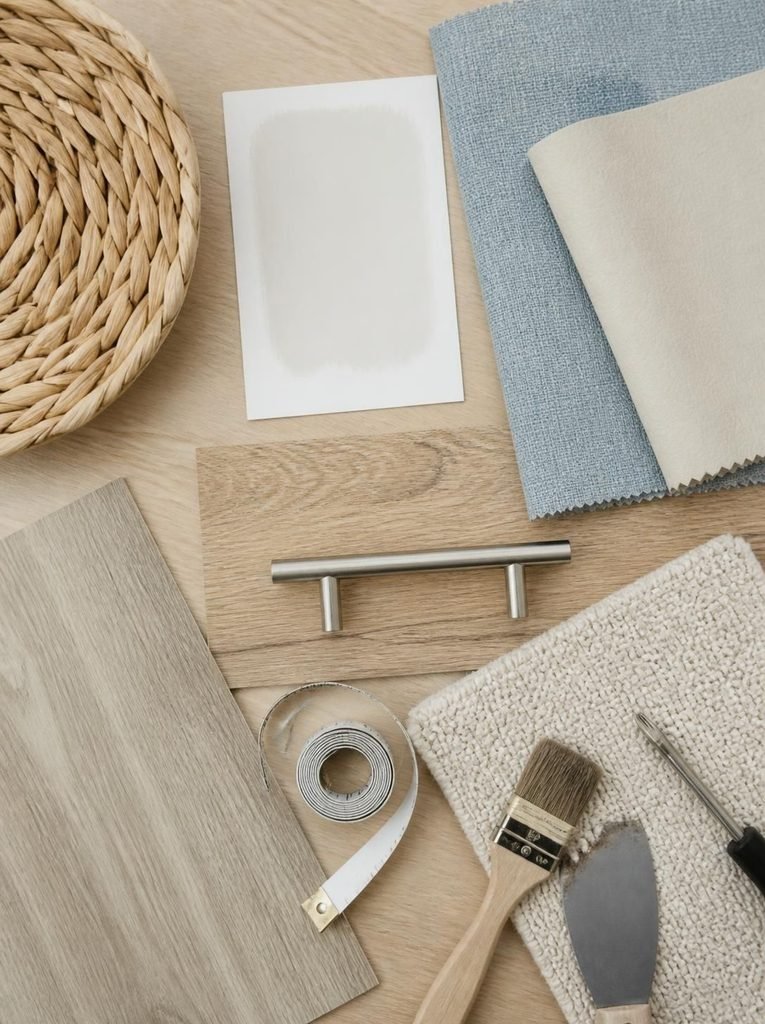
A camper is not the same as a stationary beach house.
That became especially important when I started thinking about the materials I wanted to use. Beautiful fabrics and delicate finishes can look wonderful in photographs, but they are not always practical when you are dealing with sand, dirt, cooking, pets, wet clothing, and limited ventilation.
For a coastal camper, I prefer materials that are:
Easy to wipe clean
Lightweight
Durable
Moisture resistant
Easy to replace
Suitable for small spaces
For upholstery, washable or performance fabrics can make everyday life much easier. For flooring, choose something that can handle moisture and regular cleaning. For decorative wood, lightweight materials are preferable when possible because every camper has weight limitations.
I also avoid adding unnecessary heavy furniture. A remodel should make the camper more functional, not create a beautiful interior that adds a significant amount of weight.
Plan the Color Scheme Around Natural Light
One of the easiest ways to create a coastal feeling is to work with the natural light already available in the camper.
Small camper interiors can feel dark because of limited windows, older wood cabinetry, dark upholstery, or dated wall colors. Lighter finishes can make the same space feel considerably larger.
I like using white or warm off white on larger surfaces because it reflects light without making the interior feel cold.
If the camper receives plenty of natural sunlight, you can introduce slightly deeper coastal colors through cushions, curtains, cabinet hardware, or small pieces of artwork.
Blue works especially well as an accent.
Instead of painting every cabinet blue, I prefer using blue in smaller areas where it can be changed later. A blue cushion, striped curtain, throw pillow, rug, or small decorative piece can give the camper that coastal character without locking you into one style.
Create a Remodeling Budget Before Shopping
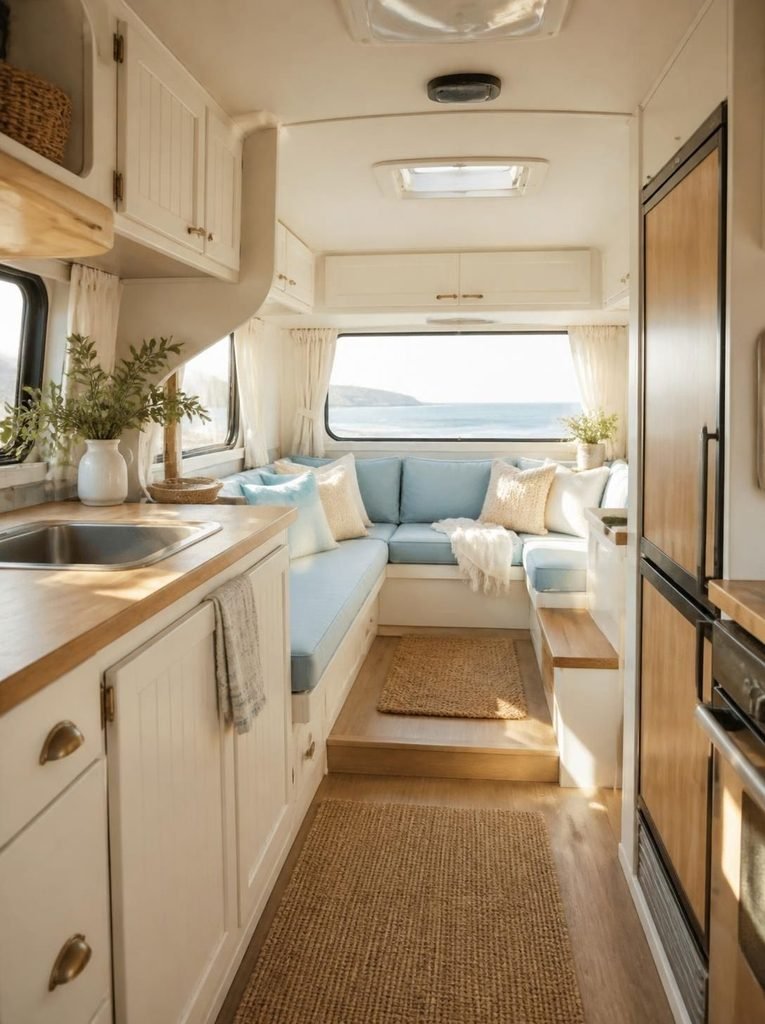
A coastal camper can become expensive surprisingly quickly because there are so many small things you can buy.
Paint might seem inexpensive, but once you add cabinet hardware, flooring, curtains, cushions, lighting, storage products, wall treatments, rugs, bedding, and accessories, the total can grow quickly.
Before shopping, I make a list of the changes I actually want and divide them into three categories.
Essential repairs
Important upgrades
Decorative extras
Repairs always come first. After that, I focus on upgrades that improve how the camper functions. Decorative items come last.
This approach also makes it easier to remodel gradually. You do not need to complete every project in one weekend.
Think About Storage Before Adding Decor
Storage is one of the biggest challenges in a camper, so I would plan it before filling the space with coastal accessories.
Look at areas that are currently being wasted. The space under seating, inside cabinet doors, beside the bed, underneath the sink, and above countertops can often provide useful storage without taking up additional floor space.
I like storage solutions that keep everyday items easy to reach while keeping the counters and surfaces clear.
This is especially important in a coastal camper because the clean, open appearance is part of what creates that relaxed beach house feeling.
Too many decorative objects can quickly make a small camper feel crowded.
Make a Simple Remodeling Plan
Once I know what needs to change, I like to work from the largest projects to the smallest details.
A simple order is:
Inspect the camper
Repair moisture or structural problems
Remove outdated finishes
Prepare surfaces
Paint walls and cabinets
Install flooring or other major finishes
Update hardware and lighting
Improve storage
Add curtains and upholstery
Finish with coastal decor
Working in this order prevents you from damaging new finishes while completing messy projects.
It also helps you see the transformation as you go. Once the walls and cabinets are lighter, it becomes much easier to decide which fabrics, colors, and accessories actually belong in the finished space.
The goal is not simply to make the camper look like a beach house. The best coastal camper remodel combines that relaxed coastal appearance with practical choices that make camping easier.
Give the Cabinets a Coastal Makeover
The cabinets usually make up a large part of a camper interior, so changing them can completely transform the space. In my remodel, this was one of the areas I paid the most attention to because dated wood cabinetry can make a small camper feel much darker than it actually is.
I prefer soft white or warm cream for coastal cabinets because it keeps the interior bright without making it feel too stark.
Before painting, I remove the cabinet doors and hardware and clean everything thoroughly. Camper cabinets can collect grease, dust, and residue that can prevent paint from adhering properly.
I lightly sand the surfaces, repair any damaged areas, and use a suitable primer before applying the paint. I also allow each coat to dry properly instead of trying to rush the process.
For a camper, durability matters just as much as appearance. Cabinet doors are constantly being opened, closed, touched, and cleaned, so I want a finish that can handle regular use.
If your existing cabinets are in good condition, painting them is one of the easiest ways to get a dramatic change without replacing the entire kitchen.
Replace the Cabinet Hardware
New hardware is a small change that can make freshly painted cabinets look much more finished.
I like simple hardware for a coastal camper rather than anything that looks overly decorative. Brushed metal, matte finishes, simple pulls, and natural wood details all work well with a relaxed coastal style.
You can also use hardware to introduce another material into the space.
For example, white cabinets with brushed metal pulls and warm wood accents create a much more layered appearance than using the same finish everywhere.
Before ordering new hardware, measure your existing screw spacing carefully. This is especially important if you want to avoid filling old holes and drilling new ones.
Brighten the Kitchen
The kitchen can become one of the most noticeable areas after a camper remodel because it contains several large surfaces close together.
I wanted mine to feel clean and bright without sacrificing the practicality needed for cooking on the road.
A lighter countertop can make the kitchen feel larger, especially when combined with light cabinets. If the existing countertop is still in good condition, you may not need to replace it at all.
Another option is using a countertop refinishing product or a suitable adhesive surface designed for the application.
I would always check the manufacturer’s instructions and make sure the material is appropriate for a camper kitchen before using it.
For the backsplash, I prefer simple patterns and light colors. Small coastal-inspired tiles, subtle geometric patterns, or a plain light backsplash can work beautifully without making the kitchen feel too busy.
Add Warm Wood Accents
One thing I noticed while planning the coastal look was that using too much white could make the camper feel cold.
Natural wood is an easy way to bring warmth back into the interior.
I like using wood in small areas rather than covering everything with it. A wood shelf, cutting board, countertop accent, picture frame, or small storage detail can be enough.
The combination of white, natural wood, and muted blue creates a coastal appearance without relying on obvious beach decorations.
This is also why I prefer natural textures over themed decor. Materials such as woven baskets, rattan-style storage, linen-look fabrics, and light wood can give the camper that relaxed coastal feeling naturally.
Update the Flooring
Flooring can have a surprisingly large effect on a camper remodel.
If the existing floor is dark, damaged, or visually dated, replacing it with a lighter finish can make the entire interior feel fresher.
For my coastal design, I would choose a light wood-look or neutral flooring rather than something heavily patterned.
The floor needs to handle much more than just appearance. Sand, dirt, water, cooking spills, and muddy shoes are all realistic parts of camper life.
I therefore prefer flooring that is easy to sweep, wipe, and maintain.
Before installing anything, check the existing floor carefully for soft spots or moisture damage. A new floor should never be used to cover a problem underneath.
Also consider the weight, thickness, installation method, and manufacturer recommendations for use in an RV or camper.
Bring in Better Lighting
Good lighting can completely change how a small camper feels.
Even after painting the interior lighter, I found that the space could still feel dull when the lighting was limited.
I like using several types of lighting rather than relying on one overhead fixture.
Under cabinet lighting can make the kitchen much easier to use at night. Small reading lights can make the sleeping area more comfortable. A brighter main fixture can provide general lighting when you need it.
Warm or neutral lighting usually works well with a coastal color palette because it keeps the space feeling comfortable rather than clinical.
When changing electrical fixtures, make sure the replacement is compatible with your camper’s electrical system. If you are not comfortable working with the wiring, have a qualified professional handle the installation.
Refresh the Dinette
The dinette is another area where a relatively small update can make a major difference.
Instead of automatically replacing the entire dinette, I would look at the cushions and upholstery first.
New cushion covers in a light neutral fabric can immediately brighten the space. A subtle blue stripe or soft coastal pattern can add personality without overwhelming the room.
I also like adding a few pillows that can easily be removed when the camper is being used heavily.
The key is to avoid filling every seat with decorative cushions. You still need the dinette to function comfortably for eating, working, playing games, or relaxing.
Make the Sleeping Area Feel Like a Coastal Retreat
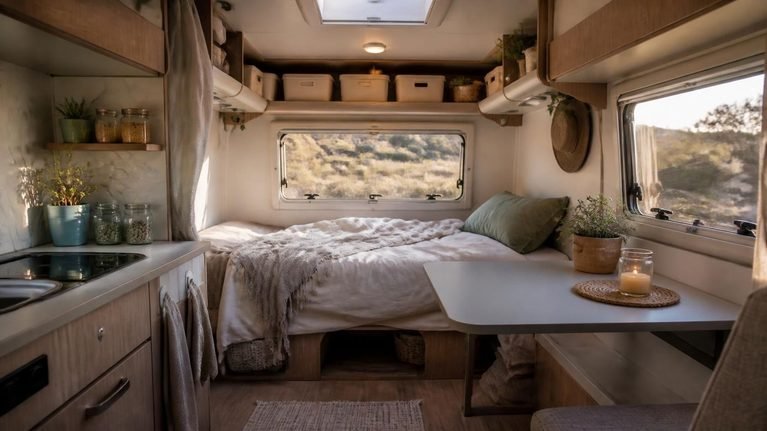
The bed takes up a significant amount of visual space, so changing the bedding can make the sleeping area feel completely different.
I prefer simple layers rather than a heavily themed coastal comforter.
A white or cream base works well with a lightweight blue or beige blanket. Then you can add one or two textured pillows for warmth.
Natural fabrics and relaxed patterns help create the beach house feeling without making the camper look like a vacation rental.
I also pay attention to the storage around the bed. If there is unused space underneath or beside the mattress, that can become valuable storage for bedding, shoes, or less frequently used camping equipment.
Use Curtains to Soften the Interior
Curtains are another easy way to introduce color and texture.
For a coastal camper, I like lightweight curtains in white, cream, beige, or a soft blue pattern.
The important thing is choosing something practical. Camper curtains can collect dust and cooking smells, so washable fabrics are much easier to live with.
I also prefer simple window treatments that do not block too much natural light during the day.
If privacy is important, you can layer a light curtain with a more opaque option so you can control the amount of light coming into the camper.
Create More Functional Storage
Once the major surfaces are finished, I focus on storage.
A beautiful camper is much easier to enjoy when everything has a place.
I like using matching baskets and containers because they make open shelving look organized while still adding texture to the interior.
The space inside cabinet doors is another area worth using. Small organizers can hold cleaning supplies, kitchen tools, toiletries, or other items that would otherwise take up valuable shelf space.
Under bed storage is particularly useful for bulky items.
I also try to keep frequently used items within easy reach and reserve harder-to-access areas for things I only need occasionally.
Add Coastal Details Without Overdoing It
This is where it can be tempting to keep adding decorations.
I found that a few carefully chosen pieces work much better than filling every empty surface with beach-themed accessories.
Instead of covering the camper with seashells, anchors, and signs, I prefer subtle coastal details.
A framed ocean photograph
A small piece of blue artwork
A woven basket
A natural wood tray
A striped pillow
A simple ceramic accessory
A textured throw
These details create the feeling without making the camper look overly themed.
The coastal style should come from the overall combination of colors, textures, light, and materials rather than from decorations alone.
Keep the Remodel Lightweight
One thing that is easy to forget during a camper renovation is weight.
A beautiful piece of furniture might work perfectly in a house but be completely impractical inside a camper.
Before adding anything permanent, consider how much it weighs and whether you actually need it.
This applies to furniture, shelving, countertops, flooring, storage systems, and decorative pieces.
I prefer lightweight materials whenever possible and try to reuse existing structures instead of replacing them unnecessarily.
The goal is to make the camper more comfortable without compromising how it travels.
Make the Remodel Easy to Maintain
The finished camper should be enjoyable to use, not something you are constantly worried about damaging.
That is why I focus on washable fabrics, wipeable surfaces, durable flooring, simple storage, and finishes that can handle everyday use.
A coastal camper will naturally encounter sand, water, dirt, and humidity. Choosing practical materials from the beginning makes cleanup much easier.
I also avoid placing delicate decorative pieces in areas where they can easily fall while driving.
Everything inside a camper needs to have a purpose, a secure place, or both.
Create a Cohesive Look
Once the major remodeling projects are finished, step back and look at the entire interior instead of focusing on individual pieces.
This is where I usually notice whether the colors and materials are actually working together.
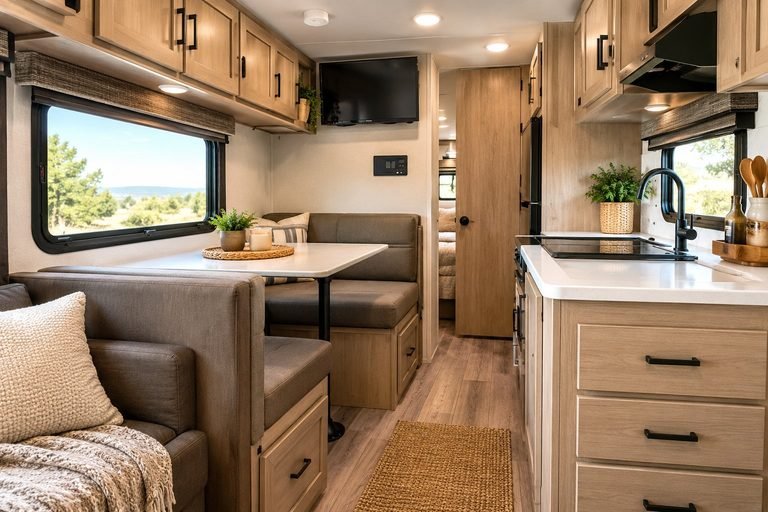
If you have white cabinets, light flooring, natural wood, blue accents, and woven textures, they should feel like parts of the same design rather than separate decorating decisions.
I like repeating a few materials throughout the camper.
For example, natural wood can appear in a small shelf and cutting board. Blue can appear in the cushions and curtains. Woven texture can appear in a basket and small storage container.
Repeating elements gives the interior a more intentional appearance.
Don’t Forget the Exterior
A coastal camper remodel does not have to stop at the interior.
Even small exterior improvements can make the camper feel more finished.
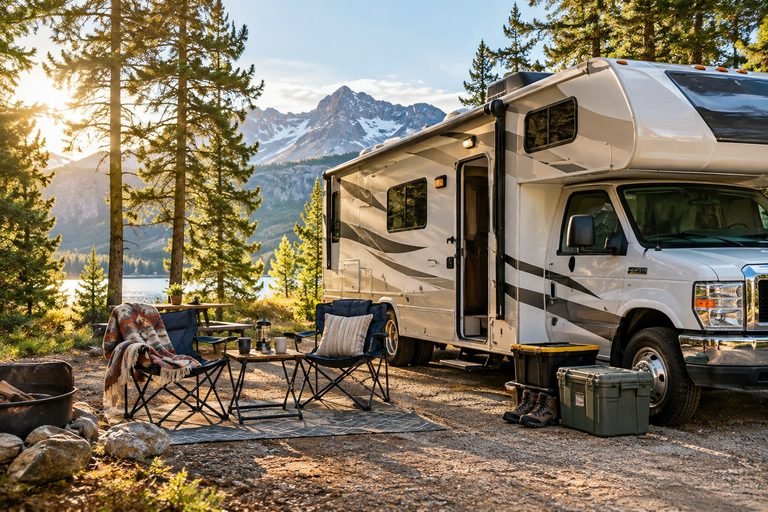
A clean exterior, refreshed entry area, outdoor rug, comfortable camping chairs, and a few practical outdoor accessories can extend the coastal atmosphere beyond the interior.
I prefer keeping the exterior simple and functional because outdoor camping equipment already takes up plenty of space.
A comfortable outdoor seating area can actually make a bigger difference than several decorative items inside the camper.
The best coastal camper remodel is not about creating a perfect showroom. It is about making the space brighter, more comfortable, easier to organize, and better suited to the way you actually camp.
Once the major remodeling work is finished, the final stage is about putting everything together and making sure the camper works just as well in real life as it looks in photos.
Finish the Remodel With Practical Details
Once the major remodeling work is finished, I like to step back before buying anything else. At this stage, the camper can look almost finished, but the small practical details are what make the space comfortable to actually use.
I go through each area and ask myself whether something is easy to reach, easy to clean, and secure enough for travel.
This is especially important with a camper because everything moves while you are driving. A decorative item that looks perfect sitting on a shelf at home may become a problem after a few miles on the road.
I prefer keeping countertops and walkways as clear as possible. The more open space you have, the larger the camper feels.
Organize the Kitchen for Real Camping
A beautiful kitchen is nice, but an organized kitchen is much more useful.
I like keeping the items I use most often in the easiest places to reach. Plates, cups, cooking utensils, coffee supplies, and basic food preparation items should not require digging through several cabinets.
Clear containers can work well for pantry items, while small baskets can keep similar products together.
I also recommend making use of vertical space. A small wall organizer, cabinet door organizer, or narrow shelf can create additional storage without taking up much floor space.
The trick is not to fill every available space.
Having empty room in a cabinet makes it much easier to put things away after a trip to the grocery store or when you are packing for a longer camping weekend.
Keep the Bathroom Simple
The bathroom does not need a complete luxury makeover to fit the coastal style.
A fresh coat of paint, new hardware, a light shower curtain, and a few simple storage improvements can make a surprisingly large difference.
I like keeping bathroom colors light and using small coastal accents rather than adding too many decorative pieces.
Storage is particularly important here.
A small hanging organizer can hold toiletries while keeping the counter clear. Lightweight baskets can also make open storage look more organized.
I would avoid materials that are difficult to clean or that do not handle moisture well. The bathroom needs to remain practical above everything else.
Use Mirrors to Make the Camper Feel Larger
A mirror can be one of the simplest ways to make a small camper feel more spacious.
If you have a suitable wall available, a lightweight mirror can reflect natural light and make the interior feel less enclosed.
I prefer simple frames that coordinate with the rest of the camper rather than large decorative mirrors.
Before installing anything, make sure it is securely attached and suitable for travel. Anything mounted inside a moving camper needs to be able to handle vibration and movement.
Add a Few Personal Touches
This is the stage where I like to make the camper feel like mine.
A remodel should not look like a showroom where everything is perfectly coordinated but nothing has any personality.
I like adding a few things that remind me of places I have visited, trips I have enjoyed, or activities I like doing while traveling.
This could be a small framed photograph, a favorite blanket, a simple piece of artwork, or a meaningful travel souvenir.
The important thing is restraint.
A handful of personal items can make the camper feel warm and lived in without taking over the limited space.
Create a Coastal Outdoor Area
One of the best parts of having a coastal style camper is extending that relaxed feeling outside.
When I am setting up camp, I like creating a simple outdoor area that feels like an extension of the camper.
A comfortable outdoor rug can define the space. Folding chairs provide somewhere to relax, while a small lightweight table can hold drinks, food, books, or camping equipment.
I also like using neutral colors outside so the entire setup feels connected.
The outdoor area does not need a lot of decorations. Comfortable seating, good lighting, and a practical place to relax are much more useful.
Add Outdoor Lighting
Outdoor lighting can make evenings around the camper much more enjoyable.
String lights can create a cozy atmosphere, while portable lanterns are useful when you need practical lighting.
For a coastal-inspired setup, warm light works particularly well.
I prefer lighting that can be packed away easily and does not create unnecessary clutter.
Always use outdoor lighting according to the manufacturer’s instructions and keep electrical connections protected from moisture.
Make a Dedicated Cleaning Station
One of the best practical additions to a camper is a small cleaning area.
I like keeping basic cleaning supplies together instead of storing them in several different places.
A small container can hold:
All purpose cleaner suitable for the surfaces
Microfiber cloths
Paper towels
Small trash bags
A handheld brush
A dustpan
Having everything together makes it much easier to clean up after cooking, camping, or dealing with sand and dirt.
This becomes especially useful during longer trips when small messes can quickly become much harder to manage.
Plan for Sand and Dirt
A coastal camper naturally brings sand into the equation.
Even if you are careful, sand has a way of getting into shoes, bags, bedding, and every small corner.
I like keeping a washable mat near the entrance and having a designated place for outdoor shoes.
A small handheld vacuum can also be extremely useful for quickly cleaning the floor.
For bedding and cushions, washable covers make maintenance easier.
These small decisions may not seem exciting during a remodel, but they can make the camper much more enjoyable to use.
Don’t Spend Too Much on Decor
One of the easiest ways to overspend during a remodel is buying decorative items before the major work is complete.
I learned that it is much easier to decide what the camper actually needs once the walls, cabinets, flooring, lighting, and storage are finished.
You may discover that you do not need another decorative shelf or another set of pillows.
Instead, spend money on improvements that make the camper more comfortable or functional.
A better mattress, improved storage, quality lighting, durable flooring, or comfortable seating can provide much more value than several decorative accessories.
Coastal Camper Ideas on a Smaller Budget
You do not need a large renovation budget to create a coastal camper.
Some of my favorite changes are relatively inexpensive.
Paint the existing cabinets
Replace old cabinet handles
Install simple curtains
Add new cushion covers
Use removable wallpaper for a small accent area
Add a lightweight woven basket
Replace outdated light fixtures
Add a washable rug
Use blue and cream bedding
Add a small wood shelf
Refresh the entry area
These changes can create a completely different atmosphere without requiring a full renovation.
I also recommend completing the project in stages if your budget is limited.
Start with the changes that have the biggest visual impact, then gradually work through the smaller upgrades.
Mistakes I Would Avoid
A camper remodel can become frustrating when the design looks good but does not work well in practice.
One mistake I would avoid is adding too much weight.
Another is choosing materials purely because they look attractive without considering cleaning and durability.
I would also avoid installing permanent features before checking how they affect storage and movement inside the camper.
Another common mistake is using too many coastal decorations.
You do not need anchors, seashells, rope, starfish, and ocean signs everywhere to create a coastal camper.
The style should come from the overall design.
Light colors, natural textures, simple patterns, warm wood, and carefully chosen blue accents can create the look much more effectively.
Take Your Time With the Finishing Touches
The final stage of a camper remodel is where patience really helps.
I prefer living with the space for a little while before deciding what else it needs.
After a few trips, you start noticing things that are difficult to see while the camper is sitting at home.
Maybe a cabinet needs better organization. Maybe the bedside storage is not convenient. Maybe a certain cushion gets dirty too easily. Maybe the lighting needs to be brighter near the kitchen.
Those real camping experiences are more useful than trying to predict everything before using the finished camper.
A remodel should evolve with the way you actually travel.
Think About Maintenance From the Beginning
A good coastal camper remodel should still look good after many camping trips.
That means choosing finishes that are easy to clean and keeping the organization simple enough that you will actually maintain it.
I like having a regular reset routine after each trip.
I remove food, wipe down surfaces, clean the floors, wash removable fabrics when necessary, and return everything to its designated storage area.
I also inspect for moisture and check areas that could develop problems over time.
Taking care of small issues early can prevent them from becoming expensive repairs later.
Make the Camper Feel Bigger Without Adding Space
You cannot physically make a camper larger, but you can make it feel much more spacious.
Light colors are one of the easiest ways to do this.
Keeping the floor visually open also helps. Avoid filling every corner with furniture and storage containers.
Mirrors can reflect light, while open shelving can make frequently used items easier to access.
I also like keeping the same general color palette throughout the camper rather than creating a completely different look in every section.
When the kitchen, dining area, sleeping area, and bathroom connect visually, the entire camper feels more cohesive.
Know When to Stop Remodeling
This might be one of the most important lessons.
It is very easy to keep finding another project.
Once the camper looks brighter, you notice the old light fixture. After changing the light, you notice the countertop. Then you start thinking about replacing the dinette, changing the bathroom, adding more shelving, and repainting something else.
At some point, the camper needs to become a camper again.
For me, the goal is not to create a perfect interior. The goal is to create a comfortable space that makes traveling easier and more enjoyable.
If the camper is functional, comfortable, organized, and feels like a place I actually want to spend time in, the remodel has done its job.
My Favorite Coastal Camper Design Formula
If you are not sure where to start, I would keep the design simple.
Start with light walls and cabinets.
Add warm wood for contrast.
Use neutral flooring.
Bring in muted blue through small accents.
Choose washable and durable fabrics.
Add natural woven textures.
Improve the lighting.
Use practical storage.
Keep the countertops clear.
Finish with a few personal pieces.
This combination creates a coastal atmosphere without making the camper look overly decorated.
It also gives you enough flexibility to change small details later without having to remodel the entire interior again.
Final Thoughts
Remodeling a coastal camper is really about finding the balance between beauty and practicality.
I wanted my camper to feel bright and relaxed, but I also wanted it to work for real camping trips. That meant thinking carefully about storage, weight, moisture, cleaning, durability, and how each part of the interior would actually be used.
The biggest changes do not always require the biggest budget. Painting dated cabinets, improving lighting, changing fabrics, adding practical storage, and introducing natural textures can completely change the atmosphere of a small camper.
I also found that keeping the coastal style subtle makes the finished space feel much more timeless. Rather than trying to recreate a beach house inside the camper, I focused on the things that create that feeling naturally: light colors, warm wood, soft blue accents, comfortable fabrics, natural textures, and plenty of open space.
Most importantly, the finished camper should reflect the way you travel.
Choose materials that can handle your adventures, storage that makes everyday life easier, and decor that makes you happy to come back to the camper after a long day outside.
That is what makes a coastal camper remodel worthwhile. It is not just about making the interior look better. It is about creating a comfortable little space that makes every camping trip feel a little more relaxed.