How to Replace Your RV Slide Trim Like a PRO
RV slide trim does more than make the edges of your slide look finished. It helps protect vulnerable seams, keeps water from getting where it should not, and gives the slide room a clean transition between the exterior wall and the moving components.
When the trim begins to crack, peel away, split, or develop gaps, I do not like leaving it alone for long because a small trim problem can eventually turn into a much more frustrating repair.
Replacing RV slide trim is one of those projects that looks intimidating until you break it into manageable steps.
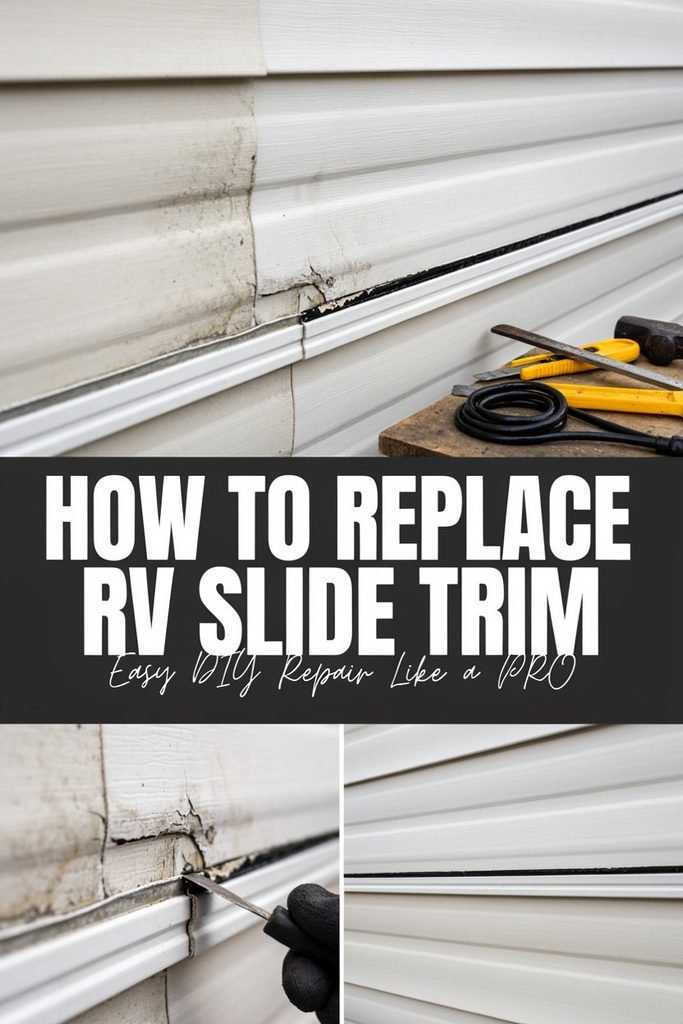
I have found that the actual installation is usually easier than getting the old trim off cleanly and preparing the surface properly.
Taking time with those two steps makes a noticeable difference in how professional the finished repair looks.
In this guide, I will walk you through how I approach replacing RV slide trim, including how to identify the damaged trim, measure for replacement material, remove the old piece without damaging the RV, prepare the surface, install the new trim, seal the edges, and check the finished job. I will also cover the mistakes I would avoid if I were doing the project again.
Why Your RV Slide Trim Matters
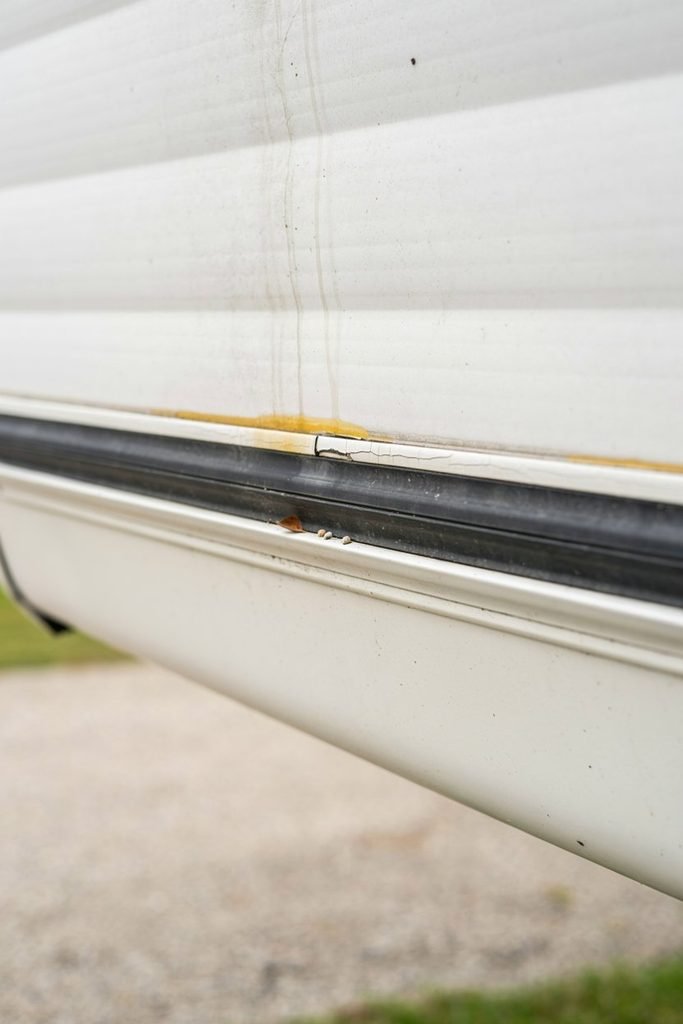
The trim around an RV slide is exposed to a surprising amount of movement and weather. Every time the slide extends or retracts, different parts of the seal and trim can flex.
Add sunlight, rain, dirt, temperature changes, and normal aging, and it is easy to understand why older trim can eventually become brittle or begin pulling away from the RV.
I pay close attention to small gaps because they can become larger as the trim continues to move. A section that has only started separating may still look harmless, but once water finds an opening, the repair can become much more involved.
Another reason I like replacing damaged trim instead of simply covering it with more sealant is appearance.
A thick bead of caulk can temporarily hide a damaged area, but it rarely gives the slide a properly finished look. New trim gives you the opportunity to correct the underlying problem and create a cleaner seal.
Before buying anything, though, I recommend figuring out exactly what type of trim your RV uses.
How to Know When RV Slide Trim Needs Replacing
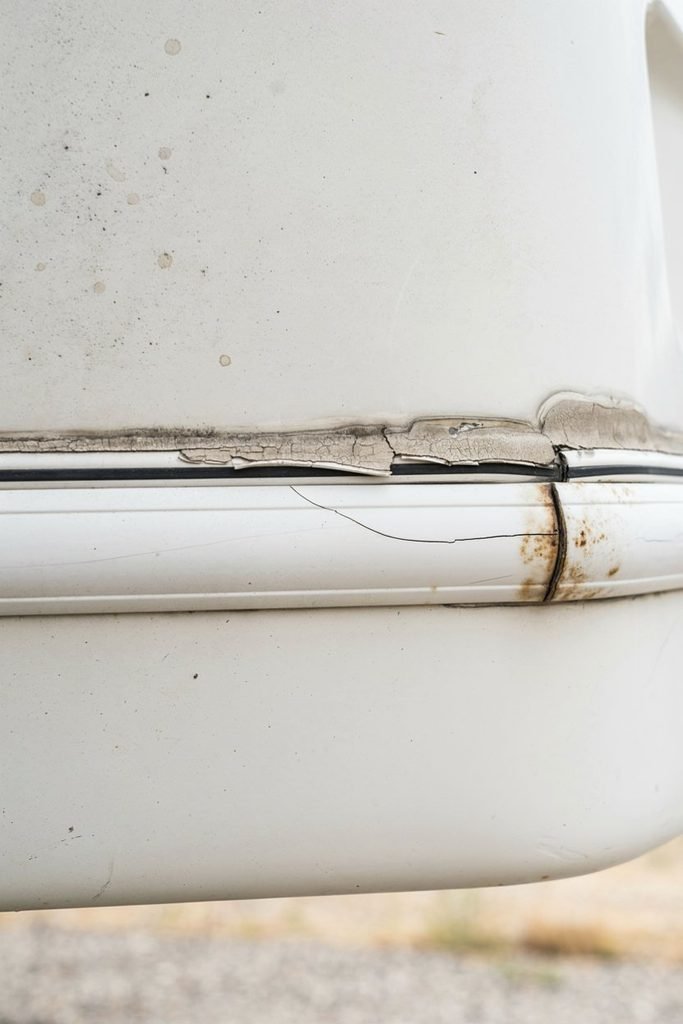
Not every imperfect looking piece of trim needs to be removed immediately. Sometimes a trim piece only needs cleaning or a small amount of compatible sealant. Other times replacement is the better option.
Here are the signs I look for.
Cracked or Brittle Trim
Older trim can become hard and brittle after years of sun exposure. When I gently inspect it and notice cracks developing along the surface, I consider that a good indication that the material is reaching the end of its useful life.
Once trim starts cracking, applying sealant over every crack is usually not the solution I prefer. The material underneath is still deteriorating.
Trim Pulling Away From the RV
This is one of the easiest problems to spot. You may notice one section lifting away from the wall or creating a visible gap.
I always inspect beyond the obvious loose section because the adhesive or fasteners may have failed farther along the trim as well.
Damaged Corners
Corners receive plenty of stress, especially around a slide that moves in and out regularly. A damaged corner can leave an opening where water and dirt can collect.
I take extra care around corners because rushing this part of the repair can leave the new trim looking uneven even when the rest of the installation is good.
Loose or Missing Fasteners
Some RV slide trim systems use screws, staples, adhesive, or a combination of materials. If you can see missing fasteners or notice the trim moving when you lightly press it, I recommend investigating the entire section rather than simply pushing it back into place.
Water Staining or Damp Areas
Water staining near the slide is something I take seriously. Trim itself may not be the original source of the leak, so do not automatically assume that replacing the trim will solve every moisture problem.
Inspect the surrounding seams, seals, roof area, and nearby openings before starting the repair.
What You Need Before Starting
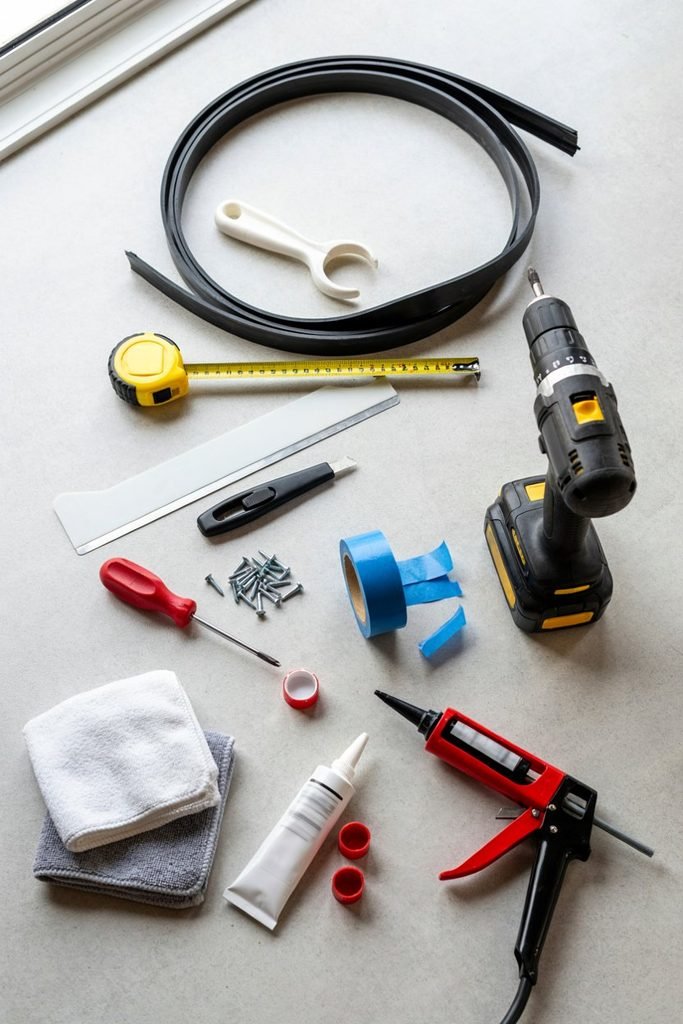
Having the right supplies ready makes this project much less frustrating. I prefer to have everything beside me before removing the old trim because once the old material is off, I want to move directly into cleaning and installation.
You may need:
• Replacement RV slide trim
• Measuring tape
• Plastic trim removal tool
• Plastic scraper
• Utility knife
• Screwdriver or drill
• Replacement screws if required
• Cleaning cloths
• Mild cleaner
• Appropriate RV sealant
• Caulk gun
• Rubbing alcohol or another surface preparation product compatible with your RV material
• Painter’s tape
• Gloves
• Safety glasses
The exact materials will depend on your RV and the type of trim you are replacing.
I would not buy replacement trim based only on a photograph. Measure the existing piece and, when possible, compare the old material with the replacement before committing to a long roll or expensive kit.
Measure Your RV Slide Trim Before Buying Replacement Material

This is one of the steps I would not rush.
Measure the length of every section that needs replacement. If you have trim running along the top, bottom, and sides of the slide, measure each section separately.
I also like to add a little extra material rather than ordering the exact measured length. You need enough material to make clean cuts and account for corners.
If your existing trim is still intact enough to remove in one piece, it can also be useful as a physical reference. You can compare its width, profile, flexibility, and attachment method with the new material.
Take photographs before removing anything as well. I have found that pictures are particularly useful when dealing with corners because they give you a reference for how the original trim was positioned.
Check How the Existing Trim Is Attached
Before pulling anything loose, look closely at how the trim is secured.
Some RV slide trim is held in place with screws. Other installations rely heavily on adhesive or sealant. Some use a combination of mechanical fasteners and sealant.
This matters because your removal method should match the attachment method.
If screws are visible, remove them carefully and keep one nearby so you can compare its size with the replacement fasteners.
If the trim appears to be bonded in place, do not immediately pull hard on it. Cutting through old sealant gradually is much safer than forcing the trim away from the RV.
Remove the Old RV Slide Trim Carefully
This is the part of the project where patience pays off.
I start at an accessible end and work slowly rather than trying to rip the entire piece away in one motion. If there is old sealant holding the trim down, I use a sharp utility knife to carefully score the sealant.
A plastic trim removal tool is helpful because it gives you leverage without putting a sharp metal edge directly against the RV surface.
I avoid digging the tool underneath aggressively. The goal is to separate the trim from the old adhesive or sealant, not to gouge the wall underneath it.
If you encounter a section that refuses to move, stop and look for a hidden screw, staple, or thicker section of sealant. Pulling harder is rarely the best answer.
Take Your Time Around the Corners
Corners deserve extra attention because they are often where old trim has been cut, folded, overlapped, or sealed differently from the straight sections.
Before removing a corner, take a clear photograph.
I also recommend marking the direction of the trim if the installation is complicated. It sounds unnecessary until you are holding several pieces of old material and trying to remember exactly how everything was positioned.
Once the old trim is removed, resist the temptation to immediately install the new material.
The next step is one of the most important parts of the entire repair: getting the surface properly clean and ready for the replacement trim.
Clean the Surface Before Installing New Trim
Once the old trim is off, this is where I slow down.
The surface underneath may have old sealant, adhesive residue, dirt, dust, and small pieces of the previous trim still attached. It can be tempting to scrape everything quickly and move on, but the condition of this surface has a direct effect on how well the new trim sits and seals.
I start by removing the larger pieces of old sealant with a plastic scraper. For stubborn areas, I work gradually rather than forcing the scraper against the RV wall.
I also pay attention to the edges because leftover material along the edge can prevent the replacement trim from sitting flat.
After removing the old material, I clean the area thoroughly and allow it to dry completely. The surface needs to be clean and dry before applying new adhesive or sealant.
I would rather spend extra time preparing the surface than install beautiful new trim over a layer of dirt or old failing sealant.
Inspect the Area for Damage
With the old trim removed, you have a good opportunity to inspect an area that is normally hidden.
Look for:
• Soft or swollen material
• Water staining
• Cracked surfaces
• Rot or deterioration
• Loose screws
• Damaged sealant
• Gaps around the slide opening
• Signs that water has been getting behind the trim
If you discover significant water damage, I would stop the trim installation and investigate the source before covering the area again.
New trim can make a damaged area look better temporarily, but it will not repair structural or water damage underneath.
This is one reason I like doing this project myself. Removing the old trim gives me a chance to actually see what is happening underneath instead of simply covering the problem.
Remove Old Sealant Without Damaging the RV
Old sealant can be surprisingly difficult to remove, especially if it has been exposed to years of weather.
I use a plastic scraper for most of the work and a utility knife only when I need to carefully cut through a stubborn edge.
The important thing is not to rush.
You do not need to remove every microscopic trace of old material from every surface, but you do want to remove loose, failing, or bulky material that would interfere with the new trim.
Avoid digging into the RV wall just to make the surface look perfectly bare. The goal is a clean, stable installation surface, not unnecessary damage to the material underneath.
Dry Fit the New RV Slide Trim
Before applying adhesive or sealant, I recommend placing the replacement trim against the slide opening.
This is one of the easiest steps to skip and one of the easiest ways to create a problem.
Hold the trim in position and check the entire length.
Look at the top and bottom edges.
Check the corners.
Make sure the trim follows the shape of the slide.
Look for areas where the RV surface is uneven.
If something does not sit correctly during the dry fit, it will not magically fix itself once adhesive has been applied.
I would rather make three small adjustments while the trim is loose than discover a positioning problem after everything has been sealed.
Mark Your Cutting Points Carefully
When cutting replacement trim, measure twice before making the cut.
I like to mark the back of the trim with a pencil or another appropriate marker so I know exactly where the cut needs to be made.
Do not assume that two sections that look identical are exactly the same length.
RV construction can have small variations, and older trim may also have stretched, compressed, or changed shape over time.
For straight sections, make the cut as clean and square as possible.
A rough cut can create an unnecessary gap that becomes much harder to hide later.
Plan Your Corners Before Cutting
Corners are where a good installation can start looking amateurish.
Before making any permanent cuts, study how the original trim handled each corner.
You may need to create a clean angle, overlap two pieces, or use a trim profile designed specifically for corners.
I recommend laying the pieces out before attaching them and deciding where each joint will fall.
Try not to place an awkward joint where it will be highly visible.
When possible, I prefer the joints to be neat, consistent, and positioned where they can be properly sealed.
Install the Longest Straight Section First
Once everything has been measured and dry fitted, I usually start with the longest straightforward section.
This gives me a stable reference point for the rest of the installation.
Depending on the trim design and your RV, you may be working with screws, adhesive, sealant, or a combination of these.
Follow the requirements of the specific trim material and your RV construction.
If screws are required, avoid overtightening them. The goal is to hold the trim securely without distorting it.
If adhesive is being used, make sure the surface preparation and temperature conditions are appropriate for the product you selected.
I also avoid rushing the alignment. Once the trim is attached, correcting a crooked section can be much more frustrating than taking another minute to position it correctly.
Keep the Trim Straight as You Work
One of the easiest ways to make a DIY repair look uneven is allowing the trim to slowly drift out of position as you move along the slide.
I like using small pieces of painter’s tape to temporarily hold sections in place while I work.
This gives me a chance to step back and look at the installation from a short distance.
That little step is surprisingly useful.
Something can look perfectly straight when you are standing directly beside it and noticeably crooked when you step back.
I check the alignment regularly instead of waiting until the entire section is attached.
Work Carefully Around the Slide Corners
Once the straight sections are positioned, move carefully into the corners.
Do not force the trim into a sharp bend if the material is not designed to bend that way. Forcing it can create stress that eventually causes the trim to lift or crack.
Make sure the corner transitions are smooth and that the trim does not create a raised section that could interfere with the slide movement.
This is also a good point to check the slide clearance.
Before the sealant is applied, move the slide only if it is safe to do so and if the installation instructions for your particular RV allow it. You want to confirm that nothing is positioned where it could be caught or damaged when the slide moves.
Apply RV Sealant With a Steady Hand
Sealing the trim is where the finished repair starts to look professional.
I prefer a controlled bead rather than applying a huge amount and trying to clean up the excess afterward.
The sealant should cover the appropriate joint without creating a thick, messy ridge.
Keep your caulk gun moving at a consistent speed.
A steady bead is easier to smooth and usually looks much cleaner than stopping and starting repeatedly.
I also keep a few clean cloths nearby because sealant is much easier to clean while it is still workable.
Use a sealant that is appropriate for the specific RV application and compatible with the surfaces involved. Do not assume that any household caulk is suitable for an exterior RV slide.
Do Not Overlook the Ends of the Trim
The ends of the trim deserve attention because they are easy places for water and dirt to find an opening.
Inspect each end after the main section has been installed.
Make sure there is no obvious gap between the trim and the surrounding surface.
If the installation requires sealing the ends, do it carefully rather than leaving them exposed.
Small finishing details like this are what separate a quick repair from an installation that looks like it belongs on the RV.
Smooth the Sealant Carefully
Once the bead is applied, smooth it according to the sealant manufacturer’s recommendations.
I try not to repeatedly touch the same area because that can make the finish messier rather than cleaner.
Work in controlled sections and keep your cloths or cleanup materials ready.
The goal is a smooth transition between the trim and the RV surface.
You do not need a massive amount of sealant to make the repair waterproof. A properly prepared surface, correctly positioned trim, and compatible sealant are much more important than simply applying more product.
Give the Installation Time to Set
One mistake I avoid is immediately putting the slide through repeated movement just because the trim looks finished.
Sealants and adhesives need time to cure properly, and the required curing time depends on the product you use.
Follow the manufacturer’s instructions instead of guessing.
During this period, keep the area clean and avoid disturbing the new trim.
Once the appropriate curing period has passed, you can move on to checking the installation.
Check the Trim Before Using the Slide Normally
Before considering the project finished, inspect the entire repair from several angles.
Look for:
• Uneven sections
• Gaps
• Loose corners
• Excess sealant
• Trim that has lifted away from the wall
• Exposed fasteners that should be secured
• Areas where the sealant did not make proper contact
I also like to run my eyes along the complete length rather than inspecting only the section that originally looked damaged.
A repair can reveal another weak area once the old trim has been removed.
Test the Slide Movement Carefully
The final test is making sure the new trim does not interfere with the normal movement of the slide.
Operate the slide carefully and watch the repaired area.
Listen for unusual rubbing or catching.
Pay particular attention to the corners and any location where the trim changes direction.
If anything looks like it is being pulled, folded, pinched, or dragged, stop and investigate before continuing to operate the slide.
The goal is not simply to make the trim look new. It needs to remain securely positioned while the slide performs its normal movement.
The Most Important Lesson From This Repair
The biggest difference between a quick RV trim replacement and a professional looking repair usually comes down to preparation.
Removing the old trim carefully, cleaning the surface, checking for hidden damage, dry fitting the replacement, measuring your cuts, and taking your time around the corners will make the final installation much easier.
I have learned that trying to save ten minutes during preparation can easily create another hour of cleanup later.
Once the trim is installed correctly, the next priority is keeping it in good condition so you do not have to repeat the same repair sooner than necessary.
How to Tell If Your New RV Slide Trim Is Installed Correctly
Once the new trim has been installed and the sealant has had enough time to cure, I like to do one final inspection before calling the project finished.
Stand back and look at the slide from a few feet away. The trim should follow the shape of the slide without obvious waves, dips, or sections that pull away from the wall.
Then inspect it from close range.
Check the corners, joints, ends, fasteners, and sealed edges. You are looking for anything that could allow water behind the trim or cause the material to loosen later.
I also like to gently inspect the trim by hand. It should feel secure without excessive movement.
A professional looking installation does not necessarily mean every millimeter is perfect. What matters is that the trim is properly secured, the seams are protected, and the slide can move normally without putting unnecessary stress on the new material.
Check for Water Entry After the Repair
Replacing the trim is only part of protecting your RV from moisture.
If the original trim had been loose for a while, I would keep an eye on the area after the repair, especially following heavy rain.
Look around the repaired section for:
• New water staining
• Damp surfaces
• Discoloration
• Soft material
• Separating sealant
• Water collecting around the corners
If you notice moisture after replacing the trim, do not simply add another layer of sealant over everything.
Try to identify where the water is actually entering.
Water can travel along RV surfaces, which means the visible wet spot is not always the original entry point.
What to Do If the New Trim Keeps Coming Loose
If your replacement trim begins separating shortly after installation, I would not immediately blame the trim itself.
Start by checking the surface underneath.
Old adhesive residue, dust, moisture, loose material, or an incompatible sealant can prevent the new trim from bonding correctly.
Also check whether the trim is being pulled or stressed when the slide moves.
If the material is positioned incorrectly, even a strong adhesive may eventually lose the battle against repeated movement.
Another possibility is that the replacement trim is not the correct profile for your RV.
That is why I recommend comparing the old and new pieces before installation rather than buying replacement material based solely on appearance.
Common RV Slide Trim Replacement Mistakes
There are several shortcuts that can make this project harder than it needs to be.
Installing Over Dirty Surfaces
This is one of the biggest problems.
New trim cannot compensate for a surface that was not properly prepared.
Take the extra time to remove loose sealant, dirt, adhesive residue, and debris before installation.
Using Too Much Sealant
More sealant does not automatically mean a better seal.
A huge bead can create a messy appearance and make future repairs much harder.
I prefer a controlled bead that provides the necessary coverage without covering the entire area in excess material.
Cutting Before Dry Fitting
Never assume your measurements are perfect until you have physically checked the trim against the RV.
Dry fitting gives you an opportunity to catch mistakes before adhesive or sealant makes the repair permanent.
Ignoring the Corners
Straight sections are relatively forgiving.
Corners are not.
Take your time around every corner and make sure the trim follows the shape of the slide without being forced into position.
Skipping the Inspection
Once the trim looks good, it can be tempting to put your tools away immediately.
I always recommend one final inspection.
Look at the repair from close up and from a distance.
Check the edges.
Check the corners.
Check the fasteners.
Check the sealant.
Then check the slide movement.
That final inspection can catch a small problem before it becomes a much bigger repair.
How to Keep Your RV Slide Trim Looking Good
Good maintenance can extend the life of your replacement trim.
I like to inspect the slide trim several times throughout the camping season, particularly before and after longer trips.
Look for cracks, separation, hardened sealant, loose sections, or areas where the trim appears to be changing shape.
Keep dirt and debris from building up around the slide as well.
When washing the RV, avoid using unnecessarily aggressive cleaning methods around the trim.
Harsh chemicals, excessive pressure, and rough scrubbing can shorten the life of some trim and sealant materials.
If you notice a small problem early, it is much easier to deal with than a section that has been loose for months.
Inspect Your RV Slide Before Long Trips
A quick inspection before a road trip is something I consider worth doing.
I walk around the slide and look at the trim from the outside.
I check the corners and make sure nothing has started lifting.
I also look for anything that could interfere with the slide moving properly.
This only takes a few minutes, but it can save you from discovering a problem at a campground when you are trying to set up.
When You Should Hire an RV Professional
Replacing exterior trim is a project many RV owners can handle, but there are situations where I would bring in a professional.
If you find extensive water damage, soft structural material, significant rot, damaged framing, or a slide mechanism problem, the trim may only be a symptom of a larger issue.
I would also be cautious if the slide is not moving correctly.
Trim replacement should not be used as a solution for mechanical problems.
A professional RV technician can determine whether the issue is related to the slide mechanism, structure, seals, or another component.
Knowing when a project has moved beyond a simple trim replacement is just as important as knowing how to do the repair yourself.
RV Slide Trim Replacement FAQ
Can I replace RV slide trim myself?
Yes, many RV owners can replace damaged slide trim themselves if the surrounding area is structurally sound and the repair only involves the trim, fasteners, adhesive, and sealant.
The most important parts are choosing compatible replacement material and preparing the surface correctly.
How long does RV slide trim replacement take?
The actual installation can be fairly quick, but I would allow additional time for removing the old trim, cleaning the surface, checking for hidden damage, dry fitting the new material, and allowing sealant or adhesive to cure.
The condition of the existing trim and the size of the slide can make the project take considerably longer.
Do I need to replace the entire trim?
Not necessarily.
If only one section is damaged and you can obtain matching replacement material, replacing the affected section may be enough.
However, if the entire trim is brittle, cracked, discolored, or deteriorating, replacing a larger section can give you a more consistent and longer lasting result.
Can I use regular household caulk on RV slide trim?
I would not choose a sealant simply because it is convenient.
RV exteriors experience movement, weather exposure, temperature changes, and vibration. Use a sealant appropriate for the specific RV application and compatible with the materials involved.
Always follow the manufacturer’s recommendations.
Why does my RV slide trim keep coming loose?
There can be several reasons.
The surface may not have been properly cleaned, the wrong adhesive or sealant may have been used, the trim may not be compatible with the application, or the slide movement may be putting excessive stress on the material.
Check the underlying surface and the slide movement before simply reinstalling the trim.
Should I replace damaged trim before it rains?
If the trim is creating an obvious opening or allowing water behind the exterior surface, I would address it as soon as practical.
Water damage can become considerably more expensive than replacing a damaged piece of trim.
If a permanent repair cannot be completed immediately, protecting the affected area temporarily may help reduce exposure while you arrange the proper repair.
How often should I inspect RV slide trim?
I like checking it several times during the camping season and before longer trips.
There is no universal replacement schedule because trim life depends on the material, weather exposure, slide movement, installation quality, and overall RV use.
Regular inspection is more useful than replacing it simply because a certain amount of time has passed.
My Final Tips for Replacing RV Slide Trim
The biggest lesson I would take away from this project is that the installation itself is only part of the job.
Preparation matters just as much.
Remove the old trim carefully.
Inspect what is underneath.
Clean the surface thoroughly.
Measure before cutting.
Dry fit everything.
Pay special attention to the corners.
Use compatible sealant.
Give the materials enough time to cure.
Then test the slide carefully before considering the repair complete.
I also would not rush simply because the damaged trim looks like a small problem. RV repairs have a way of becoming much more complicated when moisture gets involved.
Replacing worn slide trim is one of those maintenance jobs where a little patience can save you a much bigger headache later.
Once the new trim is properly installed, keep an eye on it during your regular RV inspections. Catching a loose edge or small crack early is much easier than repairing water damage after it has had time to spread.
For me, the goal of a good RV repair is not just making the problem disappear. It is understanding why the original part failed, fixing the underlying issue, and leaving the RV in better condition than when the project started.