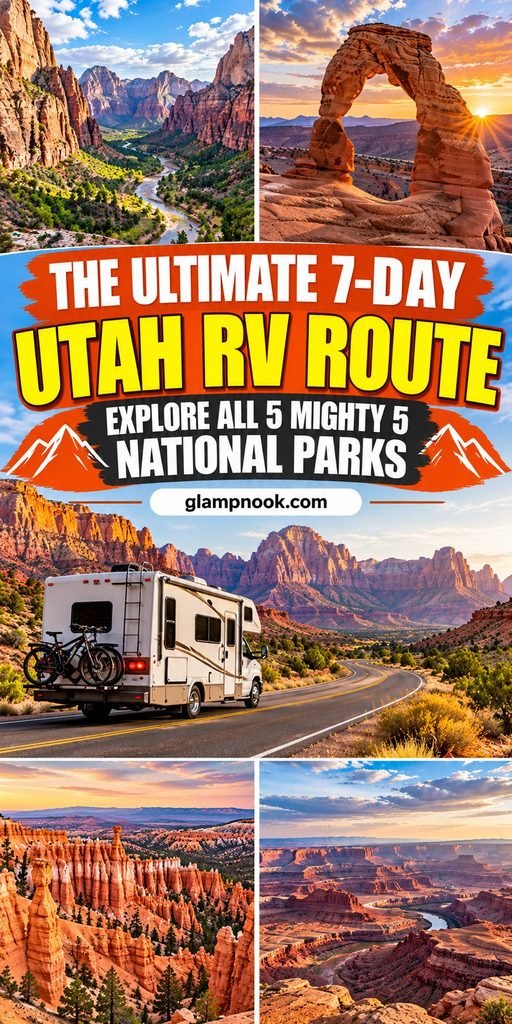
The Ultimate 7-Day Utah RV Route: Explore All 5 Mighty 5 National Parks
Utah is one of those destinations that makes an RV road trip feel like a real adventure. From towering red sandstone cliffs and unusual rock formations to winding scenic highways, deep canyons, and incredible desert landscapes, there is something beautiful waiting around almost every corner.
If I were planning a seven-day Utah RV adventure, I would build the route around the famous Mighty 5 national parks: Zion, Bryce Canyon, Capitol Reef, Arches, and Canyonlands. Each park has its own personality, which makes traveling through all five an unforgettable experience.
The trick is planning your overnight stops carefully, allowing enough time to explore, and choosing roads that are suitable for your RV. You do not want to spend most of your vacation rushing between campgrounds or discovering that your motorhome cannot fit on a particular road.
In this guide, I am sharing a practical seven-day Utah RV route that takes you from Las Vegas to Moab, with scenic stops, camping suggestions, attractions, and helpful driving advice along the way.
Your 7-Day Utah RV Route at a Glance
For this itinerary, I recommend starting in Las Vegas, Nevada, and finishing in Moab, Utah. This creates a one-way road trip through all five national parks without having to drive back to your starting point during the same seven days.
Here is how I would organize the journey:
| Day | Destination | Main Experience |
|---|---|---|
| Day 1 | Las Vegas to Zion | Scenic drive and first canyon views |
| Day 2 | Zion National Park | Explore Zion Canyon |
| Day 3 | Zion to Bryce Canyon | Hoodoos and scenic viewpoints |
| Day 4 | Bryce Canyon to Capitol Reef | Scenic Highway 12 |
| Day 5 | Capitol Reef to Moab | Fruita and desert landscapes |
| Day 6 | Arches National Park | Natural arches and sandstone formations |
| Day 7 | Canyonlands National Park | Panoramic canyon viewpoints |
The route covers approximately 700 miles before additional sightseeing and campground driving. Actual mileage will depend on your chosen campsites, road conditions, and stops.
Before You Start: Planning Your Utah RV Road Trip

Before getting into the daily itinerary, there are a few things I would organize in advance. Utah is popular with road trippers, and arriving without a camping plan can make an otherwise wonderful vacation unnecessarily stressful.
1. Choose the Right RV for the Route
You do not need an enormous motorhome to enjoy Utah, but your vehicle choice matters.
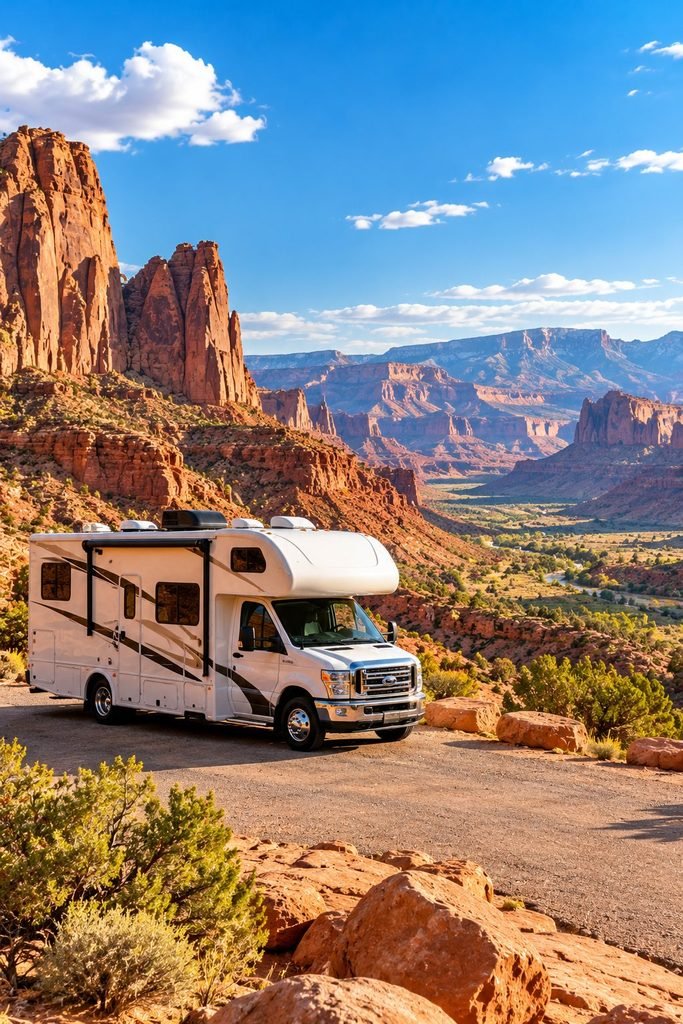
A smaller motorhome, campervan, or travel trailer can make navigating scenic roads and finding suitable campsites easier. Larger RVs require more attention because some roads, parking areas, and campground spaces have vehicle length restrictions.
Before booking your rental, check:
- The total length of the RV, including any towing vehicle.
- The vehicle’s height and width.
- Whether the rental agreement permits travel on your planned roads.
- Whether your selected campgrounds can accommodate your vehicle.
- Whether you have enough storage for water, food, and outdoor equipment.
I would avoid choosing an RV based only on how much sleeping space it offers. A vehicle that is comfortable to drive and park can make a seven-day trip much easier.
2. Book Your RV Campgrounds Early
Camping is a major part of the Utah RV experience, but popular national park campgrounds can fill up well in advance.
For this route, I would look for overnight accommodation around:
- Springdale or the Zion area.
- Bryce Canyon City or nearby communities.
- Torrey, near Capitol Reef.
- Moab, for access to Arches and Canyonlands.
Do not assume every campground can accommodate your RV. Check maximum vehicle length, hookup availability, seasonal opening dates, and cancellation policies before booking.
3. Decide When to Visit Utah
The best time for this road trip depends on what you want from the experience.
Spring (March to May): Spring can bring comfortable daytime temperatures and beautiful scenery. However, higher elevations around Bryce Canyon can still experience cold weather and occasional snow.
Summer (June to August): Summer offers long daylight hours and plenty of time for sightseeing. The downside is intense heat in lower elevation desert areas, busy campgrounds, and crowded park facilities.
Fall (September to October): Fall is an excellent period to consider for an RV itinerary. Temperatures are often more comfortable, and seasonal colors can make the scenery even more beautiful.
Winter (November to February): Winter can bring snow, icy roads, and campground closures, particularly around Bryce Canyon. Some lower elevation areas remain accessible, but this route requires more flexibility.
For a first-time Utah RV road trip, I would generally consider late spring or early fall while checking weather and road conditions before departure.
Day 1: Las Vegas to Zion National Park

Your Utah adventure begins in Las Vegas, where you can collect your RV, organize your supplies, and head northeast toward Zion National Park.
The drive from Las Vegas to the Zion area is approximately 160 miles, depending on your destination and route. Without extended stops, it can take around 2.5 to 3 hours in a regular vehicle, but I would allow more time when driving an RV.
As you approach Zion, the scenery begins to change. The desert landscape gives way to enormous sandstone cliffs, deep canyons, and striking red rock formations.
For the first day, I would keep the schedule relaxed. After picking up an RV, buying groceries, and driving to your campground, there may not be much time left for a demanding hike.
Things to Do on Your First Day
Explore Springdale
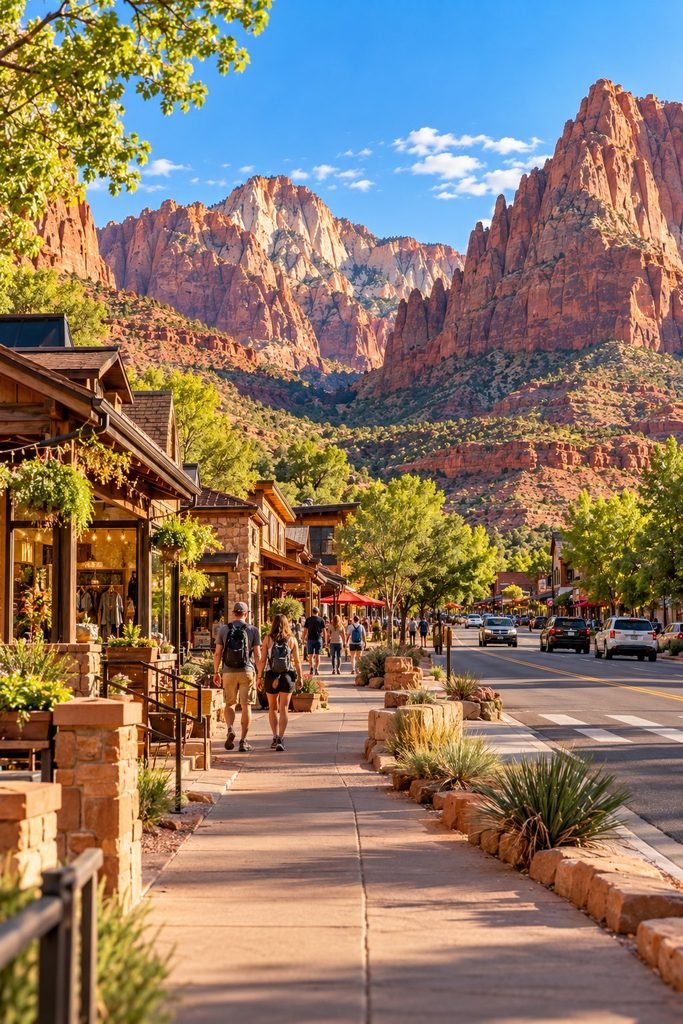
Springdale is a convenient base for visiting Zion. You can walk around town, pick up last-minute supplies, enjoy a meal, and take in the surrounding mountain views.
Visit the Zion Canyon Area
If you arrive early enough and park access allows, spend some time enjoying the canyon scenery. Even a short visit can give you a wonderful introduction to Zion.
Settle Into Your RV Campground
After a travel day, I would prioritize setting up the RV, checking your water and electrical connections, preparing dinner, and getting a good night’s rest.
You will want plenty of energy for the next day.
Where to Stay Near Zion
Look for an RV campground in or around Springdale, or another suitable location near the park.
When comparing options, check:
- RV length limits.
- Full hookup availability.
- Access to the park shuttle or town shuttle.
- Dump station facilities.
- Whether the campground is open during your travel dates.
Watchman Campground is an option inside Zion National Park, but confirm current availability, site dimensions, and RV restrictions before planning around it.
Day 2: Explore Zion National Park

Day two is dedicated to exploring Zion National Park. I would avoid trying to see every corner of the park in one day. Instead, choose a few major sights and enjoy them without constantly watching the clock.
Zion is famous for its dramatic sandstone cliffs, winding canyon roads, riverside scenery, and hiking trails.
Best Things to Do in Zion
1. Ride the Zion Canyon Shuttle
During periods when the Zion Canyon shuttle operates, it is one of the most convenient ways to access popular stops along the canyon.
The shuttle connects several important areas and helps reduce the need to find parking at each location.
Check the current shuttle schedule and operating arrangements before your visit. Private vehicle access on Zion Canyon Scenic Drive is restricted during shuttle operations, with exceptions for authorized vehicles and other permitted access.
2. Visit the Riverside Walk
Riverside Walk is a beautiful option if you want to experience Zion without committing to a strenuous hike.
The paved trail follows the Virgin River through a dramatic canyon landscape. It is a lovely place to take photographs, enjoy the scenery, and appreciate the scale of the surrounding cliffs.
3. Explore the Emerald Pools Area
The Emerald Pools area offers a different side of Zion, with vegetation, rocky scenery, and seasonal water features.
There are different trail options, so choose one that matches your fitness level and current trail conditions.
4. Enjoy the Zion Scenic Views
You do not have to spend the entire day hiking to enjoy Zion. Some of the most memorable experiences come from simply taking time to appreciate the views.
Bring your camera, carry enough drinking water, and allow time for breaks.
RV Camping Near Zion
For this night, I would stay in the same campground rather than moving the RV again.
That gives you more time to explore and avoids packing everything up after a busy day.
If you are staying outside the park, check shuttle connections and parking arrangements before setting off. RV parking within national parks can be limited, so avoid assuming that a large vehicle will fit in every visitor parking area.
Day 3: Drive From Zion to Bryce Canyon National Park

Suggested overnight area: Bryce Canyon City or a nearby RV campground.
Day three takes you from Zion’s towering canyon walls to the unusual rock formations of Bryce Canyon National Park.
The drive is approximately 85 to 90 miles, depending on your campground and route. I would allow around two hours or more in an RV, with extra time for road conditions and stops.
The landscape changes dramatically as you approach Bryce Canyon. Instead of enormous canyon walls, you begin seeing thousands of tall, narrow rock formations known as hoodoos.
The contrast is one of the reasons I would never leave Bryce Canyon out of a Utah road trip.
Best Things to Do in Bryce Canyon
1. Visit Sunrise Point
Sunrise Point is one of the best places to appreciate Bryce Canyon’s famous amphitheater.
The view opens across layers of orange, red, and cream colored rock formations. Even if you are not planning a long hike, this is a worthwhile stop.
2. Explore Sunset Point
Sunset Point offers another spectacular perspective of the hoodoos.
I would make time for both Sunrise and Sunset Points because the changing light can make the landscape look completely different.
3. Walk Part of the Navajo Loop Trail
If you enjoy hiking, the Navajo Loop is one of the park’s popular trails.
It takes you closer to the hoodoos and gives you a much better sense of the scale of the formations.
However, the trail involves elevation changes and can be strenuous in places. Check current trail conditions, closures, and weather before starting.
4. Drive the Bryce Canyon Scenic Drive
If you are traveling with family or prefer a more relaxed day, the scenic drive is a wonderful alternative.
There are several overlooks along the route where you can stop and enjoy the landscape. Check parking restrictions and RV suitability at each viewpoint before pulling in.
Where to Camp Near Bryce Canyon
Look for an RV site near Bryce Canyon City or another campground in the surrounding area.
Bryce Canyon sits at a higher elevation than Zion, so temperatures can be considerably cooler, especially in the evening.
I would pack warm layers even if you are visiting during summer. Check campground availability, hookup options, and RV length limits before booking.
Day 4: Drive From Bryce Canyon to Capitol Reef National Park

Day four is one of the most memorable driving days on this itinerary. Instead of rushing directly to your next destination, take your time along Utah’s famous Scenic Byway 12.
This highway connects the Bryce Canyon area with Torrey, near Capitol Reef National Park. The route is approximately 123 miles long and takes around three hours without extended sightseeing stops.
The scenery changes constantly along the way. You will pass red rock landscapes, forested mountains, open valleys, and some incredible viewpoints.
I would leave Bryce Canyon in the morning, make a few planned stops, and arrive near Capitol Reef with enough daylight to settle into your campground.
Important RV note: Scenic Byway 12 reaches an elevation of approximately 9,600 feet on Boulder Mountain. Weather conditions can change quickly, especially in winter. Check road conditions before departure, and make sure your RV is suitable for the route. Avoid unmaintained backcountry roads that are unsuitable for larger vehicles.
Best Stops Along Scenic Byway 12
1. Red Canyon
Red Canyon is a beautiful place to stop before continuing toward the higher elevations of the route.
You will see distinctive red sandstone formations, colorful rock walls, and natural scenery that feels like a preview of the landscapes still to come.
It is a good place to take photographs, stretch your legs, and enjoy a short break from driving.
2. Grand Staircase-Escalante National Monument
<AsyncImage query=”Grand Staircase Escalante Utah expansive red rock desert landscape scenic highway” aspectRatio=”2:3″ width=”100%”/>
As you continue along Highway 12, you will pass through landscapes associated with Grand Staircase-Escalante National Monument.
The area is known for its dramatic sandstone formations, wide desert views, and remote scenery.
I would not try to squeeze in too many hikes on this driving day. Enjoy the viewpoints and choose one or two stops that fit your schedule.
3. Boulder Mountain
Boulder Mountain provides a striking contrast to the red desert scenery.
The higher elevation brings forests, mountain views, and cooler temperatures. It is worth taking a break here if the weather and road conditions are suitable.
Be particularly careful when driving an RV through this section. Steep grades, curves, and changing weather require attention, especially if you are towing a trailer.
4. Arrive in Torrey
Torrey is a convenient base for visiting Capitol Reef.
You will find places to eat, small shops, fuel options, and accommodation around town. It is also a good place to pick up anything you may need before spending the next day exploring the park.
Where to Stay Near Capitol Reef
I would look at two main options.
Fruita Campground: This is an attractive choice for visitors who want to stay inside Capitol Reef National Park. It is located in the historic Fruita area and offers a memorable setting surrounded by red rock scenery.
However, it is not a full hookup RV resort. Check individual site dimensions, available facilities, and reservation dates before booking.
Torrey RV Campgrounds: Staying in Torrey can be more convenient if you want access to additional RV services and a choice of campground facilities.
Look for full hookups if you need electricity, water, and sewer connections during your stay.
Day 5: Explore Capitol Reef National Park and Drive to Moab

Suggested overnight area: Moab, Utah.
Capitol Reef is sometimes overlooked when travelers plan a Utah road trip, but I would not skip it.
The park has a different atmosphere from Zion and Bryce Canyon. Instead of concentrating on one famous viewpoint, you get a mixture of dramatic rock formations, historic buildings, orchards, scenic drives, and interesting geological features.
The Waterpocket Fold is the park’s defining geological feature. It is a massive wrinkle in the Earth’s crust that stretches for nearly 100 miles.
I would spend the morning exploring Capitol Reef before continuing toward Moab.
Best Things to Do in Capitol Reef
1. Explore the Fruita Historic District
Fruita is one of the most charming areas in the park.
You will find historic buildings, old orchards, and beautiful scenery surrounded by sandstone cliffs.
It is a lovely place to slow down, take photographs, and learn a little about the area’s history.
Depending on the season, certain orchards allow visitors to pick fruit under park guidelines. Check which orchards are open and whether harvesting is permitted during your visit.
2. Visit the Gifford Homestead
The Gifford Homestead is a historic farmhouse that gives visitors a glimpse into the area’s agricultural past.
It is also known for its traditional baked goods and small treats when the seasonal sales area is open.
I would check its operating dates before planning a visit because it does not operate throughout the entire year.
3. Drive the Capitol Reef Scenic Drive
The Scenic Drive is one of the easiest ways to experience the park without committing to a long hike.
The paved road takes you through beautiful red rock scenery and provides access to several viewpoints and trail areas.
The main scenic road is approximately 7.9 miles each way, so allow time for the return journey and sightseeing.
Be careful with the dirt side roads. Some have vehicle restrictions, and certain routes are unsuitable for larger RVs.
4. Hike to Hickman Bridge
If you enjoy hiking, Hickman Bridge is a wonderful natural feature to visit.
The trail takes you through a beautiful desert landscape to a large natural sandstone bridge.
It is a popular hike, but it involves uneven terrain and elevation changes. Wear comfortable footwear, carry enough water, and check trail conditions before leaving.
Continue Toward Moab
After exploring Capitol Reef, it is time to continue east toward Moab.
The drive is approximately 140 miles, depending on your starting point and route. I would allow around 2.5 to 3 hours of driving time, plus any stops.
You will generally follow Highway 24 toward Interstate 70 before continuing south toward Moab on US-191.
This is a good time to check your fuel, water, and grocery supplies before reaching your next campground.
I would avoid trying to add too many extra attractions on this day. You have two major national parks waiting in Moab, so arriving with enough time to rest is more useful than rushing through everything.
Where to Stay in Moab
Moab is one of the most convenient bases for an RV trip because it provides access to both Arches and Canyonlands.
You will find private RV resorts and campgrounds with different levels of facilities.
When booking, compare:
- Full hookups.
- RV length restrictions.
- Laundry facilities.
- Dump stations.
- Shade and swimming facilities, especially during hot weather.
- Distance from the national park entrances.
I would stay in the same Moab campground for both remaining nights. This means you will not have to pack up and move your RV every morning.
Day 6: Explore Arches National Park
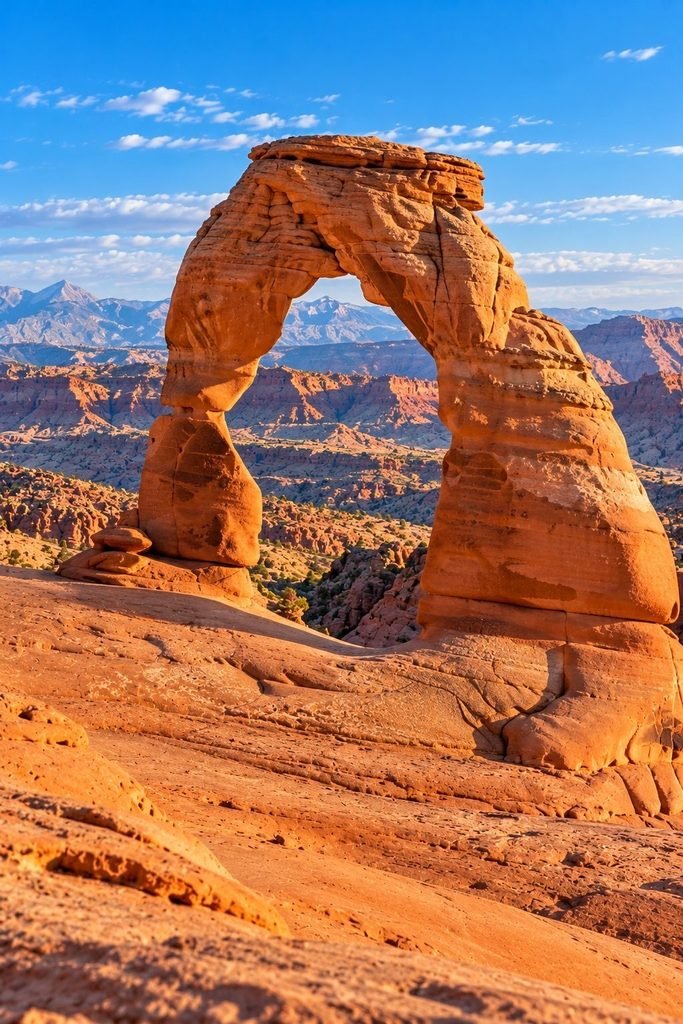
Arches National Park is one of the highlights of this entire road trip.
The park is famous for its extraordinary sandstone arches, balancing rocks, towering rock formations, and desert scenery.
There are more than 2,000 documented natural stone arches in the park, making it one of the most remarkable places to visit in Utah.
I would dedicate most of day six to Arches rather than trying to squeeze in another major destination.
Best Things to Do in Arches National Park
1. Visit Delicate Arch
Delicate Arch is probably the most recognizable natural landmark in Utah.
The freestanding sandstone arch stands above a wide open landscape, creating one of the most memorable views in the American Southwest.
You can view it from designated viewpoints, or hike the Delicate Arch Trail for a closer experience.
The full hike is approximately three miles round trip and involves exposed terrain, elevation gain, and very little shade.
If you are visiting during warmer months, I would avoid the hottest part of the day. Bring plenty of water and check current trail conditions.
2. Explore The Windows Section
The Windows Section is a wonderful place to see several impressive natural formations in one area.
You can visit North Window, South Window, and Turret Arch.
There are relatively short walking options, making this area suitable for visitors who want impressive scenery without committing to a long hike.
It is also an excellent place for photography.
3. See Balanced Rock
Balanced Rock is one of the park’s most unusual formations.
A huge sandstone boulder appears to sit precariously on top of a much narrower rock column.
There is a short trail around the formation, making it a convenient stop when driving through the park.
4. Visit Double Arch
Double Arch is another place I would make time for.
Two enormous arches connect to create an impressive natural structure. You can walk relatively close to the formation and appreciate its scale.
The short approach makes it a good option if you are traveling with people who do not want a demanding hike.
5. Explore the Devils Garden Area
Devils Garden is one of the most rewarding areas of the park for visitors who enjoy walking.
It is home to several natural arches, including Landscape Arch, which is among the longest natural rock arches in North America.
You can choose a shorter walk to see Landscape Arch or continue farther along the trail if you have the time, fitness, and suitable conditions.
Some sections are exposed and involve uneven slickrock, so choose your route carefully.
RV Tips for Visiting Arches
I would leave the RV at your campground and use a smaller vehicle to explore the park if possible.
Parking areas can be limited, especially around popular trailheads and viewpoints.
Arriving early in the morning can help you avoid some of the busiest periods and make parking easier.
Also, Arches does not have RV hookups inside the park. Moab is the better base if you need electricity, water, and sewer facilities.
Check current entrance arrangements before your visit because reservation and timed-entry policies can change.
Day 7: Visit Canyonlands National Park

Your final day takes you to Canyonlands National Park, where you will see a completely different landscape from the natural arches of the previous day.
Canyonlands is known for enormous canyons, deep valleys, dramatic cliffs, and wide open desert views.
The park is divided into several districts, and they are not connected by roads inside the park. For this seven-day itinerary, I recommend visiting the Island in the Sky district because it is the most convenient option from Moab.
Best Things to Do in Canyonlands
1. Visit Mesa Arch
Mesa Arch is one of the most photographed locations in Canyonlands.
The natural sandstone arch frames a beautiful view across the surrounding canyon landscape.
Many visitors arrive early in the morning to see the changing light through the arch.
The walk to Mesa Arch is relatively short, but the area can become busy. Be respectful of other visitors and stay away from unsafe cliff edges.
2. Enjoy the View at Grand View Point
Grand View Point offers one of the most impressive panoramic views in the park.
You can see layers of canyon walls stretching into the distance, with deep valleys and dramatic geological formations.
There is a viewpoint close to the parking area, so you do not need to complete a long hike to enjoy the scenery.
3. Stop at Green River Overlook
Green River Overlook is another beautiful stop.
From the viewpoint, you can look across a vast canyon landscape with the Green River winding through the formations below.
It is a great place to pause, take photographs, and enjoy the scale of the park.
4. Explore Shafer Canyon Overlook
Shafer Canyon Overlook provides a dramatic view of the surrounding canyon walls and the winding road below.
It is a particularly interesting stop for road trip enthusiasts because you can appreciate just how rugged the landscape is.
Do not confuse viewing the road from the overlook with driving it. Shafer Trail is a rugged backcountry route, not a road I would recommend taking an ordinary rental RV onto.
Important RV Considerations at Canyonlands
Canyonlands requires a little more planning if you are traveling in a large motorhome.
Some areas of the Island in the Sky district have limited parking and can be difficult for oversized vehicles.
If your RV is longer than 25 feet, check current vehicle restrictions before entering. In many cases, leaving the RV at your Moab campground and visiting in a smaller vehicle is the easier choice.
Where to Stay on Your Final Night
If you are flying home or collecting a vehicle elsewhere, I would spend the final night in Moab.
This gives you access to restaurants, grocery stores, fuel stations, and RV facilities.
You can also use the evening to clean your RV, organize your belongings, empty the waste tanks, and prepare for the return journey.
How Much Does a 7-Day Utah RV Road Trip Cost?
The cost of this road trip depends on your RV rental, travel season, campground choices, fuel consumption, and how many people are sharing the expenses.
I would not plan this trip around one fixed budget because RV rental prices and campsite rates can change considerably throughout the year.
Instead, I would divide the budget into the following categories.
1. RV Rental
Your rental will probably be one of the biggest expenses.
The price depends on the type of RV, rental company, travel dates, mileage allowance, insurance, and whether you are picking up and dropping off at different locations.
Remember to check whether the rental company charges extra for:
- Additional mileage.
- Generator use.
- Bedding and kitchen equipment.
- Cleaning.
- Insurance.
- One-way rental arrangements.
A campervan may be easier to maneuver, while a larger motorhome can provide more sleeping space and amenities.
2. Campground Fees
You will need to budget for approximately six nights of accommodation on this itinerary.
Prices vary depending on whether you choose a national park campground, private RV resort, or basic campsite.
Full hookup campgrounds usually cost more than simple dry camping options.
I would reserve the most convenient sites first, particularly around Zion, Bryce Canyon, and Moab.
3. Fuel
Fuel costs depend on the RV’s fuel economy, fuel prices, driving conditions, and how much extra sightseeing you do.
Mountain roads, elevation changes, air conditioning, and heavy loads can all affect fuel consumption.
For a more accurate estimate, use this calculation:
Total estimated fuel cost = Total miles driven ÷ RV miles per gallon × Average fuel price per gallon.
Include extra mileage for campground trips, grocery shopping, and any side trips.
4. National Park Entrance Fees
If you are visiting all five national parks, entrance fees can become a noticeable part of the budget.
Compare individual park entry fees with the cost and eligibility requirements of an America the Beautiful annual pass before your trip.
The pass can be worthwhile for visitors planning multiple national park visits, but check current fee rules and pass conditions.
5. Food and Supplies
One advantage of traveling in an RV is having a kitchen.
You can prepare breakfast, pack lunches, and cook dinner rather than eating at restaurants every day.
Before leaving Las Vegas, I would stock up on:
- Drinking water.
- Breakfast supplies.
- Sandwich ingredients.
- Snacks.
- Easy meals.
- Coffee and other drinks.
- Basic cooking supplies.
Moab also has grocery stores where you can restock before your final park visits.
What to Pack for a 7-Day Utah RV Road Trip
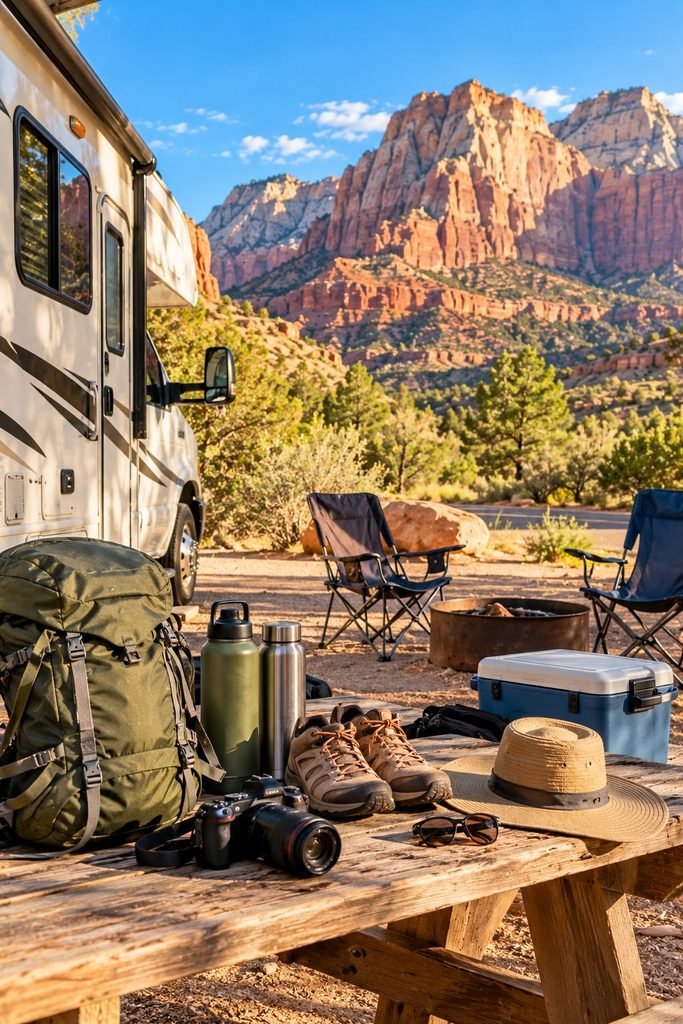
Packing for Utah requires a little more thought than an ordinary vacation because you will experience different elevations, temperatures, and outdoor conditions.
Here are the essentials I would bring.
Clothing
- Comfortable hiking trousers or shorts.
- Lightweight breathable shirts.
- Warm layers for cooler mornings and evenings.
- A waterproof jacket.
- Comfortable walking shoes.
- Extra socks.
- A sun hat.
- Sunglasses.
Bryce Canyon is considerably higher in elevation than some of Utah’s other parks, so do not assume every destination will have the same temperature.
RV Essentials
- Drinking water containers.
- RV toilet supplies.
- Electrical adapters compatible with your rental.
- Charging cables.
- Portable power bank.
- Headlamp or flashlight.
- Basic cleaning supplies.
- Outdoor chairs.
- Reusable food containers.
- First aid kit.
Check what your rental already provides so you do not waste money buying duplicate equipment.
Hiking and Outdoor Essentials
- Reusable water bottles.
- Sunscreen.
- Day backpack.
- Snacks.
- Hiking poles if needed.
- Offline maps.
- Camera.
- Comfortable walking shoes.
Carry more water than you think you will need, especially when hiking in exposed desert areas.
Important Tips for Driving an RV Through Utah
Utah is an incredible destination for an RV adventure, but the roads and landscapes can be challenging if you are not prepared.
These are the tips I would keep in mind throughout the trip.
1. Check Your RV Dimensions Before Booking
Do not wait until you arrive in Utah to discover that your rental is too tall, wide, or long for a particular road.
This is particularly important around Zion’s Zion-Mount Carmel Highway and Tunnel.
Vehicle size, height, width, and weight restrictions apply. Confirm the current limits before planning to drive through the tunnel, particularly if you are renting a large motorhome.
If your vehicle exceeds the limits, plan an alternative route rather than assuming an escort will be available.
2. Do Not Depend Entirely on GPS
GPS directions are useful, but they are not always suitable for large RVs.
Some navigation systems may suggest narrow roads, steep routes, or unmaintained dirt roads.
Use official park maps, road signs, and current road information to confirm your route.
3. Start Early
I would aim to reach the most popular park areas early in the morning.
This can help you avoid some traffic congestion, find parking more easily, and enjoy cooler temperatures.
It is especially useful when visiting Arches and popular Zion Canyon locations.
4. Keep an Eye on Weather Conditions
Utah’s weather can change quickly.
Summer brings intense heat and the possibility of thunderstorms and flash flooding. Higher elevations can experience cold temperatures and snow during other seasons.
Never drive or hike through floodwater, and avoid narrow canyon areas when flash flood warnings are in effect.
5. Plan Fuel Stops Carefully
Do not assume fuel stations will be available just when you need them.
Fill up before heading into remote areas, particularly if your RV has a large fuel tank and consumes more fuel than a regular vehicle.
I would also keep an eye on your fuel gauge rather than waiting until it is nearly empty.
6. Respect RV Parking Restrictions
Large RVs cannot fit into every parking area.
At some viewpoints, parking spaces are designed for ordinary cars and smaller vehicles.
If a park recommends leaving oversized vehicles elsewhere, follow that guidance rather than blocking roads or taking up multiple spaces where prohibited.
7. Give Yourself Enough Time
Seven days is enough to experience the highlights of the Mighty 5, but it is a busy itinerary.
If you want longer hikes, relaxed mornings, or extra time at scenic stops, consider extending the trip to nine or ten days.
I would rather enjoy fewer attractions properly than rush through every park.
Is Seven Days Enough to Visit All Five Utah National Parks?
Yes, seven days can be enough to experience the main highlights of all five national parks, especially if you are comfortable with a fairly active road trip.
However, it is important to understand that you will not see everything.
Zion alone could keep you busy for several days, while Canyonlands has multiple districts that deserve separate visits.
For this itinerary, I would prioritize the most accessible and memorable attractions:
- Zion Canyon and Riverside Walk.
- Bryce Canyon’s main viewpoints.
- Capitol Reef’s Fruita area and Scenic Drive.
- Delicate Arch and the Windows Section at Arches.
- Mesa Arch and Grand View Point at Canyonlands.
If you have more time, I would add another night in Zion or Moab.
Frequently Asked Questions About a 7-Day Utah RV Road Trip
Where Should I Start a 7-Day Utah RV Road Trip?
Las Vegas is a convenient starting point for a west-to-east itinerary covering Zion, Bryce Canyon, Capitol Reef, Arches, and Canyonlands.
You can also start in Salt Lake City and travel in the opposite direction, depending on RV rental availability and your preferred return airport.
How Many Miles Is the Utah Mighty 5 RV Route?
The total mileage depends on your starting point, campground locations, park entrances, and sightseeing detours.
The Las Vegas-to-Moab itinerary described here covers roughly 700 miles before additional local driving and detours. Use a route planner suitable for your RV to calculate the exact distance.
Can You Visit All Five Utah National Parks in Seven Days?
Yes. You can visit all five parks in seven days if you focus on their major attractions and plan your campground locations carefully.
It will be a relatively busy trip, so travelers who prefer longer hikes and slower mornings may enjoy a nine or ten-day itinerary more.
What Is the Best Month for a Utah RV Road Trip?
Late spring and early fall are good periods to consider because daytime temperatures are often more comfortable than during the hottest summer months.
However, weather varies by elevation. Bryce Canyon can be cold even when the lower desert areas are warm.
Can You Drive a Large RV Through Zion National Park?
You can visit Zion with an RV, but certain roads have vehicle restrictions.
The Zion-Mount Carmel Highway and Tunnel have specific size and weight limits. Check the current restrictions before planning your route, particularly if you are renting a large motorhome.
Do You Need Reservations for Utah National Parks?
Entrance reservation requirements vary by park and year. Some activities and campgrounds have separate reservation or permit requirements.
Always check current park arrangements before your trip rather than relying on information from an older itinerary.
Where Should I Stay When Visiting Arches and Canyonlands?
Moab is the most convenient base for visiting both parks.
It offers a variety of RV campgrounds, restaurants, grocery stores, and fuel stations.
You can stay at one campground and use a smaller vehicle for your daily park visits.
Is Utah Safe for an RV Road Trip?
Utah is a popular road trip destination, but normal outdoor and driving precautions are important.
Prepare for changing weather, steep roads, wildlife, remote areas, and limited mobile phone coverage. Keep emergency supplies in your RV and check road conditions before traveling.
Final Thoughts on the Ultimate 7-Day Utah RV Route
A seven-day RV road trip through Utah is an incredible way to experience some of the most beautiful scenery in the American Southwest.
From Zion’s towering sandstone cliffs to Bryce Canyon’s unusual hoodoos, Capitol Reef’s dramatic geological formations, and the natural arches and deep canyons around Moab, every destination brings something different to the journey.
What I like most about this route is the variety. You are not spending seven days looking at the same landscape. Each driving day introduces a new environment, a different kind of scenery, and another reason to stop and take photographs.
The biggest thing I would recommend is planning your campground locations, checking RV restrictions, and allowing enough time for each park. Do not underestimate driving distances or assume that every scenic road is suitable for a large motorhome.
If you can extend the trip beyond seven days, even better. You will have more time for hiking, relaxing at campgrounds, and discovering some of the quieter corners of Utah.
But if seven days is what you have, this route gives you a wonderful introduction to all five of Utah’s famous national parks.