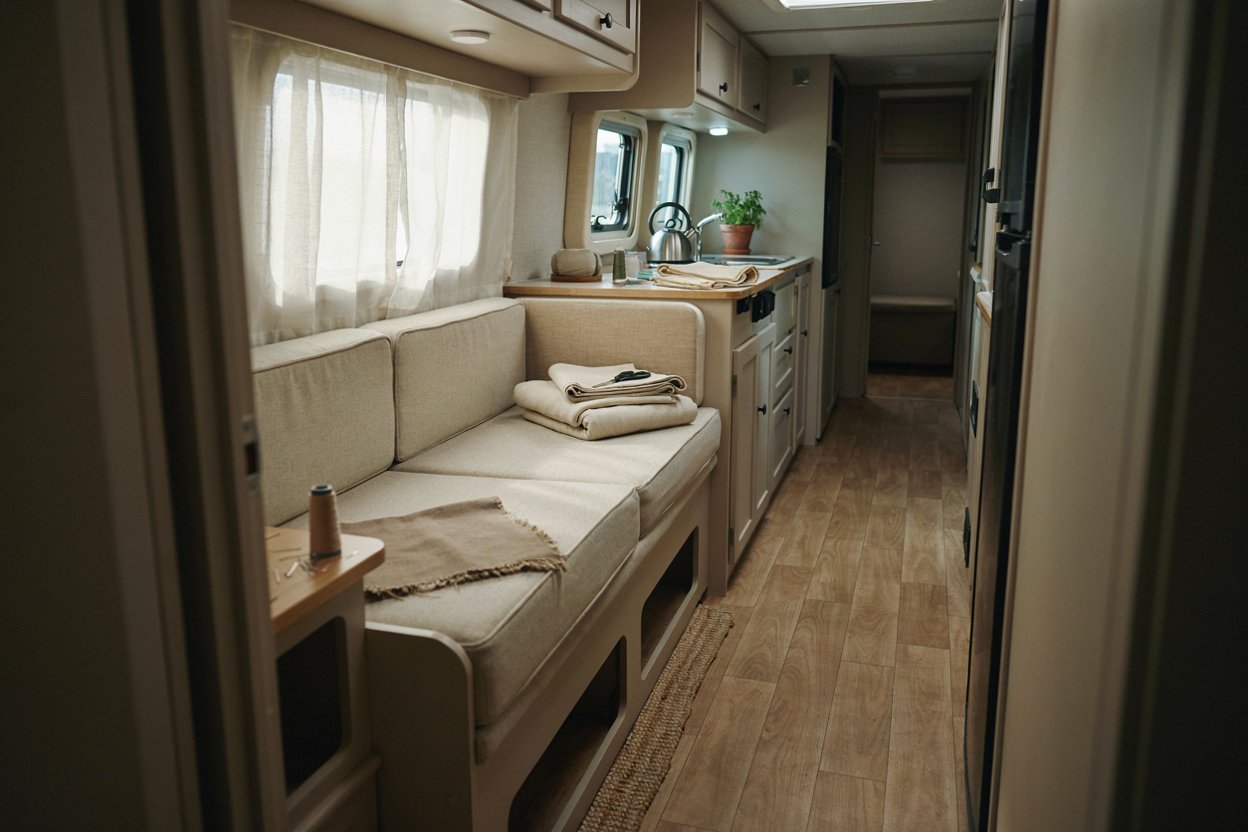
How To Reupholster Camper Cushions The Easy Way
Reupholstering camper cushions is one of those projects that can completely change the way an older RV or camper feels without requiring a full renovation.
When the cushions look tired, stained, faded, or simply stuck in another decade, replacing the entire seating area can seem expensive.
I found that giving the existing cushions new covers was a much more practical way to make the space feel cleaner, brighter, and more like my own.
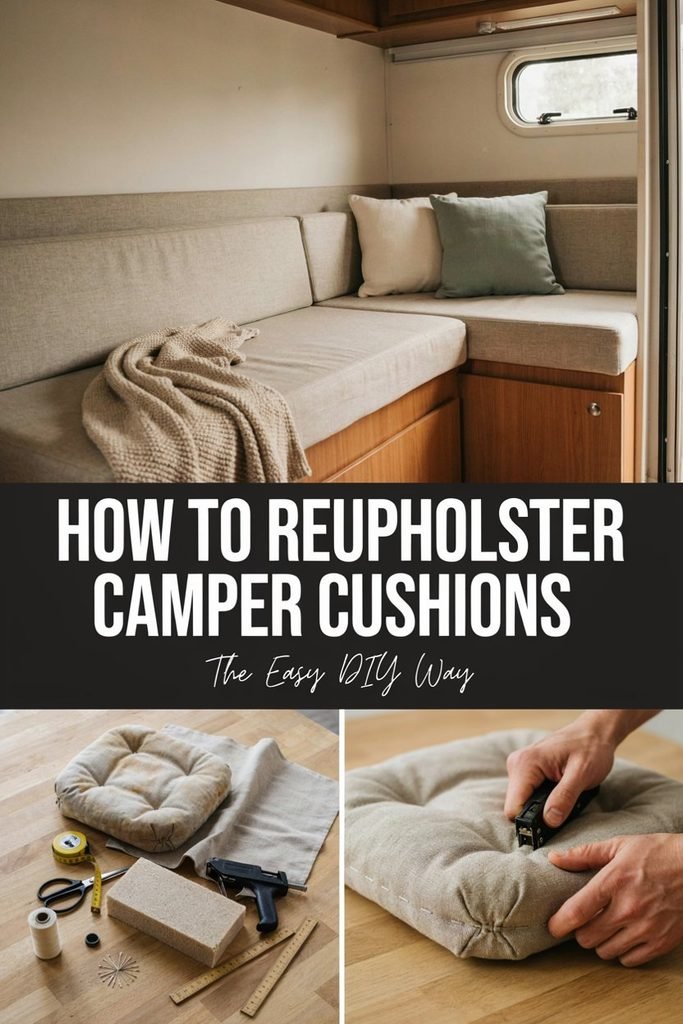
What makes this project especially worthwhile is that you do not need a professional upholstery workshop to get a good result.
With the right fabric, careful measurements, a basic sewing machine, sharp scissors, a measuring tape, and some patience, you can transform old camper cushions yourself.
In this guide, I am sharing the process I use, including how I choose fabric, measure odd shaped cushions, remove old covers, organize the work, and avoid the mistakes that can make an otherwise simple camper project frustrating.
Why Reupholstering Camper Cushions Is Worth It
Camper cushions get a surprising amount of use. They are seats during the day, beds at night, and often end up holding everything from backpacks and jackets to camping gear.
After enough trips, even cushions that started out looking perfectly good can begin to show their age.
Replacing them completely is not always necessary.
The foam inside many camper cushions is still perfectly usable even when the fabric covering is worn out. Keeping the existing foam means you can spend your money on better quality upholstery fabric instead of paying for an entirely new cushion.
This was one of the biggest reasons I preferred reupholstering rather than replacing everything.
It also gives you much more control over the finished space. Instead of being limited to whatever fabric a replacement cushion happens to come with, you can choose something that works with your cabinets, flooring, curtains, bedding, and the overall style of your camper.
A simple fabric change can make an older camper feel surprisingly different.
Before You Start, Look At The Cushions Carefully
Before buying fabric or taking anything apart, I recommend looking closely at every cushion you plan to recover.
Do not assume that all of the cushions are the same size or constructed in the same way.
Camper seating can have some unusual shapes because manufacturers build the furniture around the available space. You may have a long straight cushion, a shorter cushion, a corner piece, or a cushion with a slightly angled edge.
Take a few minutes to inspect how each one is currently made.
Look at the seams.
Look at the corners.
Look at how the fabric is attached underneath.
Look for zippers, Velcro, snaps, buttons, or other closures.
Most importantly, check the condition of the foam.
If the foam is flattened, crumbling, badly stained, or no longer comfortable, recovering it may not solve the real problem. In that situation, replacing the foam at the same time can make much more sense.
If the foam is still firm and comfortable, there is usually no reason to throw it away simply because the cover looks old.
What You Need For This Camper Cushion Project
You do not need a huge collection of upholstery tools for a basic camper cushion makeover.
Here is what I would have ready before starting:
- Upholstery or heavy duty fabric
- Measuring tape
- Fabric scissors
- Seam ripper
- Sewing machine
- Heavy duty sewing needles
- Strong polyester thread
- Straight pins or sewing clips
- Fabric marking pencil or chalk
- Zippers if you are replacing the existing closures
- Iron and ironing board
- Staple remover if the original covers are stapled
- Vacuum cleaner
- Large clean work surface
I strongly recommend getting everything together before removing the old covers.
Once the cushions are sitting around your camper without their covers, the project can quickly become messy if you are constantly stopping to look for tools.
I learned that keeping the supplies together saves a lot of unnecessary frustration.
Choosing The Right Fabric
Fabric is probably the most important decision you will make.
It is tempting to choose fabric based entirely on color or pattern because you want the camper to look good. But camper cushions have to deal with considerably more wear than decorative pillows sitting on a sofa.
Think about how the cushions are actually going to be used.
If people will regularly sit on them, sleep on them, eat around them, and climb over them, choose something durable enough to handle everyday use.
I prefer upholstery weight fabric because it generally holds up better than lightweight decorative fabric. You also want something that is reasonably easy to clean.
For a camper, I would avoid fabrics that are extremely delicate or difficult to spot clean.
A neutral fabric can be a particularly practical choice because it gives you more flexibility with blankets, pillows, curtains, and other accessories.
If you want more personality, you can always bring color into the space through smaller decorative pieces rather than making the entire seating area difficult to coordinate.
Consider The Camper Environment
There is another factor that is easy to overlook.
Your camper can become extremely warm when it is sitting in the sun, especially when it is parked for long periods.
If your camper is frequently exposed to strong sunlight, think about how the fabric will handle regular exposure. A beautiful fabric that fades quickly can leave you wishing you had chosen something more practical.
I also like to think about cleaning before committing to a fabric.
Ask yourself whether you could comfortably wipe it down after a weekend camping trip.
That simple question can save you a lot of regret later.
How Much Fabric Do You Need?
Do not buy fabric based on the cushion measurements alone.
You need enough material to cover the top, bottom, sides, seams, corners, and any extra material required for your particular construction method.
The safest approach is to measure every cushion individually and write the measurements down.
I keep a simple measurement list because trying to remember which cushion was which later is an easy way to make a mistake.
For each cushion, record:
- Length
- Width
- Thickness
- Shape
- Number of cushions
- Existing closure style
Measure the thickness carefully.
This is particularly important when making fitted covers because the side panels need to accommodate the entire depth of the cushion.
Measure Twice Before Cutting Anything
This is probably the most important piece of advice I can give you.
Do not rush into cutting your new fabric.
Camper cushions can look straightforward while actually having small differences from one another. A few inches can make the difference between a cover that fits beautifully and one that is either too loose or impossible to pull over the foam.
I measure each cushion more than once.
Then I check those measurements against the old cover before cutting the new fabric.
If the existing cover is still in reasonable condition, it can be extremely useful as a reference. You can carefully take it apart and use the individual fabric pieces to understand how the original cover was constructed.
That gives you something much more useful than simply guessing how the pieces should fit together.
Take Photos Before Taking Anything Apart
This is a small step that I highly recommend.
Before removing the old cover, take photographs of the cushion from several angles.
Take a photo of the front.
Take one of the back.
Take close ups of the corners.
Photograph the zipper or other closure.
If there are seams that look complicated, photograph those too.
These photos become your reference when you start putting everything back together.
I especially like doing this when there are several cushions that look almost identical. Once the covers are removed, it can become surprisingly difficult to remember which piece belonged to which cushion.
Labeling them can help too.
A small piece of masking tape with a simple label can save you from playing a guessing game later.
Removing The Old Camper Cushion Covers
Once everything is measured and documented, you can start removing the old covers.
Work slowly.
This is not the stage where speed helps you.
If the fabric is attached with staples, remove the staples carefully. If there is a zipper, open it completely before trying to remove the cover.
If the cover is sewn together, use a seam ripper rather than cutting randomly through the fabric.
The goal is to preserve the original pieces as much as possible.
Those old pieces can become your pattern.
This is especially helpful if the cushions have unusual corners or shapes that would otherwise be difficult to recreate.
As you remove each piece, pay attention to how it was originally assembled.
Notice which edges were sewn together.
Notice where the corners were shaped.
Notice where the zipper was installed.
Notice which direction the fabric was positioned.
You do not necessarily have to copy the original construction perfectly, but understanding how the original cover worked makes creating the replacement much easier.
Keep The Old Covers Until The Project Is Finished
Do not throw the old covers away as soon as you remove them.
I know it can be tempting because they are usually one of the least attractive parts of the project at that point.
Keep them nearby.
You may need them to double check a measurement, compare a seam, identify a particular piece, or figure out how a corner was originally constructed.
I have found that the old covers are often more useful as patterns than I initially expect.
Once the new covers are finished and fitted properly, then you can decide what to do with the old ones.
Set Up A Clean Workspace
A clean workspace makes a bigger difference than you might expect.
You need enough room to lay your fabric completely flat without it hanging over furniture or getting caught on things.
Before cutting, I clear the area and vacuum the floor.
This matters because fabric picks up everything.
Dust, pet hair, crumbs, thread, and small pieces of old foam can easily end up stuck to the new material while you are working.
I also keep my measuring tape, scissors, marking tool, pins, and seam ripper in one place.
There is something satisfying about having everything organized before the actual sewing begins.
It also helps prevent the project from taking over the entire camper.
Make A Simple Cushion Plan
If you have several cushions to recover, I recommend making a simple plan before cutting.
Write down the name or location of each cushion.
For example:
- Dinette seat
- Dinette back
- Sofa seat
- Sofa back
- Corner cushion
Then record the measurements beside each one.
This might sound unnecessary, but it becomes extremely helpful once you have several pieces of fabric spread across your workspace.
You can also use the plan to work out the most efficient way to position your pattern pieces on the new fabric.
That can help reduce waste, which is particularly important if you have chosen a more expensive upholstery fabric.
Check The Foam Before Moving On
With the old covers removed, this is the perfect time to inspect the foam properly.
Press down on it with your hand.
Does it spring back?
Does it feel uneven?
Are there areas that have become permanently compressed?
Look around the edges too.
If the foam has started breaking apart or has significant damage, new fabric will not make the cushion comfortable again.
If the foam is still in good condition, give it a thorough vacuum before putting the new covers on.
If there are stains or odors, deal with those before continuing.
You want the cleanest possible foundation underneath your new upholstery.
Do Not Skip The Planning Stage
The sewing itself is only one part of this project.
The preparation is what determines how easy the sewing will be.
When I am working on a camper renovation, I would rather spend extra time measuring, labeling, photographing, and organizing everything than rush into cutting fabric and discover later that something does not fit.
That extra preparation is particularly important with camper cushions because every camper has its own little quirks.
Once you know the measurements, understand how the original covers were constructed, have chosen a durable fabric, and have your workspace organized, the actual transformation becomes much less intimidating.
Cutting, Sewing, And Fitting The New Camper Cushion Covers
Once the old covers were removed, the foam was checked, and all the measurements were written down, the project started feeling much more manageable.
This is the stage where the camper actually begins to change.
The old fabric is gone, the new upholstery fabric is ready, and you can finally start turning those measurements into something that will fit your cushions. I will be honest here. This is also the stage where rushing can create problems that are difficult to fix later.
I found it much easier to take my time with every piece rather than trying to get everything cut and sewn in one afternoon.
Use The Old Covers As Your Pattern
If you were able to remove the original covers without destroying them, they can make this part considerably easier.
Lay each old fabric piece flat and look carefully at its shape.
Do not assume that a rectangular looking cushion is made from simple rectangles. The original manufacturer may have slightly shaped the corners or used different sized side panels to create the proper fit.
Place each old piece on your new fabric and use it as a guide.
Before cutting, make sure you know which side of the fabric is facing up and which direction the pattern should run.
This becomes particularly important with striped, checked, floral, or directional fabrics.
There is nothing more frustrating than finishing a cover and realizing that the pattern is running sideways on one cushion.
Add Your Seam Allowance
One mistake I would strongly recommend avoiding is cutting your new fabric exactly the same size as the finished cushion.
You need room for your seams.
The amount you add depends on how you are constructing the cover and the seam allowance you plan to use. The important thing is to be consistent.
If you are using the original cover as your pattern, look at the existing seams and measure how much fabric was allowed around them.
That gives you a useful starting point.
Mark your cutting lines clearly before picking up your scissors.
I prefer making all of my marks before cutting several pieces because it gives me another opportunity to check the measurements.
Label Every Fabric Piece
This sounds like a small organizational trick, but it saves a lot of confusion.
Once you have several pieces cut, they can start looking almost identical.
Label the wrong side of each piece with its cushion location.
You might write:
- Dinette seat
- Dinette back
- Left side
- Right side
- Front panel
- Back panel
You can use removable fabric tape or small pieces of masking tape placed where they will not interfere with sewing.
This becomes especially useful when you have several cushions that are similar in size.
Cut One Cushion At A Time
If you are recovering an entire camper, it can be tempting to cut every piece of fabric at once.
I prefer working one cushion at a time.
Complete the measurements.
Cut the pieces.
Check them.
Sew them.
Test the fit.
Then move to the next cushion.
This approach may not seem as fast, but it gives you an opportunity to catch mistakes before they are repeated across every cushion.
If you discover that one measurement was slightly wrong, you can correct it before cutting the rest of your fabric.
That can save a surprising amount of material.
Pay Attention To Fabric Direction
Before sewing anything together, place the pieces around the cushion and visualize how they will look when finished.
This is especially important with patterned fabric.
Make sure the pattern runs consistently across the cushions.
If you are using a solid fabric, this is less complicated, but you should still decide which direction you want the fabric grain to run.
Consistency makes the finished project look much more intentional.
I also recommend taking a quick photo of your arrangement before sewing.
It gives you something to refer back to if you have to move the pieces around.
Start With The Main Panels
For a basic camper cushion cover, you will generally be working with a top panel, bottom panel, and side or boxing panels.
The exact construction depends on the shape of your cushions and the way the original covers were made.
The boxing is the fabric that runs around the edge of the cushion.
It is what gives the cover its fitted shape instead of making it look like a loose pillowcase.
If your original cover used boxing, study how it was attached before removing it.
That will give you a good idea of how wide the replacement side panels need to be.
Sewing The Side Panels
This is where careful measuring starts to pay off.
The side panel needs to correspond with the thickness of the foam while also allowing enough room for the seams.
When joining the side pieces, keep your edges aligned.
Sew slowly around corners rather than trying to force the fabric through the machine quickly.
A slower sewing speed gives you considerably more control.
If your fabric is thick, use a suitable heavy duty needle and strong thread.
You do not necessarily need a commercial upholstery sewing machine for every camper project, but your machine does need to be capable of handling the fabric you have chosen.
If the fabric is very thick and your machine struggles to move several layers, stop rather than forcing it.
Breaking a needle or damaging your machine is not worth saving a few minutes.
How To Handle The Corners
Corners are usually where a homemade cushion cover becomes obviously homemade.
The trick is not to rush them.
When you reach a corner, stop sewing before the needle gets too close to the edge.
Leave the needle down in the fabric, lift the presser foot, rotate the fabric, lower the presser foot, and continue sewing.
For more rounded corners, you may need to make small adjustments or clips in the seam allowance so the fabric can curve naturally.
Do not cut into the actual stitching line.
Those small relief cuts should stay within the seam allowance.
This allows the fabric to spread around the curve without creating excessive bunching.
Do Not Pull The Fabric While Sewing
It is easy to think that pulling the fabric will help you keep everything straight.
Usually it does the opposite.
Let the sewing machine feed the material through naturally.
Guide it gently rather than stretching it.
If you pull too hard, you can create a seam that looks straight while the fabric itself becomes distorted.
That distortion can become very noticeable once the cover is fitted over the foam.
For camper cushions, I want the fabric to look smooth and relaxed rather than stretched unnaturally.
Installing A Zipper
If your original cushion covers had zippers, replacing them with new zippers is usually worth doing.
A removable cover makes future cleaning much easier.
It also means you can take the covers off if you ever need to wash them or repair a seam.
The zipper should be installed before completely closing the cover.
Take your time with this part.
A zipper that is crooked, too short, or sewn too close to the edge can make the finished cover difficult to use.
If you are not comfortable installing zippers, you can also design the replacement cover around another closure method, depending on how the cushion is used.
The important thing is to make sure the cover can eventually be removed.
Test The Cover Before Finishing The Seams
This is one of the most important steps in the entire project.
Before completely finishing every seam, turn the cover right side out and carefully test it on the foam.
Do not wait until every cushion is finished.
Test your first completed cover.
If it is too tight, too loose, or one side is sitting incorrectly, you want to discover that before repeating the same construction on the remaining cushions.
Getting the cover onto the foam can sometimes require a little patience.
Start by inserting the corners.
Then work the fabric gradually around the rest of the cushion.
Do not yank aggressively on the fabric.
If you have measured everything correctly, the cover should eventually settle into place.
A Snug Fit Is Better Than A Baggy Fit
You want your camper cushions to look fitted, but there is a difference between fitted and excessively tight.
A cover that is too loose can create wrinkles and make the cushion look sloppy.
A cover that is too tight can distort the foam, stress the seams, and make removing the cover later extremely difficult.
Aim for a snug, comfortable fit.
Once the cover is installed, run your hands across the top and sides.
Look for wrinkles.
Check the corners.
Look at the seams.
If something looks uneven, remove the cover and make the adjustment while it is still easy to do.
What To Do If Your Cover Is Slightly Too Loose
If your finished cover has a little more room than expected, do not immediately start over.
Try fitting the cover properly first.
Sometimes what looks like excess fabric disappears once the foam is fully positioned inside the cover.
If there is still noticeable looseness, you may be able to take in a seam slightly.
This is one reason I prefer sewing conservatively on the first fitting.
You can always remove a little more fabric.
Adding fabric back after cutting too much away is considerably harder.
What To Do If The Cover Is Too Tight
If the cover is genuinely too tight, do not force it over the cushion.
A small amount of resistance is normal with a fitted cushion cover, but excessive tension can damage both the fabric and the stitching.
Turn the cover inside out and inspect the seams.
Check your measurements against the original cover.
Look for a seam allowance that was made too wide.
Sometimes a small adjustment is enough to give you the extra room you need.
If you are significantly short on fabric, it is better to correct the problem before continuing with the rest of the cushions.
Press Your Seams
An iron can make a surprisingly big difference to the finished appearance.
Pressing your seams as you sew helps the fabric sit flatter and makes your edges cleaner.
You do not need to iron every section endlessly.
Simply press the seams at the appropriate stages according to the fabric you are using.
Always check the fabric manufacturer’s care instructions before applying high heat.
For thicker upholstery fabrics, even careful pressing can help create sharper edges and make the finished cover easier to assemble.
Keep Your Sewing Consistent
Try to maintain the same seam allowance throughout the project.
Inconsistent seam allowances can change the final dimensions of your cushion cover.
That may not seem like a major issue on one seam, but several small differences can add up.
I like to use the seam guide on my sewing machine as a reference rather than trying to judge the distance by eye.
Consistency is one of those boring details that becomes very noticeable in the finished product.
Do Not Worry About Making Every Seam Perfect
There is a difference between taking pride in your work and expecting yourself to sew like a professional upholsterer.
Your camper is going to be used.
People are going to sit on these cushions.
You are going to sleep on them, eat around them, move them, store things on them, and probably spill something on them eventually.
The goal is a strong, comfortable, attractive cover that fits properly.
A tiny stitch that is not perfectly straight will not matter nearly as much as a weak seam or badly fitted corner.
Focus your attention on the parts that affect durability and fit.
Take Your Time With The First Cushion
The first cushion is your practice cushion.
Even if you have sewing experience, camper cushions have their own challenges.
Use the first one to figure out how your fabric behaves, how much room you need around the foam, how your corners come together, and how your machine handles the material.
Once you have one cushion finished successfully, the remaining cushions should become much easier.
That first finished cushion also gives you something tangible to compare against.
You can sit on it.
Look at it from across the camper.
Check how the fabric works with the rest of the interior.
Sometimes seeing one finished cushion in the actual space can change your mind about whether you want to continue with the same fabric or make a small adjustment.
Check The Finished Cushion From Every Angle
When your first cover is completely sewn and fitted, do not just look at it from the top.
Step back.
Look at the cushion from the front.
Look from the side.
Look at the corners.
Check underneath.
Make sure the zipper or closure is functioning correctly.
Sit on it.
Move it around.
You want to know how the cover behaves when the cushion is actually being used.
If the fabric shifts excessively or the seams pull when you sit down, fix that now.
It is much easier to correct one cushion than discover the same problem after completing the entire camper.
Keep The Process Organized
At this point, the camper can start looking like a fabric workshop.
Try not to let that overwhelm you.
Keep finished cushions in one clean area.
Keep cut fabric pieces together by cushion.
Keep scraps separate from finished pieces.
Put your scissors, thread, pins, and sewing tools back in the same place after each cushion.
This sounds simple, but organization makes a project like this feel much less exhausting.
I would rather spend an extra few minutes keeping everything organized than waste half an hour searching for the piece I need.
The Difference Between A Quick Cover And A Good Cover
There are shortcuts you can take with camper cushions.
But not every shortcut is worth taking.
A quick cover might technically hide the old fabric.
A properly fitted cover will make the entire camper look more finished.
The difference usually comes down to details such as accurate measurements, clean corners, consistent seams, durable fabric, and a closure that allows the cover to be removed.
Those details take a little more time, but they are what make the finished project feel intentional.
Once the first cushion is fitted properly, repeat the same process for the remaining cushions.
Do not assume every cushion will behave exactly the same way.
Measure and check each one individually.
What I Would Do Differently On A Future Camper Project
If I were starting another camper cushion project, I would spend even more time in the planning stage.
I would photograph every cushion before removing the old covers.
I would label every piece immediately.
I would measure each cushion separately.
I would buy a little extra fabric rather than trying to calculate everything down to the last inch.
And I would definitely test the first completed cover before cutting all of the remaining fabric.
Those small decisions make the project easier and give you more room to correct mistakes.
The goal is not simply to cover old cushions.
The goal is to create seating that looks like it belongs in the camper and can handle the reality of camping.
Finishing The Camper Cushion Makeover
Once all of the covers are sewn and the cushions are back inside them, it is tempting to call the project finished.
I would not quite stop there.
The final stage is where you get to see whether all of the measuring, cutting, sewing, and fitting actually worked together. It is also where a few small adjustments can make the difference between cushions that simply have new fabric and cushions that look like they were professionally finished.
This part is less about sewing and more about making everything work properly inside the camper.
Put The Cushions Back Into Their Original Positions
Start by putting each recovered cushion back where it originally belonged.
This is where those labels and photographs from Part 1 become useful.
Some cushions may look interchangeable when they are sitting on the floor, but once they are inside the camper, you may notice small differences in their shape.
Do not force a cushion into a space where it does not seem to fit.
Check that the edges line up with the surrounding furniture and that the cushion sits evenly against the wall, cabinet, or neighboring cushion.
If something feels wrong, take it back out and inspect the cover.
A small fitting problem is much easier to correct now than after you have lived with it for several camping trips.
Check The Cushions When You Sit On Them
Standing back and looking at the finished cushions is important, but sitting on them tells you much more.
Sit in the normal position you would use while camping.
Move around.
Lean against the back cushion.
If the cushions convert into a sleeping area, arrange them into the bed position as well.
Watch what happens to the fabric when the foam compresses.
You should not see excessive pulling around the seams.
The fabric should move naturally with the cushion.
If a seam is under too much tension, that is something I would fix before considering the project complete.
Make Sure The Cushions Still Convert Into A Bed
If your camper has a dinette or seating area that converts into a sleeping space, this deserves its own test.
Put everything into sleeping position.
Check whether the recovered cushions still sit together properly.
Make sure the new covers have not changed the dimensions enough to create gaps between cushions.
This is one reason I would avoid making covers unnecessarily thick or adding extra layers of material without considering the original dimensions.
A few small changes can become noticeable when several cushions need to fit together.
Lie down on the completed sleeping area if you can.
You want to make sure there are no uncomfortable seams, excessive wrinkles, or awkward edges underneath you.
Look At The Camper As A Whole
Now step away from the cushions.
This is one of my favorite parts of any camper update because you finally get to see the change as a complete space rather than as individual pieces.
Look at the upholstery alongside the cabinets, flooring, curtains, walls, and bedding.
Does the fabric make the interior feel brighter?
Does it work with the existing colors?
Does it make the camper feel more modern?
Sometimes changing the cushions is enough to make the rest of the interior look better without doing another major renovation.
That is one of the reasons I like this project so much.
You can make a noticeable difference without tearing the camper apart.
Add A Few Simple Finishing Touches
You do not need to completely redecorate the camper after reupholstering the cushions.
A few carefully chosen additions can be enough.
I like keeping camper interiors practical because there is already enough to organize when you are preparing for a trip.
A couple of washable throw pillows can add some personality.
A simple blanket can bring in another color.
A small washable rug can help tie the seating area together.
The important thing is not to overcrowd the space.
The new cushions should remain the main feature.
How Much Does It Cost To Reupholster Camper Cushions?
The cost can vary considerably depending on the size of your camper, how many cushions you have, the fabric you choose, and whether you need to replace any foam.
For a DIY project, your biggest expense will usually be the upholstery fabric.
You may also need to purchase thread, needles, zippers, clips, or other sewing supplies.
If you already own a sewing machine and basic sewing equipment, the project can be considerably more affordable.
That is one of the biggest advantages of doing the work yourself.
You are paying primarily for materials and your time rather than labor.
Before buying anything, I recommend calculating the approximate cost of the entire project.
Add the fabric.
Add the zippers.
Add the thread.
Add replacement foam if needed.
Add any tools you do not already own.
Then compare that number with the cost of having the cushions professionally recovered or purchasing replacement cushions.
Sometimes DIY is dramatically cheaper.
Other times, especially with a large camper and expensive upholstery fabric, the difference may be smaller than expected.
Knowing the numbers before you start helps you decide whether the project makes sense for you.
Buy A Little More Fabric Than You Think You Need
This is an area where I would rather have extra fabric than come up short.
Running out of fabric when you are halfway through the project is incredibly frustrating.
It can also become a problem if the fabric is seasonal, discontinued, or sold from different production batches.
If you make a measurement mistake, extra fabric gives you room to correct it.
You can also keep the leftover material for future repairs.
That can be particularly useful in a camper because upholstery eventually gets worn, stained, or damaged.
Keep Some Leftover Fabric For Repairs
I recommend storing your leftover fabric somewhere dry and protected.
You do not need a huge piece.
Even a reasonably sized leftover section can be useful if you ever need to repair a seam, replace a damaged panel, or patch an area that has become worn.
Write down the fabric name if you know it.
If you still have the packaging, keep that with the leftover material.
That way, you have a reference if you need more later.
How To Keep Camper Cushion Covers Clean
The best cleaning method depends on the fabric you selected.
Before using any cleaning product, check the manufacturer’s care instructions.
For everyday dirt, regular vacuuming can help prevent dust and crumbs from becoming embedded in the fabric.
I also like dealing with spills as soon as possible.
The longer something sits on upholstery, the more difficult it can become to remove.
Blot rather than aggressively rubbing the fabric.
Rubbing can push the spill deeper into the fibers and may spread the stain.
If the covers are removable, that is another major advantage.
You can clean them according to the fabric’s care instructions without having to clean the entire cushion.
Be Careful With Strong Cleaning Products
A camper cushion can look durable, but that does not mean every cleaning chemical is safe for the fabric.
Strong products can cause discoloration or damage the fibers.
Always test a cleaning solution on a small hidden area before using it on a visible section.
This is especially important if you have chosen a darker, patterned, or specialty upholstery fabric.
I would rather spend a few extra minutes testing a cleaner than discover a faded patch in the middle of a cushion.
Protect The Cushions During Camping Trips
Once you have invested the time into recovering your cushions, protecting them makes sense.
If you know you are going to be eating messy meals inside the camper, consider using washable blankets or removable covers over the seating area.
This does not mean you have to treat the cushions like they are too precious to use.
The whole point is to enjoy the camper.
It simply means that a little prevention can reduce unnecessary wear.
If you have children or pets using the camper, washable layers can be particularly helpful.
Common Camper Upholstery Mistakes To Avoid
There are several mistakes that can turn an otherwise enjoyable DIY project into a frustrating one.
Cutting Without Measuring Carefully
Never rely on visual estimates.
Measure every cushion.
Write the measurements down.
Check them again before cutting.
Using The Wrong Fabric
A lightweight decorative fabric may look beautiful but may not hold up well to repeated sitting and sleeping.
Choose something suitable for upholstery and the way your camper is actually used.
Throwing Away The Original Covers Too Soon
The original covers can be extremely useful as patterns and construction references.
Keep them until the new covers are finished.
Making The Covers Too Loose
Loose covers tend to wrinkle and shift.
A properly fitted cover will look much cleaner.
Making The Covers Too Tight
Excessively tight covers can strain seams and make the covers difficult to remove.
Aim for a snug fit rather than an extremely tight one.
Forgetting About Pattern Direction
If your fabric has a directional pattern, check the orientation before cutting.
Once the pieces are sewn together, fixing this mistake can mean starting over.
Skipping The Test Fit
Always test the first completed cover on the foam before producing the rest.
This one step can prevent an entire batch of incorrectly sized covers.
Rushing The Corners
Corners are highly visible.
Take your time and make sure the fabric lays smoothly around them.
Ignoring The Foam
Beautiful fabric cannot fix uncomfortable or damaged foam.
Inspect the foam while the covers are removed.
What If You Do Not Have A Sewing Machine?
You can technically make cushion covers by hand, but I would strongly recommend using a sewing machine if you are recovering several camper cushions.
There is simply a lot of stitching involved.
A machine will give you stronger and more consistent seams while saving a considerable amount of time.
If you only have one small cushion to recover, hand sewing may be possible depending on the fabric and construction.
For an entire camper interior, however, a sewing machine makes the project much more realistic.
When Should You Hire A Professional?
DIY upholstery is not for everyone.
There is nothing wrong with deciding that the project is outside your comfort zone.
Professional help may make more sense if your cushions have complicated shapes, curved sections, piping, unusual foam construction, or intricate upholstery details.
It can also be worthwhile if you have expensive fabric and do not want to risk making an irreversible cutting mistake.
For simple rectangular or reasonably straightforward camper cushions, however, this is one of those projects that many people can tackle with patience.
You do not need to know everything before you start.
You simply need to be willing to measure carefully and work through the process one cushion at a time.
Is Reupholstering Camper Cushions Worth It?
For me, this is one of those camper projects where the effort can make a bigger difference than the price suggests.
The cushions are such a large visual part of the interior that changing the upholstery can make an older camper feel considerably fresher.
You are also reusing the foam you already have instead of throwing away perfectly usable materials.
The project does require time.
There will probably be a seam that needs to be redone.
There may be a corner that takes longer than expected.
You might cut a piece incorrectly.
That is part of doing a project like this yourself.
But once the cushions are finished and back in place, those frustrating moments tend to feel much less important.
My Biggest Tips For Getting A Better Result
If you are planning to tackle this project yourself, these are the things I would keep at the front of my mind.
Measure everything carefully.
Keep the original covers until the project is complete.
Take photographs before disassembly.
Label every piece.
Choose upholstery fabric based on durability as well as appearance.
Buy a little extra fabric.
Work on one cushion at a time.
Test fit the first cover before cutting everything else.
Do not rush the corners.
Use strong thread and an appropriate needle.
Press your seams when needed.
Keep the workspace organized.
Check the cushions in both seating and sleeping positions.
Keep some leftover fabric for future repairs.
Most importantly, give yourself enough time.
There is no prize for finishing camper upholstery in one weekend.
The Best Part Of The Project
What I like most about reupholstering camper cushions is that it does not require you to completely transform the camper.
You can keep the cabinets.
You can keep the existing layout.
You can keep the original foam.
You are simply changing one of the most noticeable parts of the interior.
That can be enough to make the space feel cleaner, more comfortable, and much more personal.
And because you did the work yourself, there is something especially satisfying about sitting down on those finished cushions after everything is back in place.
Final Thoughts
Reupholstering camper cushions is one of those DIY projects that looks more complicated before you break it into individual steps.
Measure the cushions.
Document the original covers.
Choose a durable fabric.
Remove the old upholstery carefully.
Use those original pieces as your guide.
Cut slowly.
Sew consistently.
Test the fit.
Make adjustments before repeating the process.
Then put everything back together and enjoy the difference.
You do not need a perfect sewing room or professional upholstery equipment to make a meaningful improvement to your camper.
You need a little organization, a willingness to work carefully, and enough patience to fix the small things instead of trying to hide them.
For me, that is what makes this kind of camper renovation worthwhile. You are not simply making old cushions look better.
You are taking something that already works and giving it a fresh life, while creating an interior that feels much more like a space you actually want to spend time in.