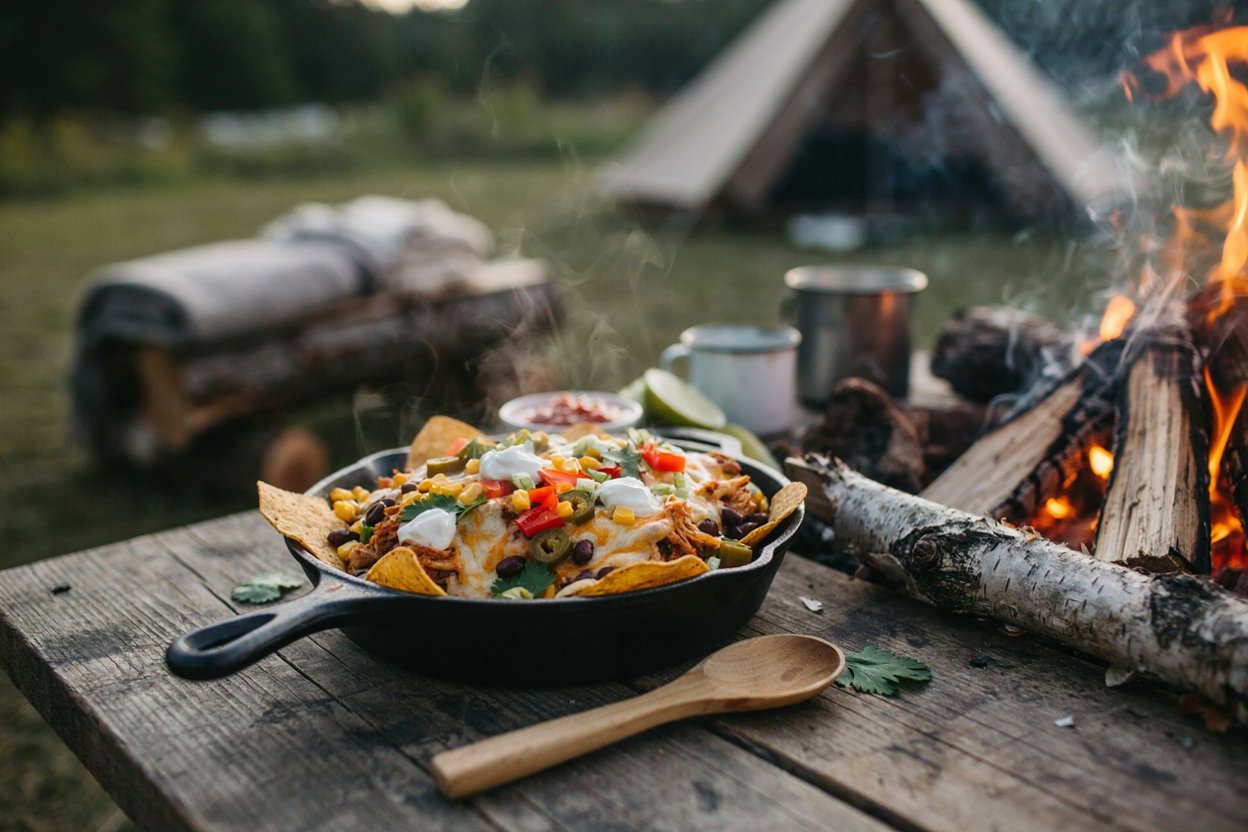
Camping Food: Grilled Nachos Recipe Made on a Grill or Over the Campfire
Camping meals do not have to mean eating the same sandwiches, hot dogs, or canned meals every time you head outdoors.
One of my favorite ways to make campin food feel a little more exciting without creating a complicated cooking project is to make grilled nachos.
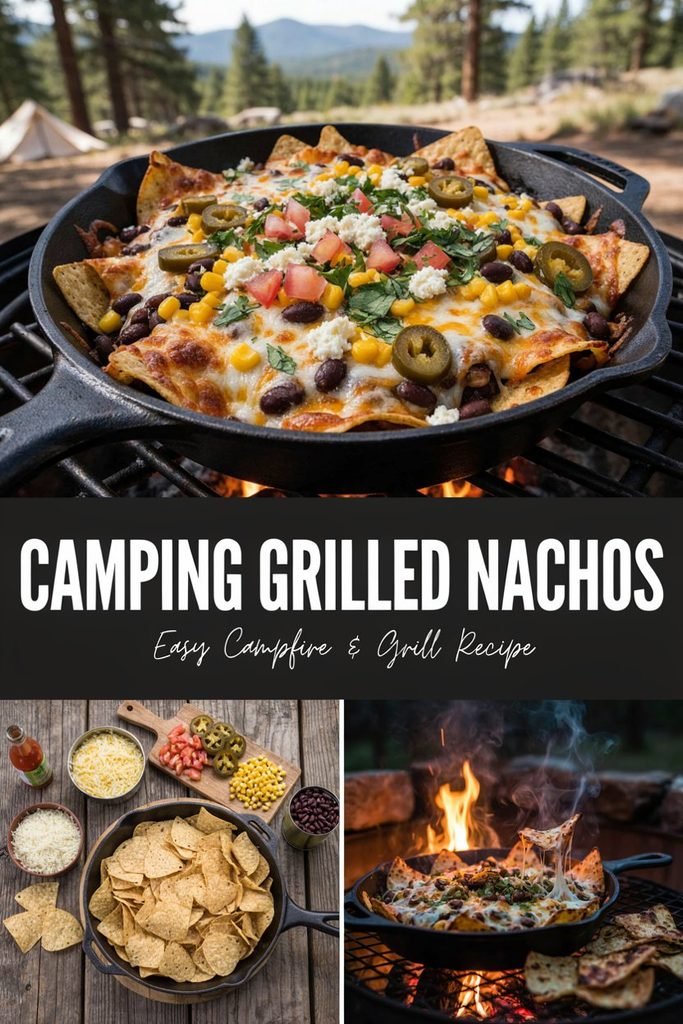
They are quick, filling, easy to customize, and can be cooked on a grill or directly over a campfire with the right setup.
I especially like this recipe when everyone wants something warm and satisfying but I do not want to spend the entire evening cooking.
Disclaimer
This post may contain affiliate links. As an Amazon Associate, I earn from qualifying purchases at no additional cost to you. I only recommend camping cookware and food preparation products that I genuinely find useful for outdoor cooking. Campfire and grill conditions can vary, so always use heat safe equipment and follow proper fire safety guidelines.
Amazon Shopping Listn You Need
- Heavy Duty Cast Iron Skillet – I use this for making grilled nachos directly over the grill or campfire.
- Grill Grate for Campfire – I always pack one when I want an easy cooking surface over the fire.
- Aluminum Foil – I use heavy duty foil to wrap nachos and make cleanup much easier.
- Long Handle Camping Tongs – I keep these handy for safely moving hot food around the grill.
- Heat Resistant BBQ Gloves – I always use these when handling hot skillets and campfire cookware.
- Portable Cutting Board – I use this to prep toppings like tomatoes, onions, peppers, and cilantro at camp.
- Reusable Food Storage Containers – I love using these to keep shredded cheese, toppings, and leftovers organized.
Why Grilled Nachos Are Such a Good Camping Meal
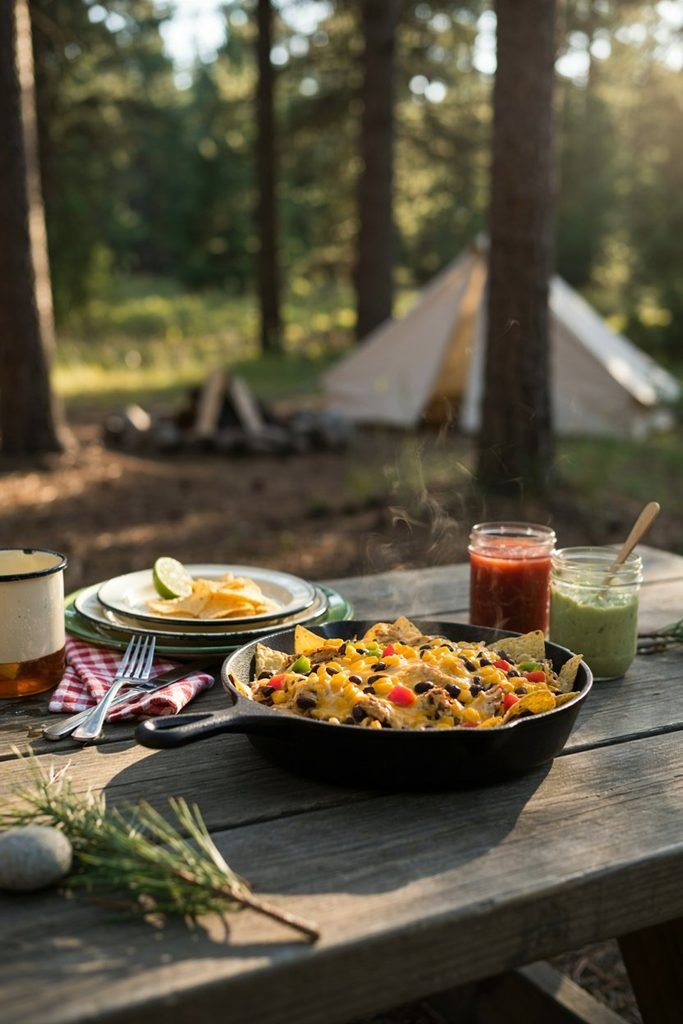
There is something about eating nachos outside that makes them feel even better than they do at home. The melted cheese, crispy tortilla chips, warm toppings, and smoky flavor from the grill or fire make this an easy camping dinner that feels like a treat.
I also appreciate how flexible this meal is. When I am camping, I do not always want to bring a long list of ingredients or deal with several pots and pans. Nachos let me work with ingredients I already have packed for the trip.
You can keep them simple with cheese, beans, salsa, and jalapeños, or make them more substantial with cooked chicken, ground beef, pulled pork, corn, peppers, or other toppings your family enjoys.
Another reason I like making these at camp is that everyone can get involved. If I am cooking for my family, I can set out the toppings and let everyone build their own portion. This works particularly well when people have different preferences.
The most important thing I have learned is that camping nachos are best when you pay attention to the heat. It is very easy to end up with beautifully melted cheese on top and burnt chips underneath if the pan is sitting directly over an extremely hot fire. A little control over the heat makes a huge difference.
What You Need to Make Camping Nachos
You do not need special equipment to make this recipe. I normally keep the setup as simple as possible because fewer dishes and fewer cooking tools make campsite meals much easier.
Ingredients
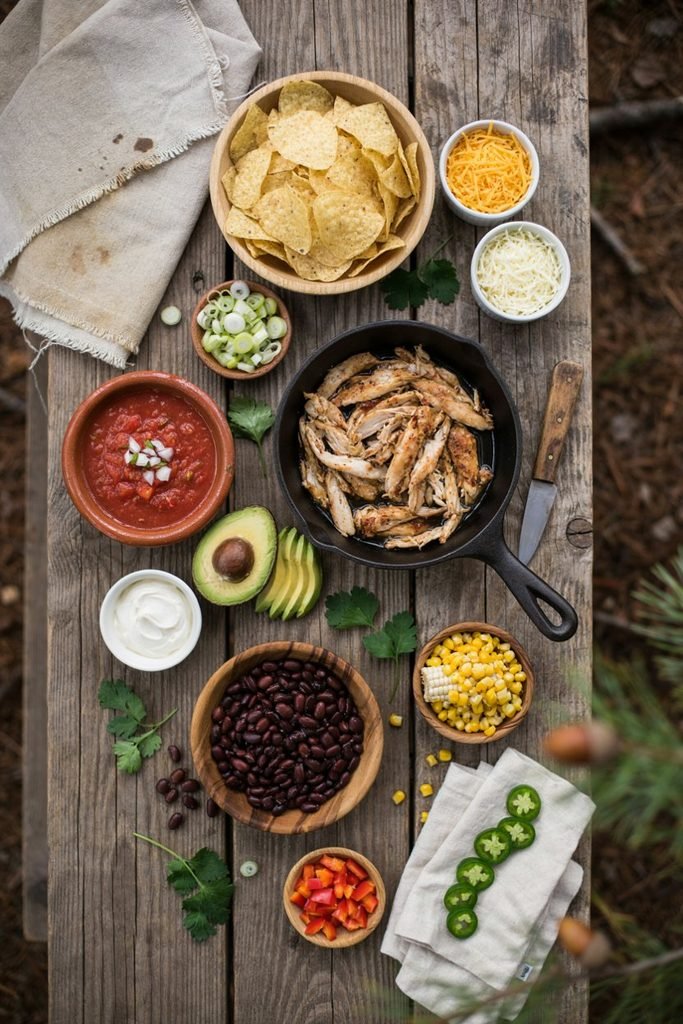
For a basic batch of grilled camping nachos, you will need:
- Tortilla chips
- Shredded cheddar cheese
- Monterey Jack cheese or a Mexican cheese blend
- Black beans, drained and rinsed
- Salsa
- Jalapeños
- Cooked chicken, ground beef, or another protein if desired
- Corn
- Diced bell pepper
- Green onions
- Sour cream for serving
- Fresh cilantro if you enjoy it
- Avocado or guacamole for serving
You do not have to use every ingredient on this list. The beauty of camping nachos is that you can adjust them according to what you have available.
If I know I am going camping for several days, I prefer to plan ingredients that can be used in more than one meal. For example, cooked chicken can be used for nachos one evening and then added to wraps or sandwiches the next day. The same idea works with shredded cheese, salsa, corn, peppers, and beans.
Choosing the Right Tortilla Chips
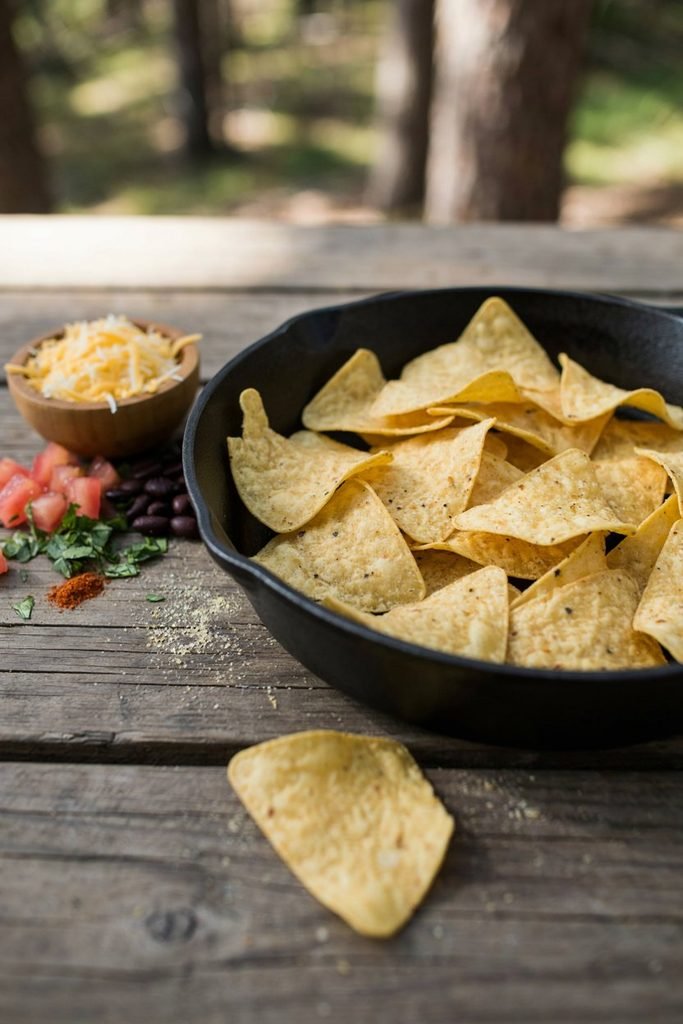
The chips are more important than they might seem. When making nachos at home, you can easily put another tray in the oven if something goes wrong. At a campsite, I would rather get the first batch right.
I recommend using sturdy tortilla chips rather than very thin chips. The thicker chips hold up better underneath the toppings and are less likely to become soggy.
I also try not to pile the chips into one extremely deep layer. A little overlap is fine, but spreading them into a reasonably even layer helps the cheese and toppings reach more of the chips.
If you are feeding several people, it is often better to make two smaller batches instead of creating one enormous pile. This gives you more evenly melted cheese and makes it easier to control the cooking time.
Preparing Your Ingredients Before Leaving Home
One of the easiest ways to make camping cooking less stressful is to do as much preparation as possible before leaving home.
I prefer to shred the cheese, chop the vegetables, portion the beans, and prepare any meat before the camping trip. I store everything separately in sealed containers or bags so that I can quickly assemble the nachos when it is time to cook.
If you are using chicken or ground beef, cook it completely at home and refrigerate it properly before packing it in your cooler. This saves considerable time at the campsite and means you do not have to worry about trying to cook raw meat while also managing the fire.
I also like to portion the ingredients according to the number of people eating. It may seem like a small detail, but it makes campsite cooking much easier when you can simply open a container and start assembling instead of measuring and chopping everything beside the fire.
For longer camping trips, remember to keep perishable ingredients properly chilled in your cooler. Cheese, cooked meat, sour cream, and other refrigerated toppings should not be left sitting out while you prepare the meal.
What Pan Should You Use?
A sturdy cast iron skillet is my preferred option for camping nachos. It holds heat well and works beautifully over a grill grate or a controlled campfire.
A disposable aluminum pan can also work, particularly if you want an easier cleanup, but it needs to be handled carefully because it can bend when loaded with food.
If you are cooking directly over a campfire, I recommend using a pan with sturdy handles or a setup that allows you to safely move the pan away from the heat.
The important thing is that your cooking vessel can tolerate the heat and can be moved safely when the nachos are finished.
How to Set Up the Campfire
The fire should be established before you start assembling the nachos.
You do not want to put your skillet over a huge flame and then start searching for ingredients. By the time everything is ready, the bottom layer of chips could already be burning.
I prefer cooking over hot coals or a controlled grill grate rather than directly in the tallest flames. The more consistent the heat, the easier it is to melt the cheese without destroying the chips.
If your campfire is producing very intense heat, move the skillet farther away or wait for the flames to settle. You can always increase the heat gradually, but rescuing burnt tortilla chips is much harder.
How to Set Up a Grill
Grilled nachos are particularly easy if your campsite has a propane grill or a sturdy camp grill.
Preheat the grill first, then reduce the heat to a moderate level before placing your skillet or foil pan inside.
I like to think of this recipe as a melting and warming process rather than a high heat cooking process. Most of the ingredients are already cooked, so you are mainly trying to warm the toppings and melt the cheese while keeping the chips crisp.
If your grill has a lid, use it. Closing the lid helps the cheese melt more evenly without requiring excessive heat underneath the pan.
Building the Nachos
Once everything is prepared, start with a layer of tortilla chips.
Add a small amount of cheese across the chips rather than putting all of it in the center. Follow with beans, cooked meat if you are using it, corn, peppers, and any other toppings you want to warm.
Add another layer of chips and repeat the process.
I have found that layering works much better than putting all the toppings on top of one thick pile of chips. With layers, you get cheese and toppings throughout the dish instead of eating through a mountain of plain chips before reaching the good part.
Finish with another generous layer of cheese because this is what helps everything come together as it cooks.
At this point, you can add some jalapeños if you like heat, or leave them off and serve them separately so everyone can customize their own portion.
A Simple Camping Nacho Combination I Keep Coming Back To
When I want something dependable, I use tortilla chips, cheddar cheese, Monterey Jack cheese, black beans, cooked chicken, corn, diced peppers, salsa, and jalapeños.
After cooking, I add green onions, sour cream, and a little fresh cilantro.
It is simple enough for a campsite but still feels like a proper meal. The combination also gives you different textures, from crispy chips to creamy melted cheese and tender toppings.
If I am cooking for people who prefer milder food, I keep the jalapeños on the side. That way everyone can add as much heat as they want without changing the entire batch.
Before You Put the Nachos on the Heat
Take a minute to make sure your setup is ready.
Have your serving utensils nearby, make sure the fire or grill is under control, and keep anything that needs refrigeration in the cooler until you actually need it.
This is one of those recipes where preparation makes the cooking part almost effortless. Once the skillet goes over the heat, the goal is to watch the cheese rather than walk away to look for ingredients.
The nachos can go from perfectly melted to overcooked surprisingly quickly, especially over a campfire.
Cooking the Nachos at the Campsite
The best part about this recipe is how little work is involved once the ingredients are prepared. The main thing to watch is the heat. I have found that campsite nachos turn out much better when I cook them slowly enough for the cheese to melt without letting the chips sit directly over intense flames.
How to Make Grilled Nachos on a Grill
Start by preparing your grill over medium heat. If you are using a charcoal grill, allow the coals to become hot and develop a light ash coating before you begin.
Place your assembled nachos in a cast iron skillet or another grill safe pan. If you are using a disposable foil pan, place it on a sturdy grill surface rather than directly over the hottest part of the fire.
Close the grill lid and let the nachos cook for about 5 to 10 minutes.
The exact cooking time will depend on how hot your grill is and how many layers you have made. I usually start checking around the 5 minute mark rather than relying completely on the clock.
You are looking for melted cheese throughout the top layer and warm toppings underneath. The edges of the chips should remain crisp.
If the cheese is not melting but the bottom of the skillet is getting very hot, lower the grill temperature or move the pan to a cooler area. You do not need high heat to make good nachos.
How to Make Nachos Over a Campfire
Cooking nachos over a campfire is slightly different because the heat can change quickly.
Once the fire has produced a good bed of hot coals, position your grill grate over the fire. Place the skillet on the grate and keep it away from the tallest flames.
If you are using a cast iron skillet, you can cover it with a lid or foil. Covering the skillet helps trap the heat and allows the cheese to melt more evenly.
Let the nachos cook for approximately 5 to 10 minutes, checking them regularly.
I recommend rotating the skillet occasionally if one side seems to be getting more heat than the other. Campfire heat is rarely perfectly even, especially when you are cooking over natural wood.
If the chips underneath begin to smell toasted or look darker before the cheese has melted, move the skillet farther from the fire immediately.
This is one of the biggest differences between cooking at home and cooking outdoors. You cannot always control the exact temperature, so paying attention to how the food looks and smells is more useful than following a strict cooking time.
How to Keep the Bottom Chips From Burning
Burnt chips are probably the easiest way to ruin otherwise good camping nachos.
The biggest mistake is placing the skillet directly over extremely hot flames. The bottom of the pan heats much faster than the cheese can melt.
I prefer using hot coals and indirect heat whenever possible.
Another useful trick is building several thinner layers instead of one very thick layer. A deep pile of chips requires more time for the middle to warm, which means the bottom can become overcooked while you wait.
You should also avoid adding a huge amount of wet ingredients. Too much salsa, tomatoes, or other moisture can make the chips underneath soggy.
For that reason, I usually serve extra salsa on the side rather than covering the entire skillet with it before cooking.
When to Add Fresh Toppings
Not every ingredient needs to go into the skillet.
Ingredients such as black beans, cooked chicken, corn, peppers, and cheese work well during cooking because you want them warmed.
Fresh toppings are usually better added after the nachos come off the heat.
Once the cheese has melted, I like to add green onions, fresh cilantro, avocado, sour cream, guacamole, and fresh salsa.
This gives the finished nachos a much better contrast between hot and cold ingredients.
It also keeps delicate ingredients from becoming watery or overly soft.
How to Tell When the Nachos Are Done
There is no need to wait until every chip looks completely covered in melted cheese.
The nachos are ready when the cheese has melted, the toppings are heated through, and the edges remain reasonably crisp.
If you have a lid on the skillet, remove it carefully because steam can escape when you open it.
Give the nachos a quick visual check before taking the skillet away from the fire.
The cheese should look melted and soft rather than dry. The chips should still have some structure instead of appearing completely limp.
If everything looks right, move the skillet to a heat safe surface.
Remember that cast iron stays extremely hot for a long time, so do not place it directly on a plastic camping table or another surface that could be damaged by heat.
Let the Nachos Rest Briefly
I know it is tempting to start eating immediately, especially when everyone at the campsite can smell the melted cheese.
Still, I like giving the skillet a minute or two to rest.
This allows the cheese to settle slightly and makes the nachos easier to serve without everything sliding around.
It is also a good opportunity to add your cold toppings.
Spoon over some salsa, add small dollops of sour cream, scatter green onions and cilantro over the top, and add avocado or guacamole if you are using it.
Easy Ways to Change the Recipe
One of the reasons I keep coming back to camping nachos is that the recipe does not have to be exactly the same every time.
Chicken Nachos
Use leftover cooked chicken as the main protein. Shredded or chopped chicken works especially well with cheddar, Monterey Jack, black beans, corn, salsa, and jalapeños.
This is one of my favorite ways to use leftover grilled chicken from an earlier camping meal.
Beef Nachos
Cook ground beef at home before the trip and season it with taco seasoning or your preferred combination of chili powder, cumin, garlic, and paprika.
Once you arrive at the campsite, the beef only needs to be reheated with the other ingredients.
Vegetarian Camping Nachos
You can make a filling vegetarian version using black beans, pinto beans, corn, peppers, onions, tomatoes, and plenty of cheese.
Adding guacamole or avocado at the end makes this version especially satisfying.
Spicy Campfire Nachos
If everyone at the campsite enjoys spicy food, add sliced jalapeños, hot salsa, chopped green chiles, or your favorite hot sauce.
I prefer adding some of the spicy ingredients before cooking and keeping extra hot sauce on the side. This makes it easier to serve the same batch to people with different heat preferences.
Breakfast Nachos
You can even turn this recipe into a camping breakfast.
Use tortilla chips, shredded cheese, cooked breakfast sausage or bacon, scrambled eggs, peppers, and green onions. Warm everything together and finish with salsa and avocado.
This is particularly useful on mornings when you want something more substantial before a day of hiking or exploring.
What to Serve With Camping Nachos
The nachos can easily stand on their own as a complete camping meal, but a few simple sides can turn them into a larger dinner.
I like serving them with fresh fruit, a simple green salad, sliced vegetables, or corn on the cob.
If we are having a relaxed evening around the campsite, I might put out bowls of salsa, guacamole, sour cream, and chopped green onions so everyone can add what they want.
This makes the meal feel more like a casual outdoor dinner rather than simply eating directly from the skillet.
Making Nachos for a Larger Camping Group
If you are cooking for a large group, I would not try to make one enormous skillet.
Instead, prepare several smaller batches.
Smaller batches cook more evenly and give you much better control over the heat. They also make it easier for everyone to get a good combination of chips, cheese, and toppings.
If children are eating, making a mild batch separately can also be helpful.
I have found that this approach creates less frustration than trying to make one giant pan that has to satisfy everyone’s preferences.
A Simple Trick for Better Cheese Coverage
One of the most disappointing things about nachos is reaching the bottom and finding a pile of plain chips.
To avoid this, do not save all the cheese for the top.
Add cheese between the layers.
Start with chips, sprinkle over some cheese, add your beans and meat, then repeat with another layer of chips and cheese.
The cheese melts down between the layers and helps hold everything together.
You do not need to completely cover every chip. Just distribute the cheese evenly enough that every serving has a good combination of crispy chips and melted toppings.
What I Would Avoid When Making Camping Nachos
There are a few things I would keep off the skillet while it is cooking.
I would avoid adding large amounts of fresh tomatoes because they can release a lot of liquid and make the lower chips soggy.
I would also avoid using too much salsa before cooking. It is much easier to control the texture by serving additional salsa afterward.
Another thing I would avoid is walking away from the fire while the nachos are cooking.
They do not take long, and campfire heat can change quickly. A few extra minutes can make the difference between crisp chips and burnt chips.
For me, this is one of those meals where staying nearby and checking the skillet regularly is easier than trying to multitask.
The Best Part About Making These at Camp
What I enjoy most about grilled nachos is that they do not require the campsite to feel like a full outdoor kitchen.
Once the ingredients are prepared, everything comes together in one pan. There is no complicated cooking process and no need to spend an hour standing over the fire.
You can assemble the skillet, let the heat do most of the work, add your fresh toppings, and bring it straight to the picnic table.
That simplicity is exactly what I want from a good camping meal.
Serving Your Camping Nachos
Once the cheese has melted and the skillet is safely away from the heat, it is time for the best part.
I like to bring the entire skillet to the campsite table and let everyone serve themselves. There is something especially enjoyable about sharing a warm skillet of nachos outside, particularly after a long day of hiking, swimming, sightseeing, or simply relaxing around camp.
If you are serving the nachos directly from the skillet, remember that the pan can remain hot for quite a while. Keep it on a heat safe surface and use a proper utensil rather than allowing anyone to handle the pan.
Add your fresh toppings just before serving.
Some of my favorite finishing toppings include sour cream, guacamole, diced avocado, fresh salsa, green onions, cilantro, and sliced jalapeños.
I usually keep a few toppings on the side as well. This is especially useful when everyone wants something slightly different.
My Favorite Camping Nacho Topping Combinations
You can make these nachos differently every time you go camping. I actually prefer having a few combinations in mind rather than buying a completely separate list of ingredients for every trip.
Chicken and Corn Nachos
This is one of the easiest combinations when I already have cooked chicken packed in the cooler.
Layer tortilla chips with shredded chicken, black beans, corn, cheddar cheese, Monterey Jack cheese, and diced peppers.
Once everything is hot and the cheese is melted, finish with salsa, green onions, avocado, and sour cream.
Classic Beef Nachos
For a heartier dinner, use cooked seasoned ground beef with black beans, cheddar cheese, jalapeños, and corn.
After cooking, add salsa, sour cream, green onions, and guacamole.
This version is particularly filling after a busy day outdoors.
Loaded Vegetarian Nachos
You do not need meat to make these nachos satisfying.
Use black beans, corn, bell peppers, onions, tomatoes, and plenty of cheese.
After cooking, add avocado, salsa, cilantro, and sour cream.
The combination of beans and cheese gives you enough substance for a complete camping meal.
Smoky Barbecue Chicken Nachos
If you have leftover barbecue chicken, it can be turned into an entirely different meal.
Add shredded barbecue chicken between layers of tortilla chips and cheese. You can also add corn and sliced jalapeños.
After the cheese melts, finish with green onions and a small drizzle of barbecue sauce.
The smoky flavor works particularly well with food cooked outdoors.
How to Prevent Soggy Camping Nachos
Crispy chips are one of the biggest priorities when making nachos.
The easiest way to maintain that texture is to control how much moisture you add before cooking.
Use drained beans and avoid adding large quantities of salsa directly to the skillet.
If you are using canned corn, drain it thoroughly. If you are using vegetables that release a lot of water, consider cooking or draining them before assembling the nachos.
I also recommend serving wet toppings separately whenever possible.
Salsa, sour cream, guacamole, and fresh tomatoes can be added after cooking instead of sitting on the chips while they heat.
This small change makes a noticeable difference.
Can You Prepare Camping Nachos Ahead of Time?
Yes, but I would prepare the components rather than completely assemble the nachos hours before cooking.
The tortilla chips should stay dry and sealed.
The cheese can be shredded and stored in a refrigerated container.
Cooked meat can be prepared at home and kept properly chilled.
Beans, corn, and vegetables can be portioned into separate containers.
Then, when you are ready to cook, everything is already waiting for you.
I prefer this approach because assembling the nachos at the campsite only takes a few minutes and the chips stay crisp until they are actually needed.
Camping Food Safety Tips
Because some of the ingredients are perishable, food safety is important when making this recipe outdoors.
Keep cooked meat, cheese, sour cream, guacamole, and other refrigerated ingredients in a properly chilled cooler.
Try to take out only what you need rather than leaving the entire cooler open while you prepare the meal.
Cooked meat should already be fully cooked before adding it to the nachos. If you are reheating leftovers, make sure they are heated thoroughly.
Do not leave perishable toppings sitting outside for an extended period, particularly in warm weather.
If you are camping somewhere hot, I would be especially careful with ingredients such as sour cream, cooked chicken, ground beef, and guacamole.
When in doubt about whether a perishable ingredient has remained safely chilled, it is better to discard it than risk getting sick during your trip.
What to Do With Leftover Nachos
Nachos are definitely at their best immediately after cooking.
If you have leftovers, however, you can refrigerate them promptly in a sealed container and reheat them later.
The texture will not be quite the same because the chips tend to soften, particularly when they have been sitting underneath salsa or other moist toppings.
For that reason, I try to make an amount that we are likely to finish at the campsite.
If you know you will have leftovers, keep fresh toppings such as sour cream, guacamole, and salsa separate from the portion you plan to store.
This gives you a better chance of keeping the leftovers from becoming overly soggy.
Easy Cleanup After Making Nachos
One of the reasons I like using a single skillet for camping meals is the cleanup.
Let the pan cool enough to handle safely before cleaning it.
If you are using cast iron, avoid treating it like an ordinary nonstick pan. Remove food residue, clean it according to your normal cast iron routine, and dry it thoroughly.
If you are using a foil pan, cleanup is even simpler. Once it has cooled completely, you can dispose of it according to the rules at your campsite.
I always try to clean the cooking area soon after eating rather than leaving food around the campsite.
Besides making the next meal easier, keeping food scraps and leftovers contained is an important part of responsible camping.
Common Mistakes to Avoid
Using Too Much Heat
This is probably the most common mistake.
The goal is to melt the cheese and warm the ingredients, not aggressively fry the chips.
If the bottom starts cooking too quickly, move the skillet away from the hottest part of the fire.
Making the Layers Too Thick
A giant mountain of nachos may look impressive, but it does not always cook well.
Several thinner layers give you better distribution of cheese and toppings.
Adding Too Much Salsa Before Cooking
Salsa contains moisture, and too much can quickly soften the chips.
I prefer adding most of the salsa after cooking.
Using Only One Type of Cheese
There is nothing wrong with using cheddar alone, but combining cheeses can give you a better texture.
Cheddar provides plenty of flavor, while Monterey Jack melts beautifully.
A Mexican cheese blend is another easy option.
Walking Away From the Fire
Nachos cook quickly.
It is not the type of camping meal I would put over the fire and then walk away from.
Stay nearby and check the skillet regularly.
How I Would Pack This Recipe for a Camping Trip
If I were planning this meal for a weekend camping trip, I would keep the packing simple.
I would prepare the cooked meat at home, shred the cheese, chop the vegetables, drain the beans and corn, and divide everything into sealed containers.
I would keep the tortilla chips in their original sealed bag until I was ready to assemble the nachos.
The refrigerated ingredients would stay together in the cooler so I could easily find them when it was time to cook.
I would also pack a sturdy skillet, cooking utensils, aluminum foil if needed, serving spoons, plates, napkins, and a heat safe surface for the hot pan.
This kind of preparation makes a big difference when you are camping with family. I would much rather spend a few minutes preparing food at home than spend the evening chopping vegetables beside a smoky campfire.
Complete Camping Grilled Nachos Recipe
Ingredients
For approximately 4 servings:
- 8 ounces sturdy tortilla chips
- 1 1/2 cups shredded cheddar cheese
- 1 1/2 cups shredded Monterey Jack cheese
- 1 cup cooked black beans, drained
- 1 cup cooked shredded chicken or seasoned ground beef
- 1/2 cup corn, drained
- 1/2 cup diced bell pepper
- 1/4 cup sliced jalapeños
- 1/4 cup chopped green onions
- 1/2 cup salsa
- 1/2 cup sour cream
- 1/2 cup guacamole or diced avocado
- Fresh cilantro for serving, optional
Instructions
- Prepare the grill or campfire and allow it to reach a moderate, controlled heat.
- Place approximately half of the tortilla chips into a cast iron skillet or grill safe pan.
- Sprinkle half of the cheddar and Monterey Jack cheese over the chips.
- Add half of the black beans, cooked meat, corn, bell pepper, and jalapeños.
- Add the remaining tortilla chips.
- Repeat with the remaining cheese, beans, meat, corn, bell pepper, and jalapeños.
- Cover the skillet with a lid or aluminum foil if available.
- Place the skillet over moderate grill heat or over a grill grate positioned above hot campfire coals.
- Cook for approximately 5 to 10 minutes, checking regularly until the cheese is completely melted and the toppings are heated.
- Move the skillet away from the heat as soon as the cheese has melted and the chips are still crisp.
- Carefully remove the cover and allow the nachos to rest for a minute or two.
- Add salsa, sour cream, guacamole or avocado, green onions, and cilantro.
- Serve immediately while the chips are warm and crisp.
My Tips for Making the Best Camping Nachos
If I were giving someone a short list of things that matter most with this recipe, I would keep it simple.
Use sturdy tortilla chips.
Prepare your meat and vegetables before leaving home.
Use a combination of cheeses for better melting and flavor.
Build the nachos in layers instead of creating one huge pile.
Cook over moderate heat rather than intense flames.
Keep wet toppings such as salsa and sour cream mostly for serving.
Watch the skillet closely because nachos can burn quickly.
Make smaller batches when cooking for a large group.
Keep refrigerated ingredients properly chilled until you need them.
Most importantly, do not overcomplicate the meal. Camping food should make your trip easier, not turn your campsite into a full kitchen.
Why This Recipe Has Become One of My Favorite Camping Meals
There are plenty of camping recipes that require careful preparation, multiple cooking steps, or a long list of ingredients. Sometimes that is exactly what you want. Other times, especially after spending the day outside, I just want something warm that everyone will enjoy without spending another hour cooking.
That is where these grilled nachos work so well for me.
The ingredients are easy to prepare at home, the cooking happens in one pan, and the recipe is flexible enough to use whatever leftovers or toppings I already have with me.
I also like that the meal feels social. Instead of everyone getting a separate plate of food, I can put the hot skillet in the middle of the table and let everyone build their perfect bite.
Whether you make them on a propane grill, charcoal grill, or over a bed of campfire coals, these camping nachos are an easy way to turn simple ingredients into a satisfying outdoor meal.
For me, that is what makes a good camping recipe worth keeping. It should taste great, require reasonable effort, work with the equipment you actually have, and leave you with more time to enjoy being outside.