Painting an RV Interior
Painting the interior of an RV can completely change how the space feels without requiring a full renovation. I have found that one of the biggest differences comes from simply getting rid of dated colors and giving the walls, cabinets, and trim a cleaner finish.
An RV can feel surprisingly dark inside, especially when the original interior has wood tones, yellowed trim, or older patterned surfaces, so paint can make the whole space feel larger and more comfortable.
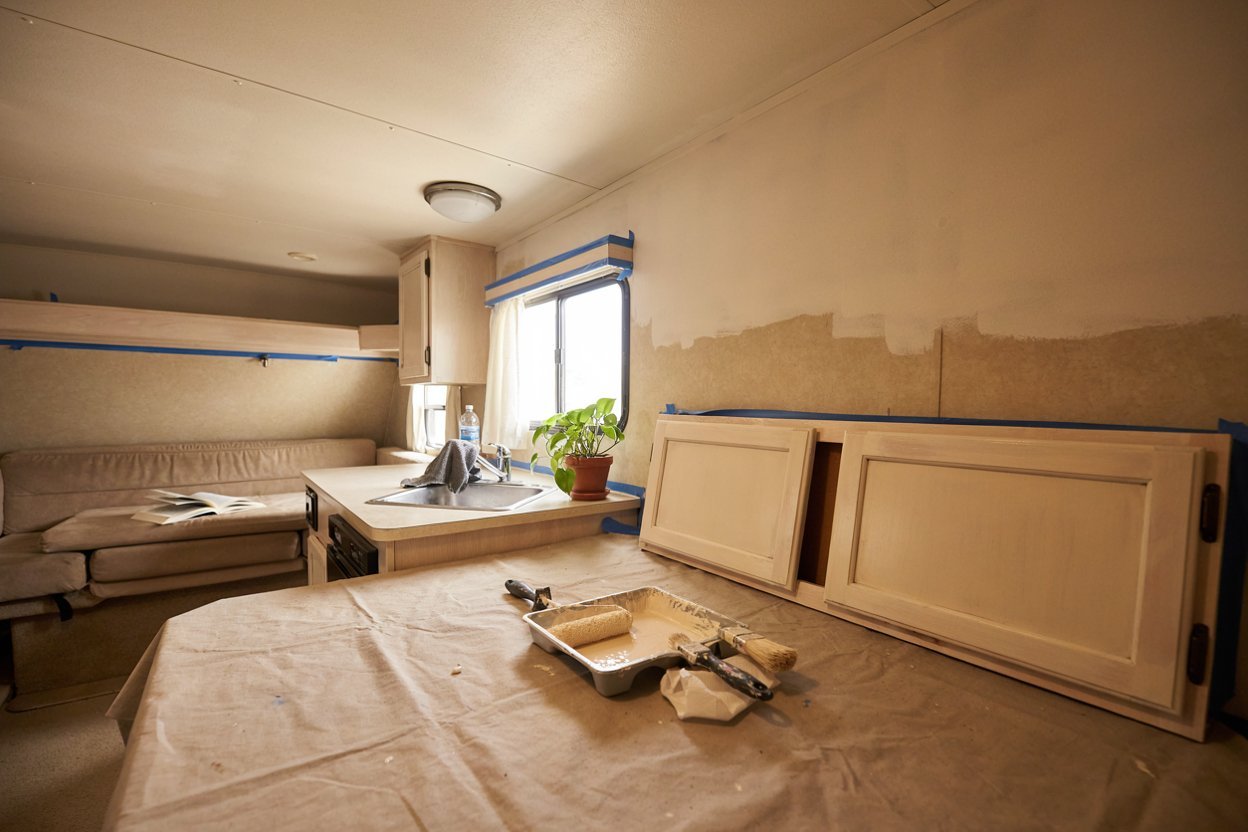
The part that matters most is preparation. RV interiors are not quite like painting a regular house. You are working with smaller spaces, unusual surfaces, cabinets, trim, hardware, and materials that can move slightly while the RV is being driven.
That means rushing straight into painting can leave you with peeling paint, visible brush marks, or a finish that does not hold up.
When I work on an RV interior, I like to break the project into manageable sections instead of trying to paint everything at once. It makes the work less overwhelming and gives me more control over the finished result.
Why Paint an RV Interior?
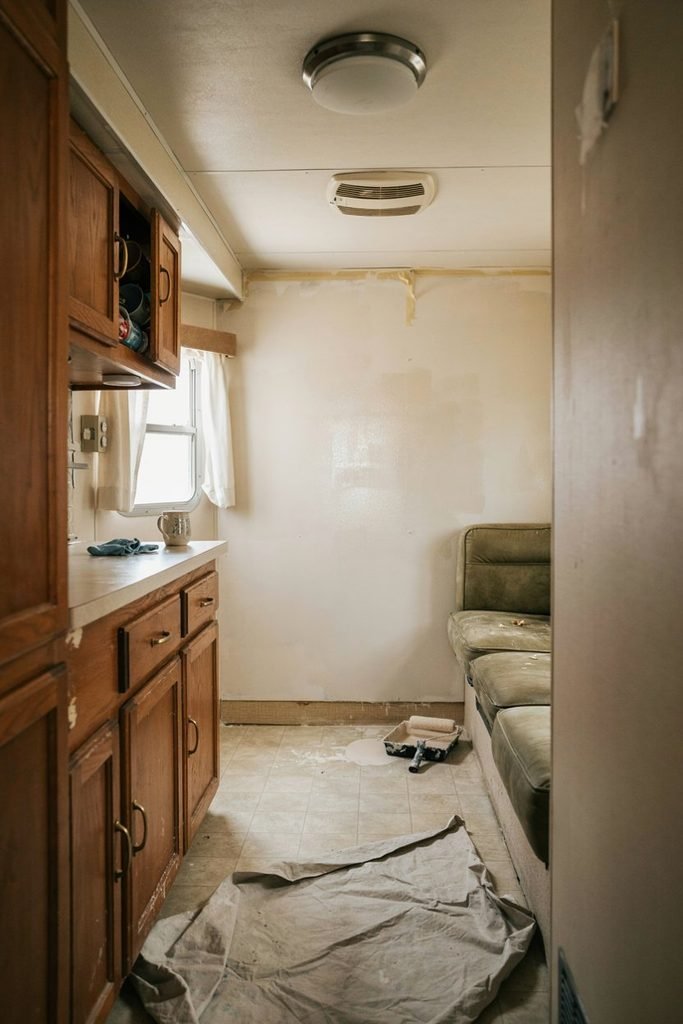
A fresh coat of paint can make an older RV feel completely different.
The original interior of many RVs can have darker wood cabinetry, beige walls, dated borders, or finishes that make the space feel smaller than it actually is. Lighter paint can reflect more light around the interior and make the living area feel cleaner and more open.
For me, the biggest benefit is not simply making the RV look prettier. A painted interior can make the space feel more like somewhere I actually want to spend time rather than a vehicle that happens to have a bed and kitchen inside it.
Paint is also considerably less expensive than replacing cabinets, wall panels, or other large parts of an RV interior. If the existing surfaces are structurally sound, changing their color can give you a completely different look without tearing everything apart.
That is especially useful when you are working with an older camper and trying to improve it without putting a huge renovation budget into the project.
Before You Start Painting
The most important thing I would tell anyone planning an RV interior painting project is not to underestimate the preparation.
It can be tempting to look at a wall or cabinet and think that all you need is a paintbrush and a can of paint. RV surfaces often have finishes that make it difficult for new paint to bond properly, though.
Before buying supplies, I walk through the entire interior and look at what I actually want to paint.
I separate the project into areas such as walls, cabinets, doors, trim, ceiling sections, and decorative pieces. Some surfaces may need more preparation than others, and deciding this beforehand makes the project much easier to organize.
I also look closely for damage.
Peeling laminate, loose trim, water stains, soft spots, cracked caulk, and damaged wood should be dealt with before painting. Paint can hide minor cosmetic imperfections, but it should not be used to cover an underlying problem.
This is particularly important around windows, the bathroom, kitchen sink, roof areas, and other places where moisture may have entered the RV.
Decide What You Actually Want to Paint
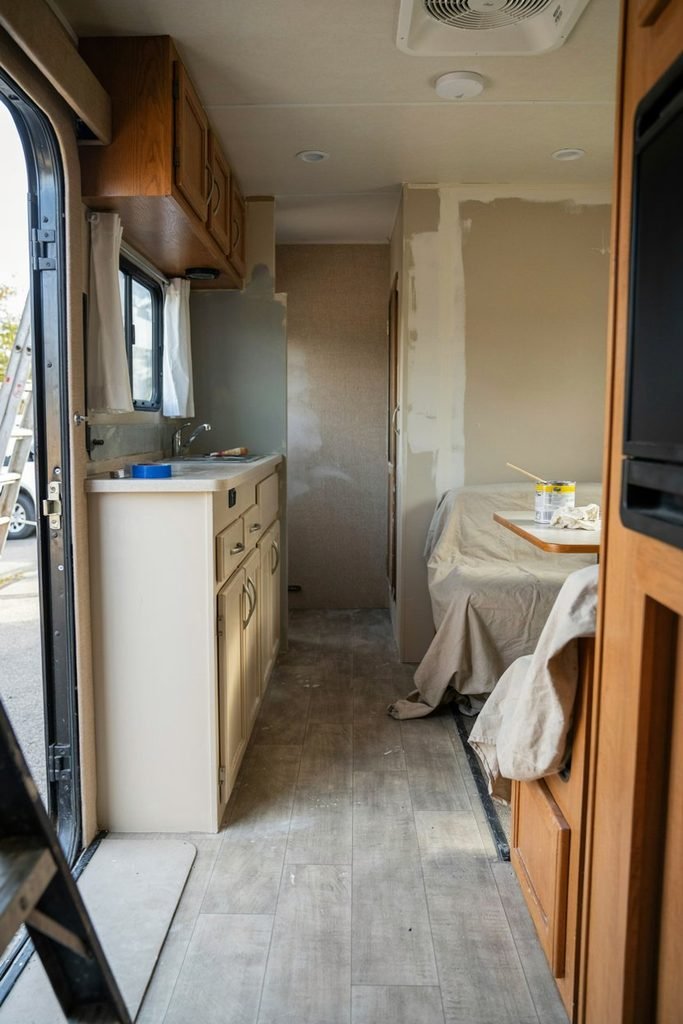
You do not necessarily have to paint every surface inside your RV.
This is something I think is worth deciding before buying supplies because an RV interior can quickly become a much larger project than expected.
For example, you might paint the cabinets and leave the walls alone. You could paint the walls while keeping the existing cabinetry. Or you could concentrate on the darker areas that make the interior feel closed in.
I prefer thinking about the overall balance before choosing a paint color.
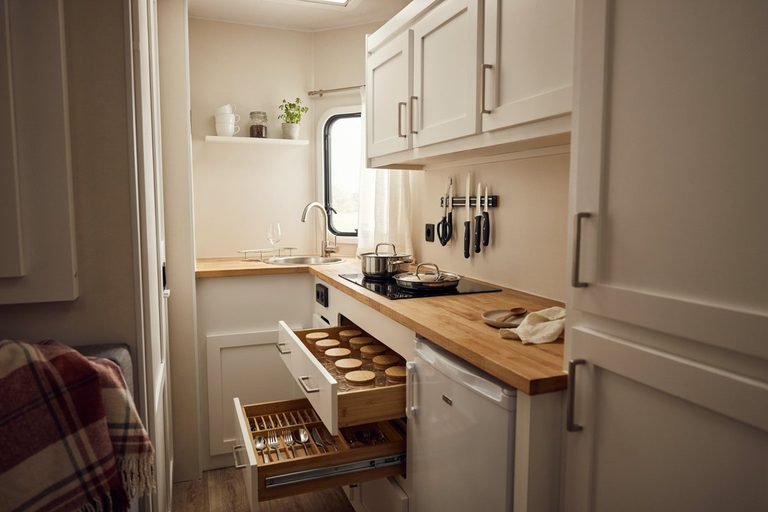
If the cabinets are dark, lighter walls can brighten the space without requiring every cabinet door to be painted. If you already have light cabinetry, changing the walls or adding a contrasting color can be enough to give the interior a new personality.
Another option is painting only the cabinet doors and drawer fronts. This can make a surprisingly noticeable difference while reducing the amount of preparation and painting required.
Choosing an RV Interior Paint Color
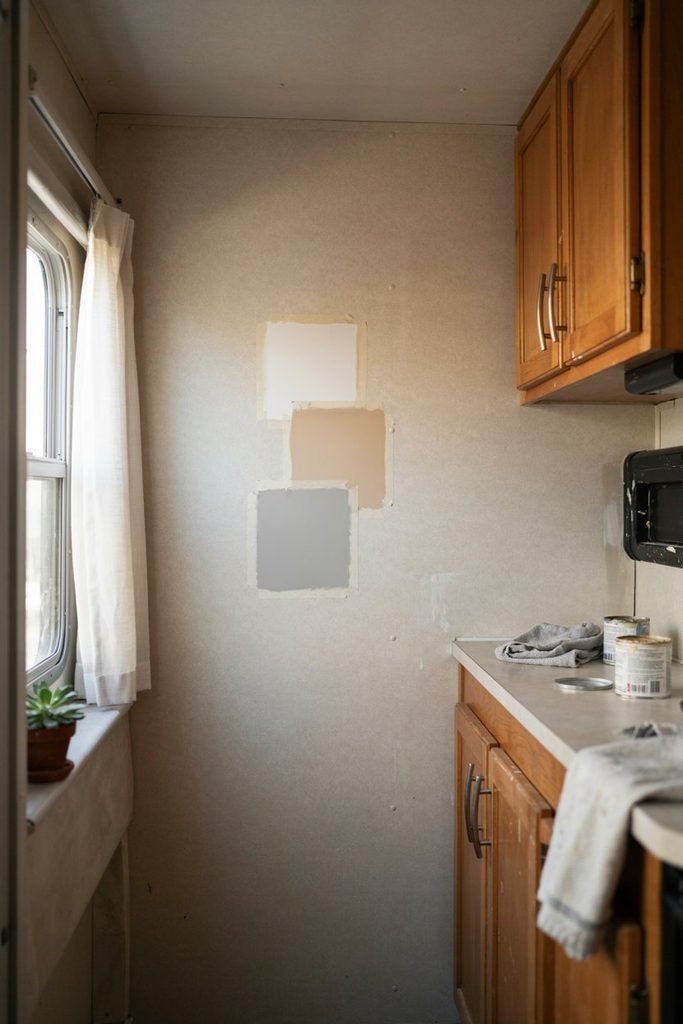
Color makes a bigger difference inside an RV than it might seem.
Because the space is compact, a color that looks beautiful in a large room can sometimes feel much stronger inside a camper. I like to think about how the color will look during the day, at night, and under the RV’s existing lighting.
White is an obvious choice for creating a bright interior, but it is not the only option.
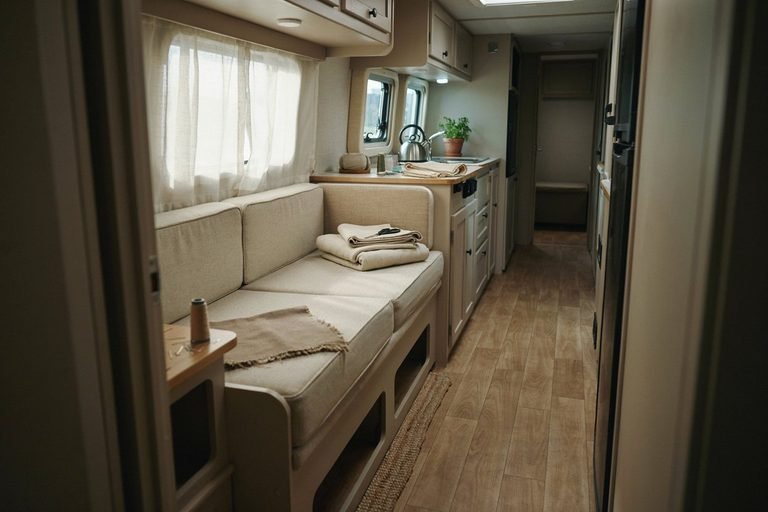
Soft cream, warm white, light gray, muted beige, pale green, and other soft neutral shades can create a lighter interior without making it feel completely sterile.
I also like using a little contrast rather than making every surface exactly the same color.
For example, lighter walls paired with slightly darker cabinets can give the interior more definition. Painting everything the same bright white can certainly make an RV feel larger, but adding another subtle tone can make the finished space feel more intentional.
Before committing to a color, I recommend testing it on a small section.
RV lighting can change how paint looks considerably. A color that appears warm in natural daylight may look completely different under the interior lights.
Cleaning the Surfaces
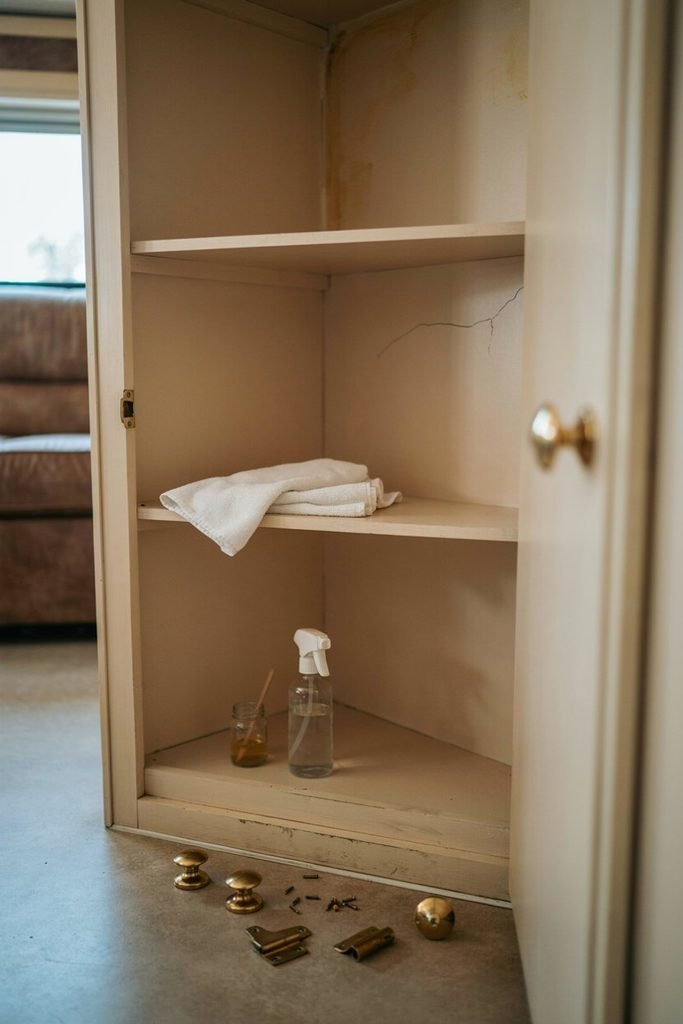
Cleaning is one of the least exciting parts of the project, but it is one of the steps I would not skip.
RV interiors collect dust, cooking residue, oils, fingerprints, and general grime. Cabinets around the kitchen can have considerably more buildup than surfaces elsewhere in the RV.
Paint needs a clean surface to adhere properly.
I start by removing anything that can be taken off easily, including cabinet hardware, handles, removable trim pieces, and other fixtures that would get in the way.
Then I clean the surfaces thoroughly and allow them to dry completely.
This is also a good opportunity to inspect everything more closely. Once the dirt and dust are gone, it becomes much easier to see scratches, cracks, old adhesive, loose edges, and areas that need repair.
I would rather spend extra time cleaning and preparing than finish the painting and discover that the new paint is lifting because the surface underneath was dirty.
Sanding RV Surfaces
Sanding is another step that can make a major difference in the finished result.
You do not necessarily need to aggressively sand every surface until you remove the original finish. The goal is generally to create a surface that the primer and paint can grip properly.
I pay particular attention to smooth cabinet finishes because they can be difficult for paint to adhere to without preparation.
After sanding, the surface needs to be cleaned again so that dust does not get trapped underneath the primer.
This is one of those steps where patience pays off. A smooth, properly prepared surface usually produces a much cleaner result than trying to compensate for poor preparation with extra coats of paint.
Do You Need Primer?
For many RV painting projects, I consider primer an important part of the process rather than an optional extra.
Primer can help create a consistent surface for the paint and improve adhesion, particularly when you are painting over an existing finish or changing from a dark color to a much lighter one.
It can also help prevent the original surface from affecting the final color.
This becomes especially useful when painting older cabinets or surfaces with different materials in the same area.
I would choose a primer based on the surface being painted rather than assuming one product will work equally well everywhere in the RV.
The manufacturer’s instructions matter here. Different materials and finishes require different preparation, and following the product instructions can save a lot of frustration later.
Painting RV Cabinets
RV cabinets usually require more patience than the walls.
Cabinet doors have edges, corners, hardware holes, and sometimes decorative grooves that can collect paint if you work too quickly.
I prefer removing cabinet doors and hardware whenever possible. Painting them separately gives me much better access to the edges and makes it easier to achieve an even finish.
I also label the doors and hardware as I remove them.
That small step can save a surprising amount of time when everything needs to go back together.
For the cabinet boxes, I work carefully around the edges and avoid putting too much paint on the brush or roller at once. Several thinner coats generally give me more control than trying to cover everything with one heavy coat.
The drying time between coats is important too. It can be tempting to keep working because the surface feels dry to the touch, but that does not always mean the paint has fully cured.
What I Would Not Rush
The biggest lesson I have learned with RV painting is that rushing usually creates more work.
It is easy to become impatient once the project is underway. You clean everything, sand the surfaces, apply primer, and then just want to see the final color.
But allowing each layer to dry properly and checking the surface before moving on can make a huge difference.
I also try not to judge the finished result while I am halfway through the project.
An RV interior can look worse before it looks better, especially when you are covering dark cabinets with a lighter color. The first coat may look uneven and leave the old color showing through.
That does not necessarily mean something has gone wrong.
I focus on building the finish gradually rather than trying to make one coat do all the work.
Preparing the RV for Painting
Before opening the paint, I remove as much clutter as possible.
Small RV interiors become difficult to work in when every countertop, cabinet, seat, and floor area is covered with supplies. Clearing the workspace makes it easier to move around and reduces the chance of accidentally touching a freshly painted surface.
I cover floors and any surfaces that are staying unpainted.
I also remove or protect hardware whenever possible rather than trying to paint around it.
Painter’s tape can help with clean edges, but I do not rely on tape as a substitute for careful painting. Good preparation and controlled brushwork still matter.
Ventilation is another consideration.
Paint fumes can become concentrated quickly inside an RV because the interior is such a small enclosed space. I keep doors and windows open when practical and follow the ventilation and safety instructions provided with the specific paint and primer.
The Goal of the Project
For me, painting an RV interior is less about making the camper look perfect and more about making the space feel comfortable and personal.
A good paint job can make an older RV feel cleaner, brighter, and much more like your own space.
The key is not to treat the project like painting a normal room in a house. The smaller space, unusual materials, cabinetry, trim, and movement of the RV all need to be considered.
Once the preparation is done properly, the actual painting becomes much easier.
Start With the Largest Surfaces
When I am painting an RV interior, I like to begin with the larger surfaces before moving on to the small details.
Walls are usually easier to work with than cabinets because there are fewer edges, corners, and individual pieces to worry about.
I work in manageable sections rather than covering an entire wall with paint and then trying to go back over everything.
A roller can make larger areas much quicker, but I still keep a good quality brush nearby for corners, edges, narrow sections, and places where the roller cannot reach.
The important thing is not to overload the roller.
Too much paint can create runs and uneven areas, especially on vertical surfaces. I would rather build the coverage gradually with multiple thin coats than put on one heavy coat that takes longer to dry and is more difficult to control.
Painting Around RV Windows
Windows require a little extra attention because the surrounding areas often have narrow edges and trim.
I take my time around these sections because paint splatters and uneven lines are much easier to notice around a window.
Painter’s tape can help protect the glass and create a cleaner edge, but I still try to keep the brush under control rather than relying entirely on the tape.
If the existing window trim is staying its original color, I make sure the paint does not build up along the edge.
This is also an area where I check carefully for old caulking, gaps, or signs of moisture before painting. A fresh coat of paint should not be used to hide a moisture problem.
Painting RV Walls
RV walls can be made from different materials, so I do not assume that every wall will behave exactly the same way.
After cleaning and preparing the surface, I apply the appropriate primer when needed and allow it to dry according to the manufacturer’s instructions.
Then I begin applying the paint in controlled sections.
I try to maintain a wet edge as I work. This helps prevent obvious overlap marks where one section dries before the neighboring section is painted.
I also avoid repeatedly going back over areas that have already started drying.
That is one of the easiest ways to create an uneven texture.
Once the paint begins setting, it is usually better to leave it alone and let it dry rather than continually brushing over it.
How Many Coats Should an RV Interior Need?
There is no single number that works for every RV.
The number of coats depends on the original color, the new color, the surface, the primer, and the type of paint being used.
When I am painting a dark interior a much lighter color, I expect to need more than one coat.
The first coat is often more about establishing coverage than creating the final appearance.
After it dries, I inspect the surface in natural light and under the RV’s interior lighting. This helps me see areas where the old color is still showing through or where the finish looks thinner.
I would rather apply another thin coat than try to correct everything with one thick coat.
The second or third coat is usually where the finish starts to look much more consistent.
Painting RV Cabinet Doors
Cabinet doors are where I spend a lot of time because they are one of the most noticeable parts of the finished interior.
Once the doors have been removed, cleaned, sanded, and primed, I place them on a suitable protected surface where I can work around all of the edges.
I avoid putting too much paint on one side at a time.
A thin, even layer is easier to control and tends to produce a smoother finish.
I also make sure the edges receive attention. It is easy to focus on the large flat section of a cabinet door and forget the edges until the door is reinstalled.
That can leave the finished project looking incomplete.
I normally let one side dry properly before turning the door over.
This takes longer, but it prevents the fresh paint from sticking to the work surface or getting damaged while I am handling the door.
Painting Cabinet Boxes
Cabinet boxes are a little more awkward because they remain attached to the RV.
This is where I slow down.
I use a smaller brush for corners and edges and a roller for larger flat sections when appropriate.
The goal is to keep the paint layer even without allowing it to collect in corners.
Drips are particularly easy to miss inside cabinet corners, so I check those areas before leaving the paint to dry.
I also keep a small brush available for correcting areas while the paint is still workable.
Once the paint starts drying, I avoid disturbing it unnecessarily.
How to Avoid Brush Marks
Brush marks can be frustrating because they may not be obvious while you are painting.
They can become much more noticeable once the surface dries and the light hits it from a different angle.
One of the biggest things that helps is using the right brush for the paint and surface.
I also avoid repeatedly brushing over the same area.
When I notice that a section has been covered evenly, I move on rather than continuing to work the paint.
Keeping the paint layer relatively thin also helps.
If the paint is too thick, it can take longer to dry and may leave a heavier texture.
For large flat surfaces, I generally prefer using a roller where the surface allows it because it can create a more consistent finish.
Dealing With Drips
Drips are much easier to prevent than to fix.
I regularly look back over the areas I have just painted before moving to another section.
I pay particular attention to cabinet edges, vertical trim, corners, and underneath shelves.
If I notice a drip while the paint is still workable, I smooth it out carefully.
If I discover one after it has dried, I do not keep adding paint on top of it.
Instead, I let the surface dry properly, smooth the raised area, remove the dust, and touch it up.
That usually produces a much cleaner result than trying to bury the drip under additional layers.
Painting RV Trim
Trim can completely change the appearance of an RV interior, but it can also be tedious.
There are usually many small sections, corners, and transitions where the trim meets another surface.
I prefer to work slowly here rather than trying to cover everything quickly.
If I am painting the trim a different color from the walls, I pay close attention to the transition between the two colors.
This is where careful preparation really becomes visible.
Clean edges can make a relatively simple paint job look much more polished.
Should You Paint the RV Ceiling?
The ceiling is one area I would think about carefully before committing to paint.
A lighter ceiling can make an RV feel brighter and more open, especially when the original ceiling is darker or discolored.
However, the ceiling can also contain vents, lights, trim, and other fixtures that make preparation more complicated.
I would inspect the ceiling carefully before painting it.
If there are stains, bubbling areas, soft spots, or signs of water intrusion, I would investigate the cause before applying paint.
Painting over a moisture problem can make the interior look better temporarily without actually solving anything.
Painting Around Fixtures
RV interiors have a surprising number of fixtures packed into a small area.
Lights, switches, vents, outlets, cabinet hardware, window trim, and other fittings can all create obstacles.
Whenever possible, I remove small fixtures that can safely be removed rather than trying to paint around them.
For anything that stays in place, I protect it carefully.
I also take photographs before removing hardware.
This is one of those simple things that makes putting everything back together much easier.
When you are dealing with several cabinet doors and multiple pieces of hardware, it can become surprisingly difficult to remember which piece belongs where.
Letting Each Coat Dry
Drying time is one of the easiest parts of an RV painting project to underestimate.
The surface may feel dry when you touch it, but that does not necessarily mean the paint has reached the level of hardness needed for another coat or for reassembly.
I follow the drying and recoating instructions on the paint rather than relying only on how the surface feels.
This is especially important with cabinet doors.
If I reinstall a door before the finish has hardened properly, the paint can become damaged around hinges and contact points.
That can turn a good paint job into a frustrating touch up project.
Inspecting the Paint Between Coats
After each coat dries, I walk around the RV and look at the surfaces from different angles.
I check for thin areas, visible brush marks, drips, missed corners, dust particles, and places where the original color is still visible.
Natural daylight is particularly useful for this.
I also look at the surfaces under the RV’s interior lights because those lights can reveal imperfections that are easy to miss during the day.
I do not try to fix everything immediately.
I make a mental note of what needs another coat or touch up and continue working systematically.
That keeps me from constantly stopping and starting.
What About Dark Cabinets?
Dark RV cabinets can take more work when you are trying to create a bright interior.
This is one situation where primer becomes particularly useful.
Instead of expecting the final paint color to completely cover a very dark surface immediately, I build the finish gradually.
The first coat may look nothing like the final result.
That is normal.
Once the primer has created a more consistent base, the paint color usually becomes much easier to control.
I also find that lighter cabinet colors can make a major difference to the feeling of the interior.
They reflect more light and can make the RV feel less enclosed.
Creating Contrast Inside the RV
I do not think every part of an RV has to be painted the same color.
A little contrast can make the interior feel more intentional.
For example, light walls with slightly darker cabinets can create definition without making the space feel heavy.
Another approach is keeping most of the interior neutral and using one small area as an accent.
That could be a cabinet section, a backsplash area, a door, or another feature that naturally draws attention.
The important thing is to consider the small size of the RV.
Too many strong colors can make the interior feel visually busy very quickly.
Painting Small Details
Once the main walls and cabinets are finished, I move onto the smaller details.
This is where the project starts to come together.
Edges, narrow trim pieces, cabinet frames, shelves, and other small areas can make the difference between an RV that looks freshly painted and one that looks professionally finished.
I use smaller brushes for these areas and keep the paint application controlled.
I also check the floor and surrounding surfaces regularly because small paint splatters can easily accumulate when you are working in such a compact space.
Give Yourself Time
An RV interior painting project can look deceptively simple from the outside.
The actual painting is only part of the work.
Moving around the small interior, waiting for coats to dry, repositioning cabinet doors, protecting surfaces, and checking details all take time.
I have found that the project goes much better when I give myself enough time instead of trying to complete everything in a single day.
Working in stages also makes the project easier to manage.
I can finish one section, clean up the area, allow it to dry, and then move onto the next.
That approach may feel slower at the beginning, but it gives me much more control over the final result.
The Details Matter
The biggest difference between a rushed RV painting project and a polished one often comes down to the small details.
Clean cabinet edges.
Even coverage.
No visible drips.
Properly painted trim.
Smooth cabinet doors.
Clean transitions around windows and fixtures.
Those details may not seem important while you are in the middle of the project, but they become very noticeable once everything is finished.
That is why I would rather spend another hour preparing or touching up an area than decide that it is good enough and regret it later.
Once the painting is complete, the project is not quite finished yet.
The paint needs time to cure, the hardware needs to go back on, the cabinets need to be reassembled carefully, and the entire interior needs one final inspection.
Let the Paint Cure Properly
Drying and curing are not necessarily the same thing.
Paint can feel dry on the surface while still being softer underneath. This is particularly important with cabinet doors, drawer fronts, shelves, and other areas that will be touched or moved frequently.
I try to give painted surfaces as much time as practical before putting everything back into regular use.
This is one area where I would rather wait longer than damage a finish that took several days to create.
Cabinet doors can be especially vulnerable because hinges and hardware put pressure on the newly painted surfaces.
If the paint has not hardened sufficiently, even a small amount of friction can leave marks.
Reinstalling Cabinet Hardware
Once everything has cured sufficiently, I reinstall the hardware carefully.
This is where keeping track of the hardware during the preparation stage really helps.
I like to check each screw, hinge, handle, and bracket before putting it back because forcing hardware into place can damage a fresh finish.
I also avoid overtightening screws.
A freshly painted cabinet can look beautiful, but a small crack around a screw hole can become noticeable very quickly.
If a piece of hardware does not fit properly, I stop and check the alignment rather than forcing it.
Putting the Cabinet Doors Back
Cabinet doors can look slightly different once they are painted because even a small change in thickness around the edges can affect how they sit.
I reinstall the doors carefully and check that each one opens and closes properly.
If a door rubs against another door or the cabinet frame, I correct the alignment rather than continuing to use it.
This matters because repeated rubbing can eventually wear through the new paint.
I also check drawers for the same reason.
A drawer that catches against a newly painted surface can create damage surprisingly quickly.
Inspect the Finished Interior in Different Lighting
One of my favorite parts of an RV painting project is seeing the finished interior under different lighting.
During the day, natural light can make the new color look bright and fresh.
At night, the RV’s interior lights may create a completely different appearance.
I walk through the finished space and look at the walls, cabinets, trim, and corners from different angles.
This gives me a chance to spot anything that needs a small touch up.
I do not expect a hand painted RV interior to look completely identical from every angle, but I want the overall finish to look consistent.
Common RV Painting Mistakes
There are several mistakes that can make an RV painting project much harder than it needs to be.
Skipping the Cleaning
Paint does not perform well when applied over grease, dust, dirt, or other residue.
This is especially important around kitchens and frequently touched cabinet doors.
Taking the time to clean the surface properly before sanding and priming can make a significant difference.
Skipping Primer When It Is Needed
Not every painting project requires the same primer, but assuming you can always skip it can create adhesion and coverage problems.
This is particularly relevant when painting smooth surfaces or making a dramatic color change.
I prefer to choose the primer based on the surface and the paint system I am using.
Applying Thick Coats
More paint does not necessarily mean better coverage.
Heavy coats can take longer to dry, run down vertical surfaces, and create an uneven finish.
Several controlled coats are usually easier to manage.
Painting Over Damaged Surfaces
Paint can improve the appearance of a surface, but it cannot repair structural damage.
If an RV wall has bubbling, soft areas, water stains, or other signs of a potential problem, I deal with that before painting.
Otherwise, the new paint may simply cover the issue temporarily.
Rushing the Drying Time
This is one mistake that can be particularly frustrating because it can undo hours of work.
If you handle cabinet doors too soon or apply another coat before the previous layer is ready, the finish can become soft, sticky, or uneven.
I follow the paint manufacturer’s recommended drying and recoating times.
Using Too Much Tape
Painter’s tape is useful, but I do not depend on it for every detail.
Some RV surfaces have unusual textures and curves, and paint can still find its way underneath poorly applied tape.
I make sure the tape is applied carefully and remove it according to the product instructions.
Forgetting the Edges
Flat surfaces attract most of the attention, but edges are often what reveal an unfinished paint job.
I check cabinet edges, door edges, shelf edges, trim, and corners before considering an area complete.
What About Paint Touch Ups?
Eventually, even a carefully painted RV interior may need a few touch ups.
RV cabinets and walls are exposed to regular use, and the interior moves with the vehicle.
I keep a small amount of leftover paint from the project for this reason.
I label the container clearly so I know exactly which color it contains.
That makes future repairs much easier.
A small touch up can often be handled quickly when you already have the correct paint available.
Without it, matching the color later can be much more difficult.
Protecting Painted RV Cabinets
Painted cabinets receive a lot of daily use.
Hands constantly touch doors and handles, dishes may slide against shelves, and objects can bump against the cabinet surfaces while the RV is moving.
I try to avoid unnecessary friction wherever possible.
Soft organizers, liners, and careful storage can help protect the inside of painted cabinets.
I also avoid using harsh cleaning products unless the paint manufacturer specifically recommends them.
For routine cleaning, I prefer a gentle approach rather than repeatedly exposing the finish to strong chemicals.
Cleaning Painted RV Walls
Painted walls usually do not require complicated maintenance.
For normal dust and light marks, a soft cloth and an appropriate gentle cleaner are generally enough.
I avoid aggressively scrubbing painted surfaces unless the paint system is designed to handle it.
The more often a wall is scrubbed, the more important the durability of the paint becomes.
This is another reason I think about the type of finish and the intended use of the space before choosing the paint.
An RV that is used heavily may need a more durable finish than one that only goes on occasional trips.
Choosing the Right Finish
The finish you choose can affect both appearance and maintenance.
Flat finishes can create a softer appearance but may be harder to clean.
Eggshell and satin finishes are popular choices for many interior surfaces because they offer some washability without looking extremely glossy.
A higher sheen can make surfaces easier to wipe down, but it can also make imperfections more visible.
I prefer to consider how much use each area receives instead of automatically choosing the same finish everywhere.
Cabinetry, walls, trim, and ceilings do not necessarily have to be treated exactly the same way.
Always check the paint manufacturer’s recommendations for the specific surface and product.
How Much Does It Cost to Paint an RV Interior?
The cost can vary considerably depending on the size of the RV, how much you are painting, the condition of the existing surfaces, and the quality and quantity of supplies you choose.
The paint itself is only part of the budget.
I would also account for primer, brushes, rollers, sanding materials, cleaning supplies, painter’s tape, drop cloths, replacement hardware if needed, and any repair materials.
If the existing cabinets and walls are in good condition, doing the work yourself can keep the overall cost much lower than replacing large sections of the interior.
The biggest variable is usually how much of the RV you decide to paint.
Painting a few cabinets and an accent wall is obviously a much smaller project than painting every cabinet, wall, door, and piece of trim.
Can You Paint an RV Interior Without Removing Everything?
Yes, but I find that removing what can safely be removed often produces a better result.
Cabinet doors are a good example.
You can paint them while they are attached, but removing them allows you to reach the edges more easily and reduces the chance of getting paint on hinges and surrounding surfaces.
The same principle applies to hardware and certain trim pieces.
At the same time, I would not remove something simply for the sake of removing it if doing so creates a risk of damage.
The goal is to make painting easier, not to turn a simple makeover into a complicated reconstruction project.
Should You Paint the Cabinets or Walls First?
There is no single order that works for every RV, but I like to think about which surfaces are most likely to create accidental splatters or overlap.
I generally prefer to complete the larger surfaces systematically and then focus on the cabinetry and trim.
The exact order can depend on whether the cabinet doors are removed, whether the walls and cabinets are different colors, and how the RV is laid out.
What matters most is having a plan before opening the paint.
Painting without a clear order can lead to unnecessary touch ups.
How to Make a Small RV Feel Larger
Paint color can have a noticeable effect on how spacious an RV feels.
Lighter colors generally reflect more light, which can make a compact interior feel more open.
I also like keeping the overall palette fairly simple.
Too many competing colors can make a small RV feel busy.
Another thing that helps is keeping the areas around windows and natural light relatively light.
The goal is not necessarily to make every surface white. It is to create enough visual brightness that the interior does not feel closed in.
What I Would Do Differently Next Time
Every DIY project teaches you something that you can use on the next one.
With RV painting, I would always give myself more preparation time than I initially think I need.
I would also make sure I have all of the supplies ready before starting instead of stopping halfway through because something important is missing.
I would take more photographs before removing hardware and label everything carefully.
Most importantly, I would never rush the drying and curing stages simply because I want to finish the project.
Those extra hours of patience can save much more time later.
Is Painting an RV Interior Worth It?
For me, painting is one of the most noticeable ways to change the personality of an RV without completely rebuilding the interior.
You can take an older space with dark cabinets, dated walls, or tired looking trim and give it a much cleaner and more personal appearance.
The project does require patience, particularly during preparation.
Cleaning, sanding, priming, painting, drying, reinstalling hardware, and touching up small imperfections can take considerably longer than expected.
But that is also why I think the results can be so satisfying.
You are not simply changing the color.
You are changing how the entire space feels when you walk inside.
Final Thoughts
Painting an RV interior is a project that rewards patience more than speed.
The most important part is not finding the most expensive paint or trying to copy someone else’s exact RV makeover.
It is understanding the surfaces you are working with, preparing them properly, choosing colors that work with the size and lighting of your RV, and giving each coat enough time to dry and cure.
I have found that the little details matter just as much as the large areas.
Clean edges, properly prepared cabinets, smooth coats, carefully painted trim, and correctly reinstalled hardware can make a relatively simple DIY project look much more polished.
If your RV interior feels dark, dated, or simply does not reflect your style anymore, paint can be a practical place to start.
You do not have to renovate everything at once.
Even changing the color of the cabinets, brightening the walls, or refreshing a few key areas can make the RV feel like a completely different space.
The best approach is to work slowly, prepare properly, and treat the RV as its own unique space rather than trying to paint it exactly like a room in a house.